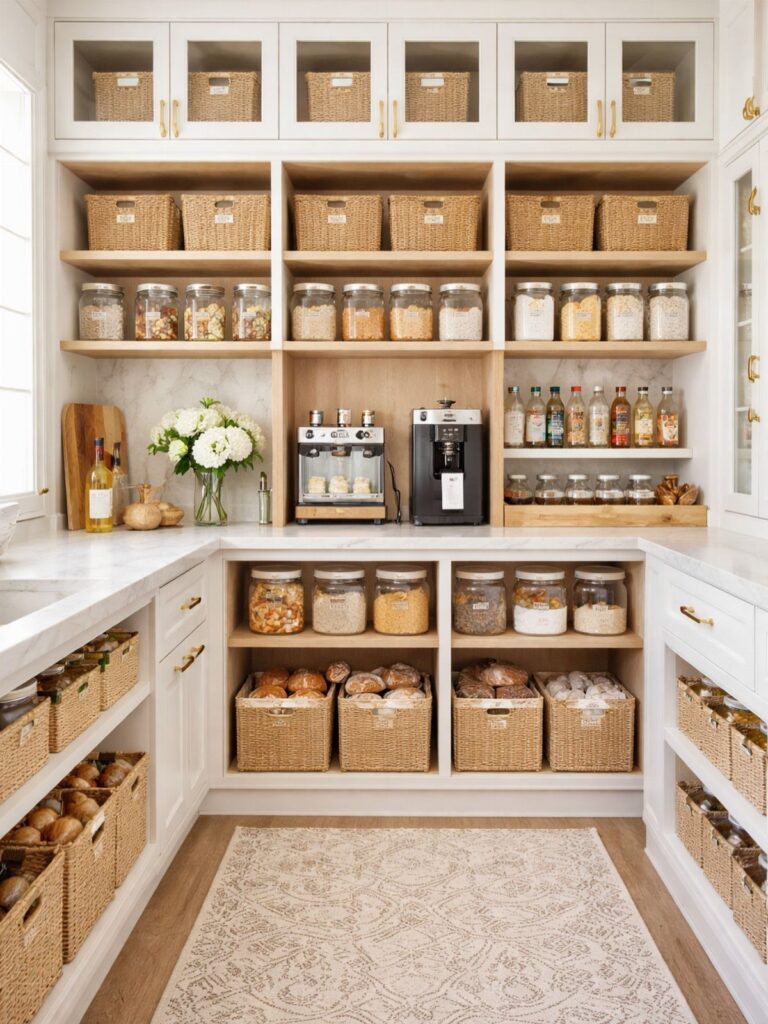
The right fix depends on what is crowding the cabinet: loose lids and pans need a plate rack or pan organizer, deep lower cabinets need pull-out sliding drawers, and a pantry needs baskets or clear airtight containers.
Fixed wood dividers lock a deep drawer into one layout, so I save them for drawers whose contents rarely change; adjustable inserts are the better bet when the load shifts.
1. Clear Labels on Bins and Jars
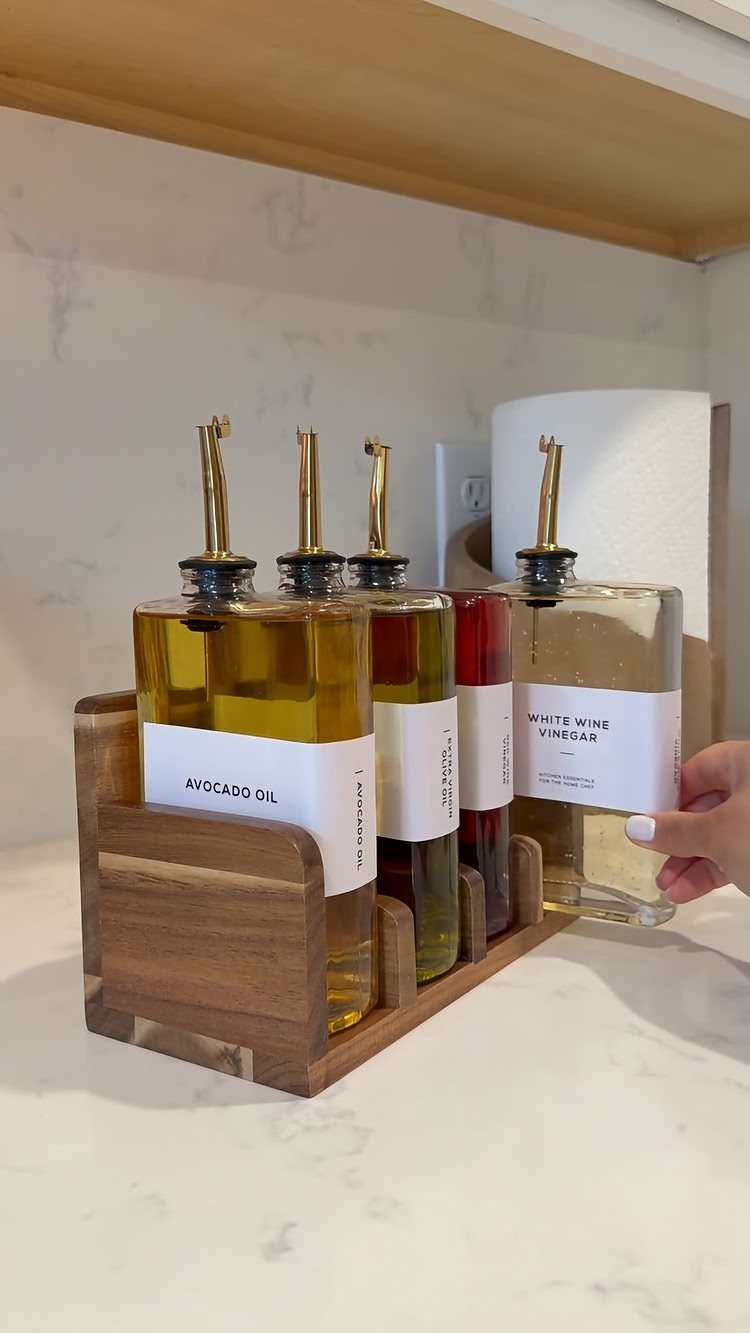
Printed labels on glass bottles settle an everyday question: which one is the white wine vinegar and which is the avocado oil.
Once the wording sits on the glass, anyone in the house can reach for the right bottle without sniffing or guessing.
A wooden rack keeps the set together near the stove, and white labels read cleanly against clear glass. Pick labels that name the contents plainly, and refill under the same label every time so it stays true.
2. Organize Under the Sink
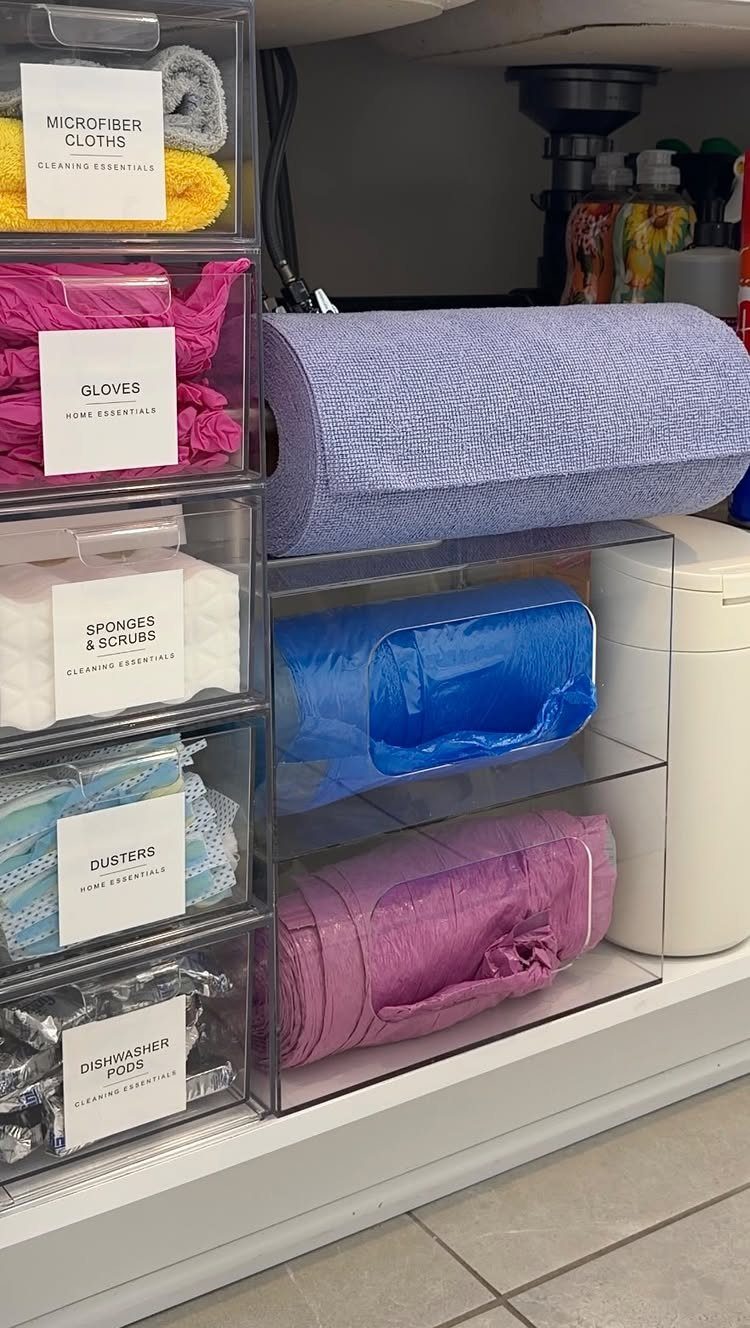
Under a sink, the pipes eat the middle of the space, so stackable clear drawers and bins do better than one open floor. Sort by job: cloths in one, gloves in another, sponges and scrubs, dusters, dishwasher pods.
Clear sides let you spot a low supply before it runs out. Label each drawer, since a labeled bin gets put back correctly by everyone.
Measure the opening and the pipe position before buying anything.
3. Baskets for Food Items
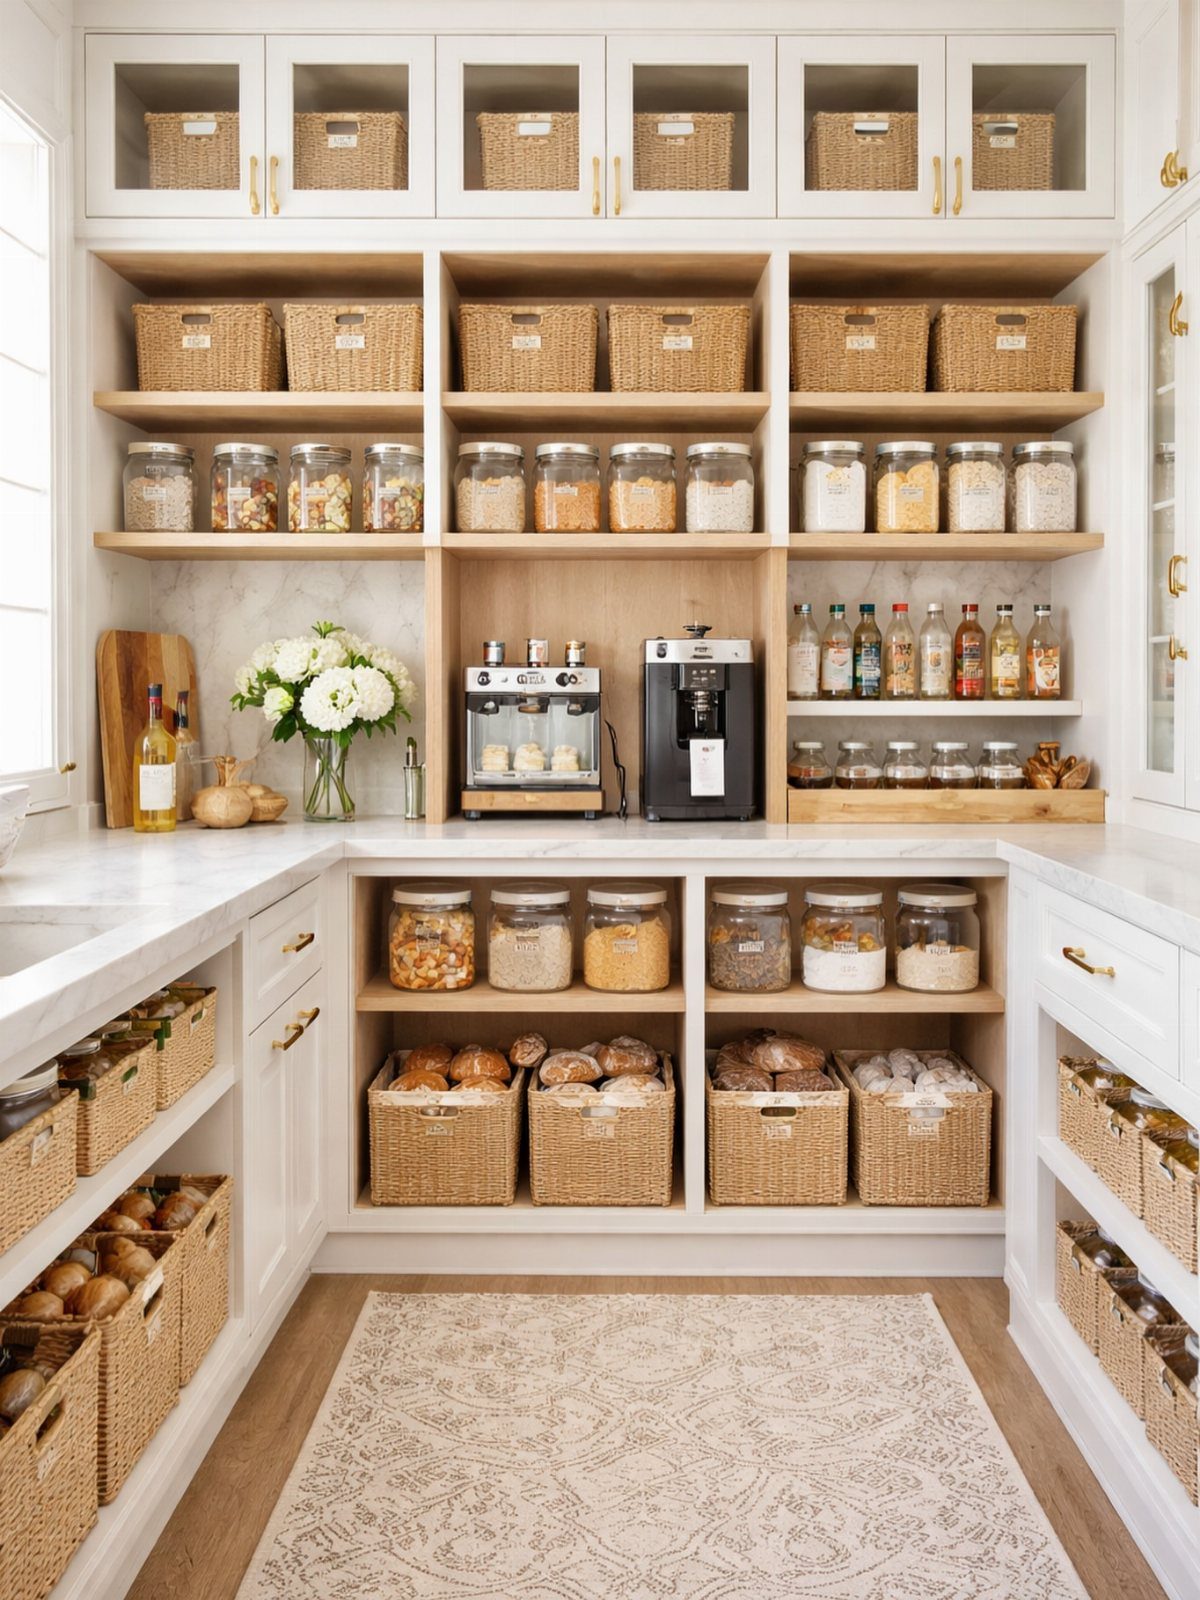
Woven baskets let a pantry shelf hold loose food in groups: one for snacks, one for packets, one for whatever the kids grab first.
Pull the basket out and you see everything in it, instead of reaching into the dark at the back.
I like pairing them with glass jars for dry goods, so the textures stay mixed but the shelf still looks calm. Baskets cost little, and one per category is a good place to start.
4. Plate Racks and Pan Organizers
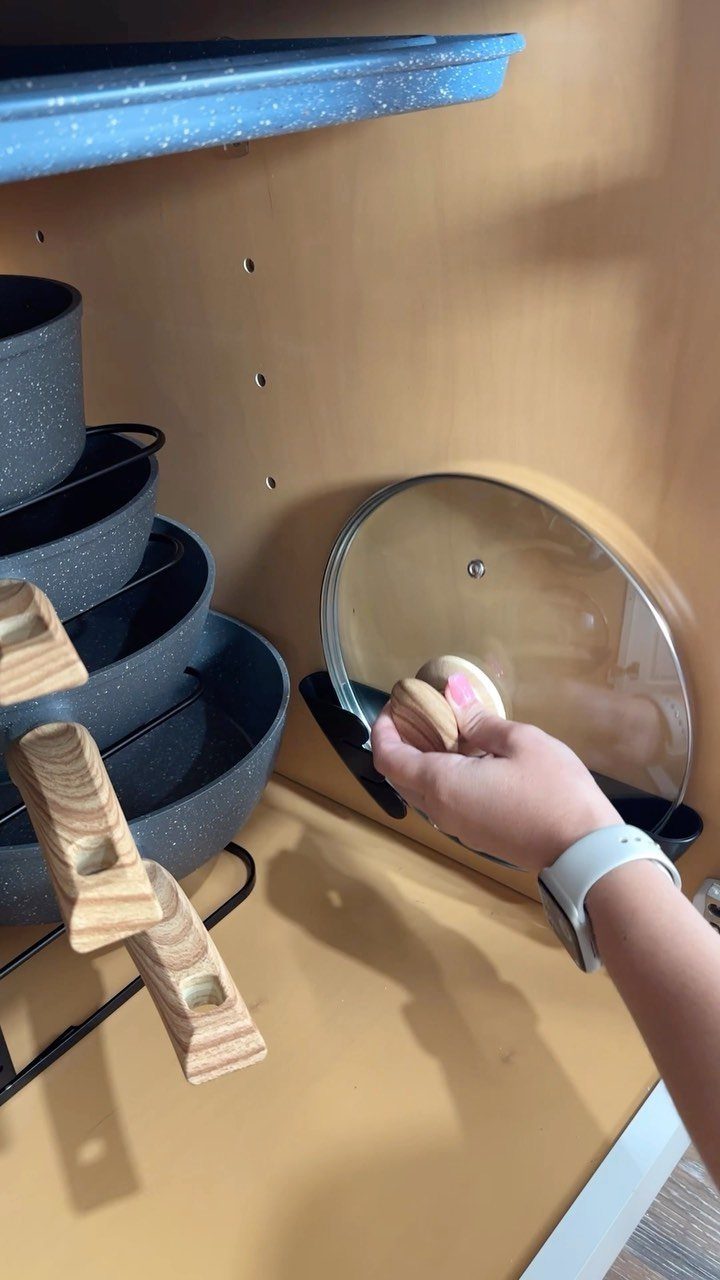
Lids are the worst offenders in a pot cabinet, sliding around and refusing to stack. A rack that stands them upright, like the black one here, lets you drop a lid in and lift it out without unstacking anything.
Put a pan rack beside it so pots nest on their own shelf. Choose a rack that fits your cabinet’s width first, then fill the rest of the space around it.
“Pots and pans and their lids can be some of the most challenging kitchen items to organize,” says Emily Arthur, chief creative officer of Isla Porter, a female-founded luxury cabinetry company focused on customization.
5. Riser Shelves
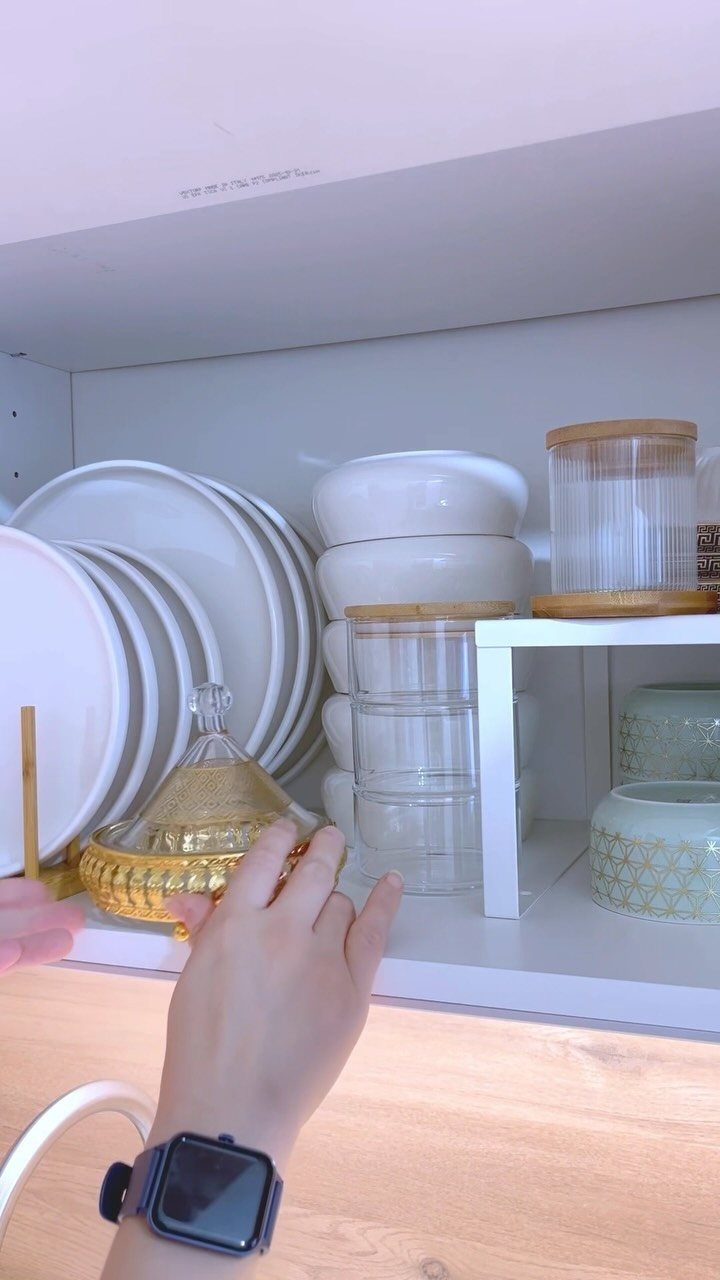
A small riser shelf gives a plate cabinet a second level. Jars or cups sit up on the riser while plates and bowls fill the space below, so nothing hides behind something taller.
White risers disappear into white cabinets, which keeps the look quiet. Check the shelf height before buying: the riser plus whatever it holds has to clear the shelf above it.
6. Grab a Caddy for Cleaning Products
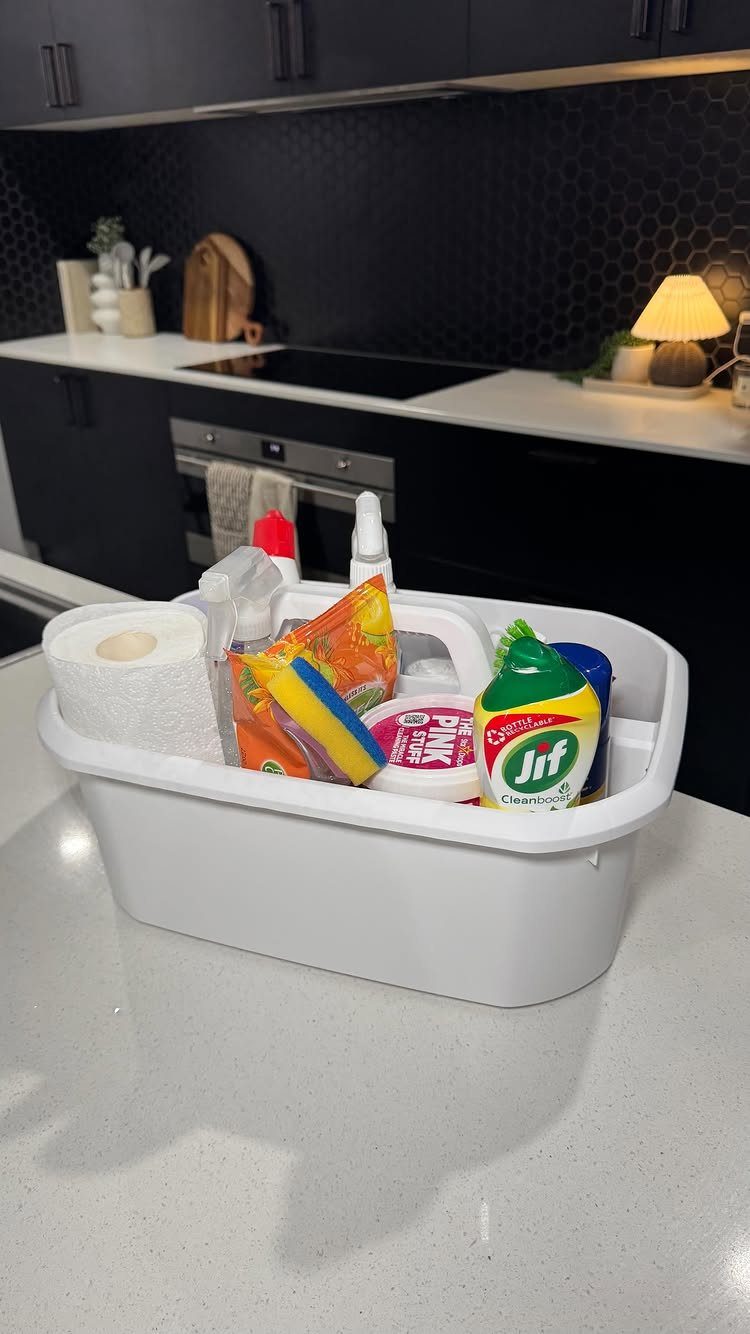
Keep it stocked with the products you use daily, like a multi-surface spray and a scouring paste, and leave the rarely used ones elsewhere.
I prefer a caddy with a handle, since it can move from the counter to the bathroom without a second trip. Store it under the sink or on a shelf, and return it there after each use.
7. Tiered Utensil Pullout
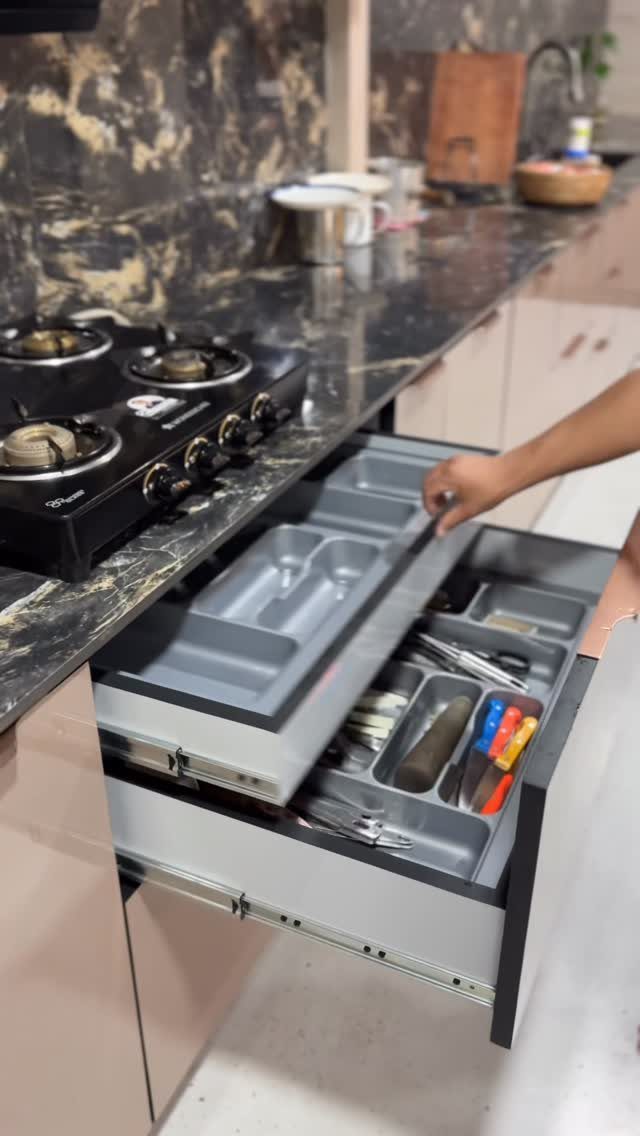
A tiered pullout puts utensils on stacked levels, so a hand reaches the top tier without digging through the one below. Grey plastic organizers like these keep cutlery and cooking tools sorted by type and slide out as a unit.
Measure the cabinet’s width and depth before buying, and leave room for the door to swing clear. Put the tools you grab daily on the top tier and the occasional ones underneath.
8. Spice Drawer Organization

Spice jars lying flat in a drawer let you read every label at a glance, which beats squinting at the tops of jars in a cabinet.
Matching glass jars with black lids keep the drawer tidy, and labels like Mint, Oregano and Paprika make the name impossible to miss.
Alphabetical order is my pick for a beginner, since there is nothing to remember.
9. Use Pegboards
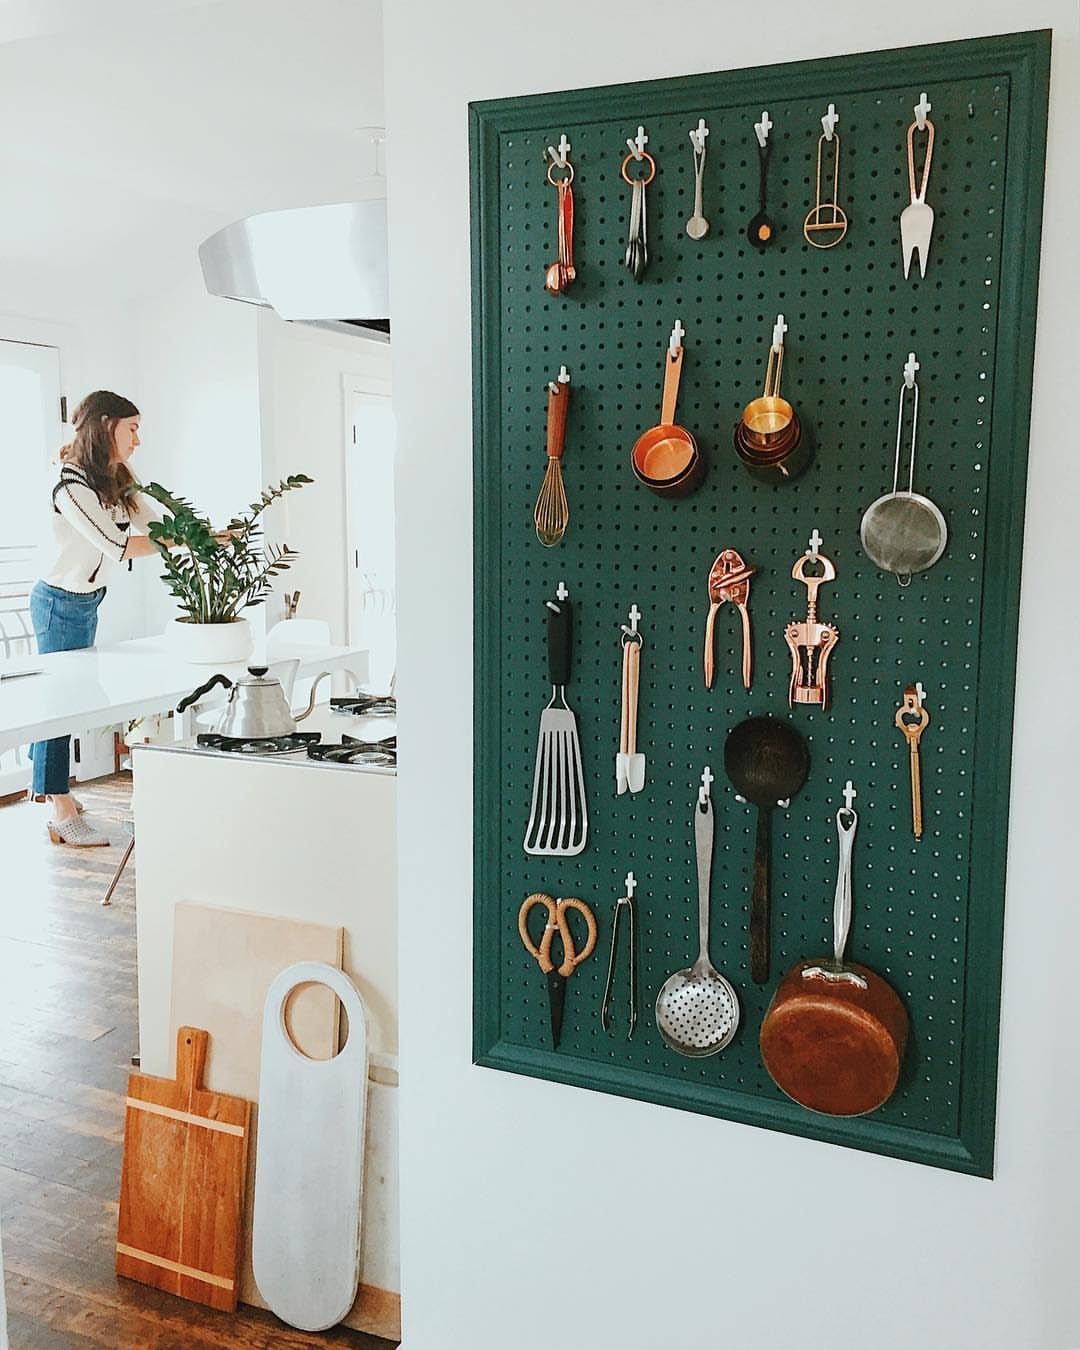
Walls take over the job of a drawer when a pegboard holds pans and utensils on hooks.
Hang the things you reach for every day, and move hooks until the layout fits your habits. Cabinet space frees up fast, though everything on display collects dust and needs a regular wipe.
10. Dedicated Cup and Tumbler Cabinet
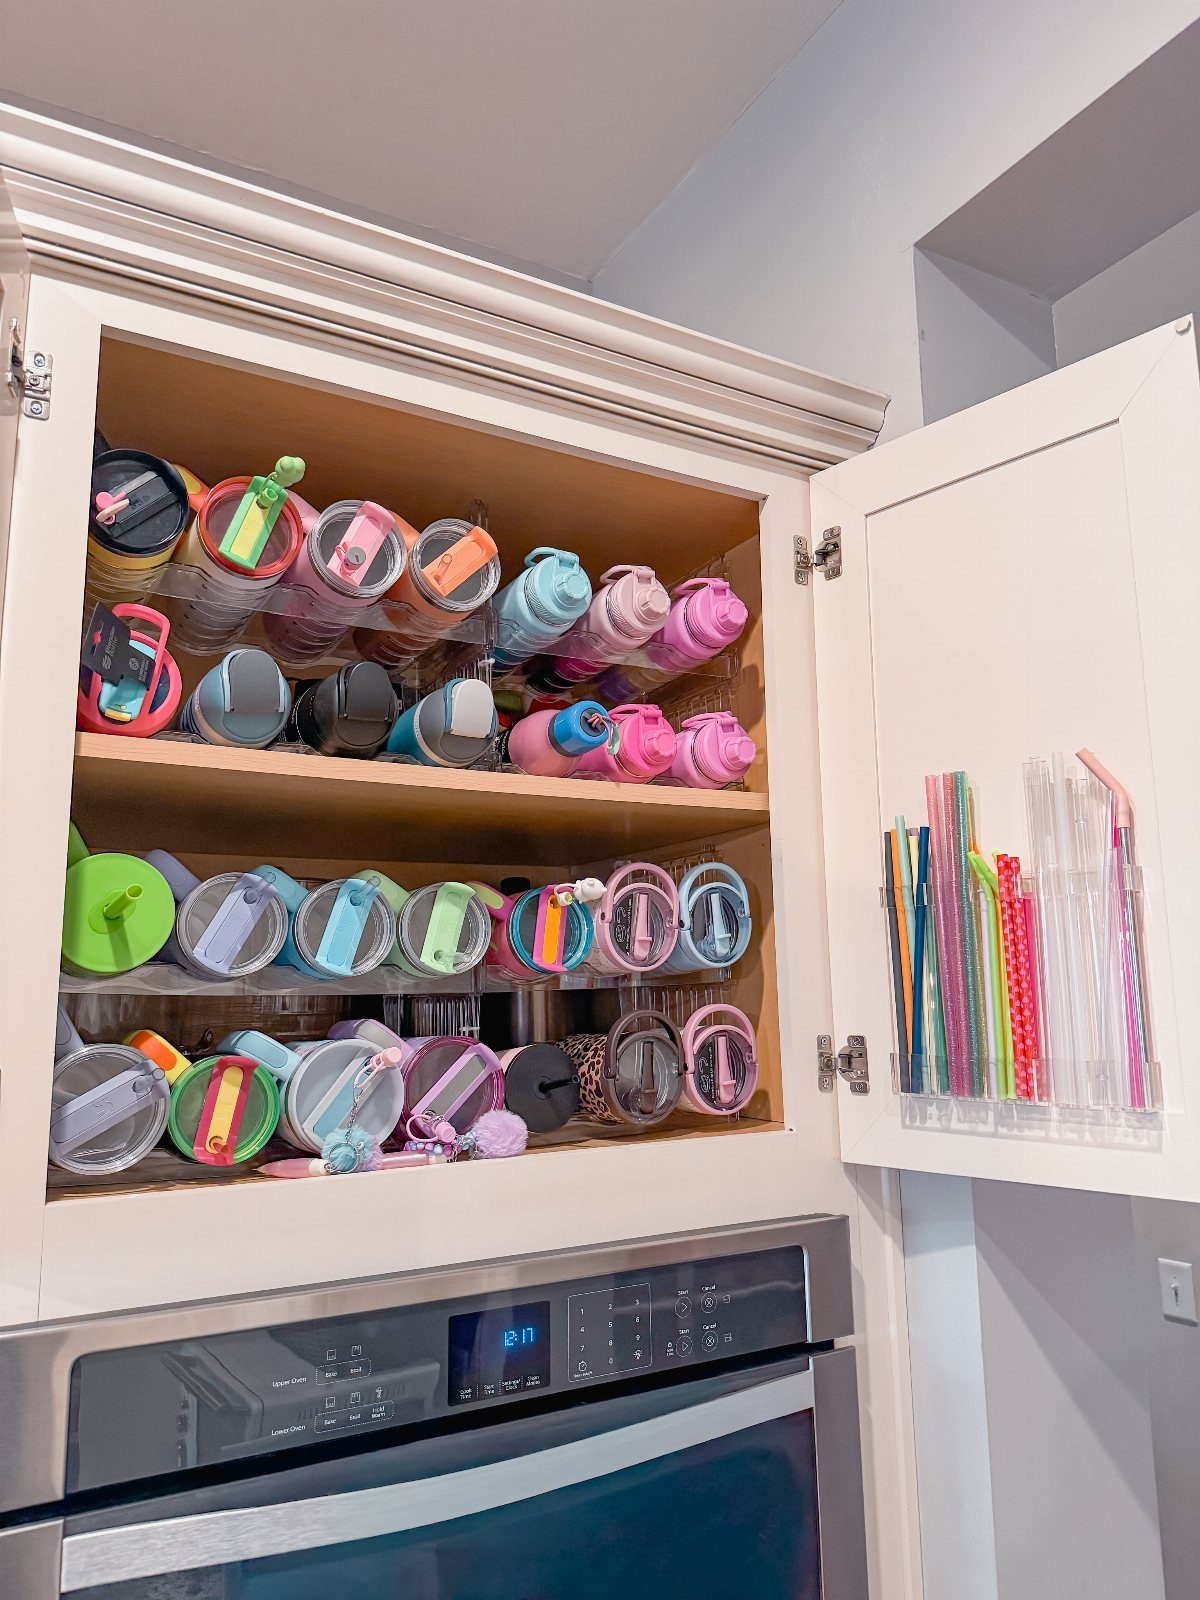
Give tumblers their own cabinet and they stop avalanching out of the one with the mugs.
Rows of reusable cups on shelves keep every lid and handle in view, and sorting by height keeps the tall ones from hiding the short ones.
A door-mounted acrylic holder is a smart add-on for straws, using space that otherwise sits empty. Choose a cabinet near the fridge or sink, so filling a cup takes a single step.
11. Pull-out Sliding Cabinet Drawers
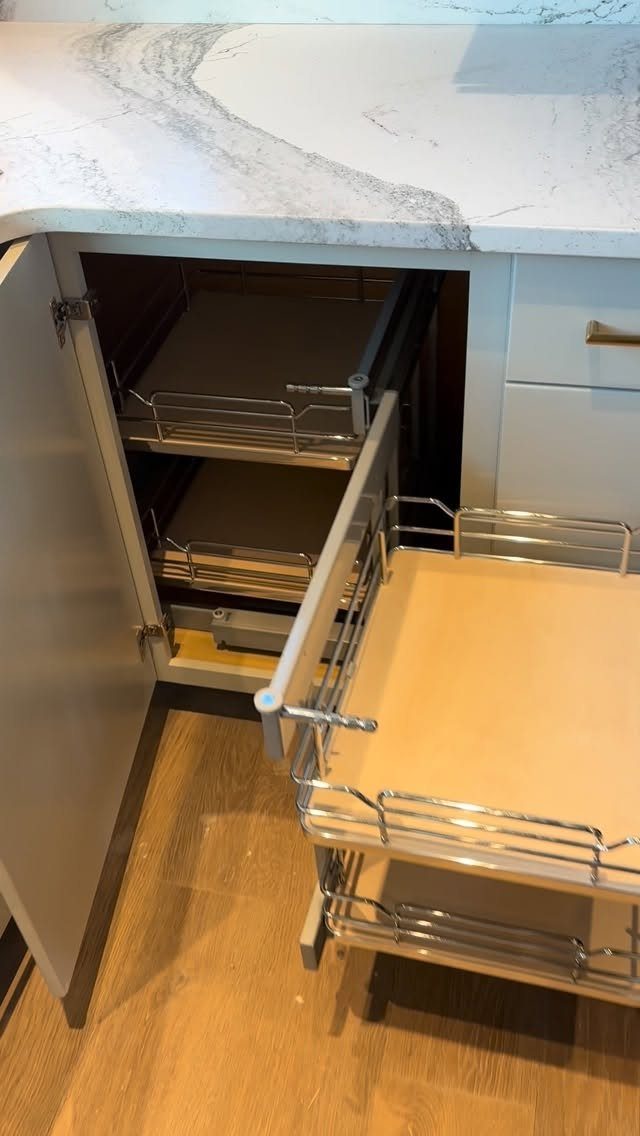
Deep lower cabinets swallow things at the back, and pull-out sliding drawers bring that whole depth to you. Three metal drawers on chrome rails stack the space into levels you can open one at a time.
I would choose these for pots, pans and bulky items you hate crawling after. Measure the cabinet opening before buying, since the drawers and rails take up a little width on each side.
12. Clear Airtight Pantry Containers
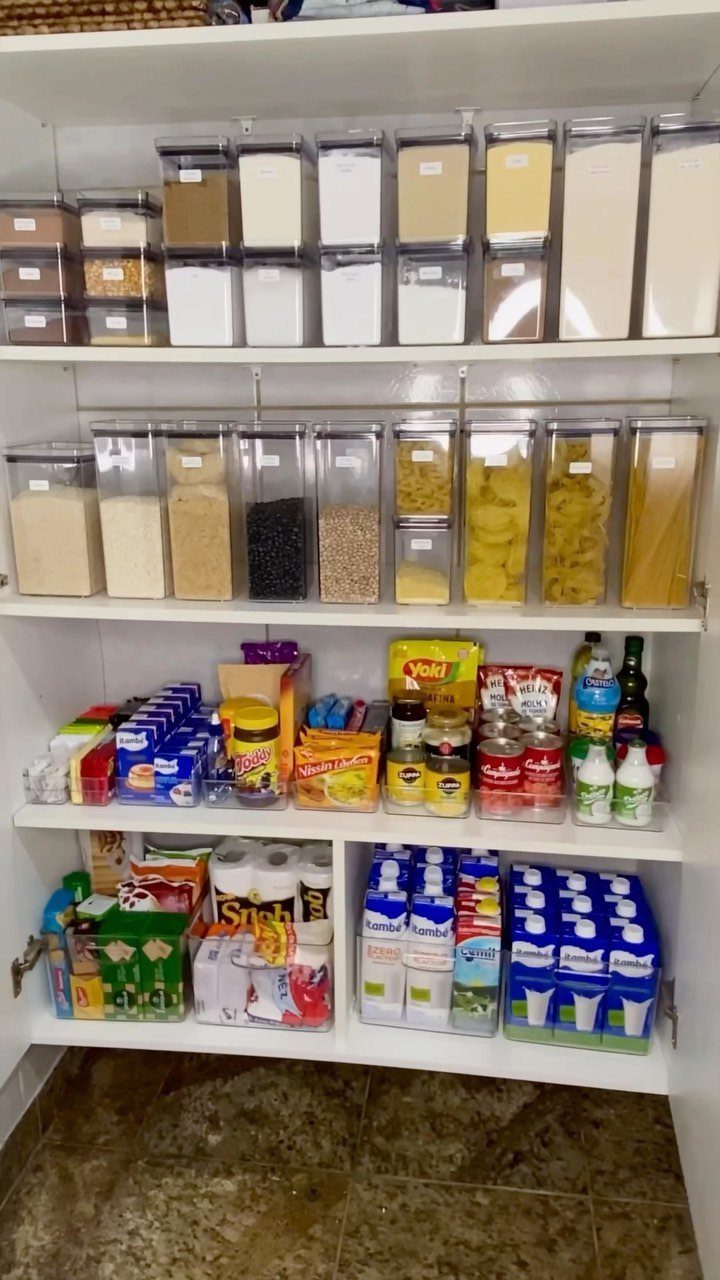
Choose one shape that stacks, so shelf space gets used fully. Buying a few at a time spreads out the cost, and labeling the lids saves guessing between similar grains.
13. Deep Drawer Dividers
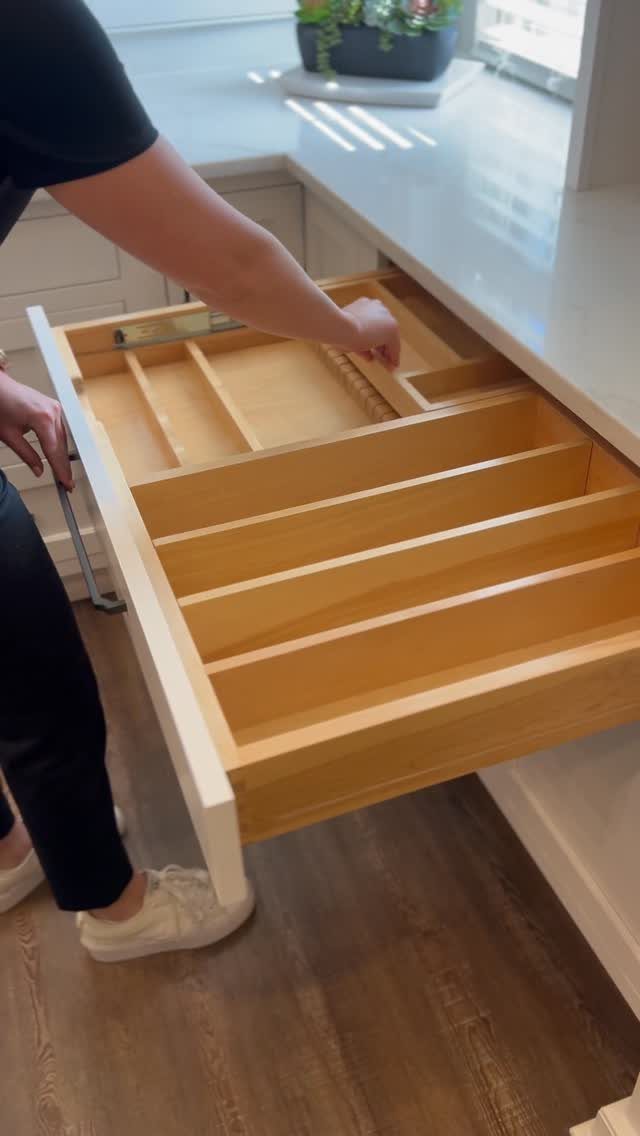
A deep drawer with fixed vertical dividers turns one big pit into narrow lanes, so items stand on edge instead of piling flat.
Wood dividers built into the drawer, as in this one, never slide out of place the way loose inserts do.
Sort the lanes by what you grab most. Baking sheets, cutting boards and platters suit tall, skinny slots, and each one lifts out without moving the rest.
Fixed dividers set the layout for good, so decide your lanes before building. If your stuff changes often, adjustable inserts are the safer pick.
Regular Maintenance Tips
Organizing is mostly front-loaded work, so maintenance only needs a few minutes if you put it on a schedule. The easiest slot is right after a grocery run, before anything goes on a shelf.
Give each bin or basket a quick once-over first.
Pull out anything expired, and toss the empty bag someone put back anyway. When groceries arrive, sort them straight into zones: snacks near the fridge, flour and baking soda on the shelf closest to where you bake.
Zones make the touch-up fast, because every item has an obvious home and a misplaced one stands out. If a zone keeps overflowing, that is a sign it needs more room, not more tidying.
Frequently Asked Questions
How do you decide where to put things in kitchen cabinets?
Store each item near the place you use it, grouped by job. Daily tools belong on the easiest-to-reach spot, such as the top tier of a utensil pullout, with occasional ones underneath.
In a deep cabinet, line up like items front to back so the front row tells you what is behind it.
What are steps to organize kitchen cabinets?
Pull everything out and toss what is expired or empty, then group what remains by use.
Give each group a container that fits: clear bins under the sink, baskets and jars in the pantry, racks for lids and pans, dividers in deep drawers.
Measure each cabinet before buying anything, and label bins, drawers and lids so everyone puts things back correctly. Finish with a short routine after each grocery run to keep it that way.