Ideas here run from a weekend of paint and a simple swap of knobs to wrapping, molding, ribbed panels and even stacking cabinets to the ceiling, so the right one depends on how much of your hall you can change.
Renters who can’t touch walls should stay with surface changes like paint, wrap or a faux marble top, while owners with a narrow hall can build up or in.
One detail decides the safest start: IKEA’s shoe cabinets are shallow, so anything added to the doors, like the molding framing or ribbed wood panel inserts, can block the flip-down clearance.
1. Shoe Cabinet for Storing Games
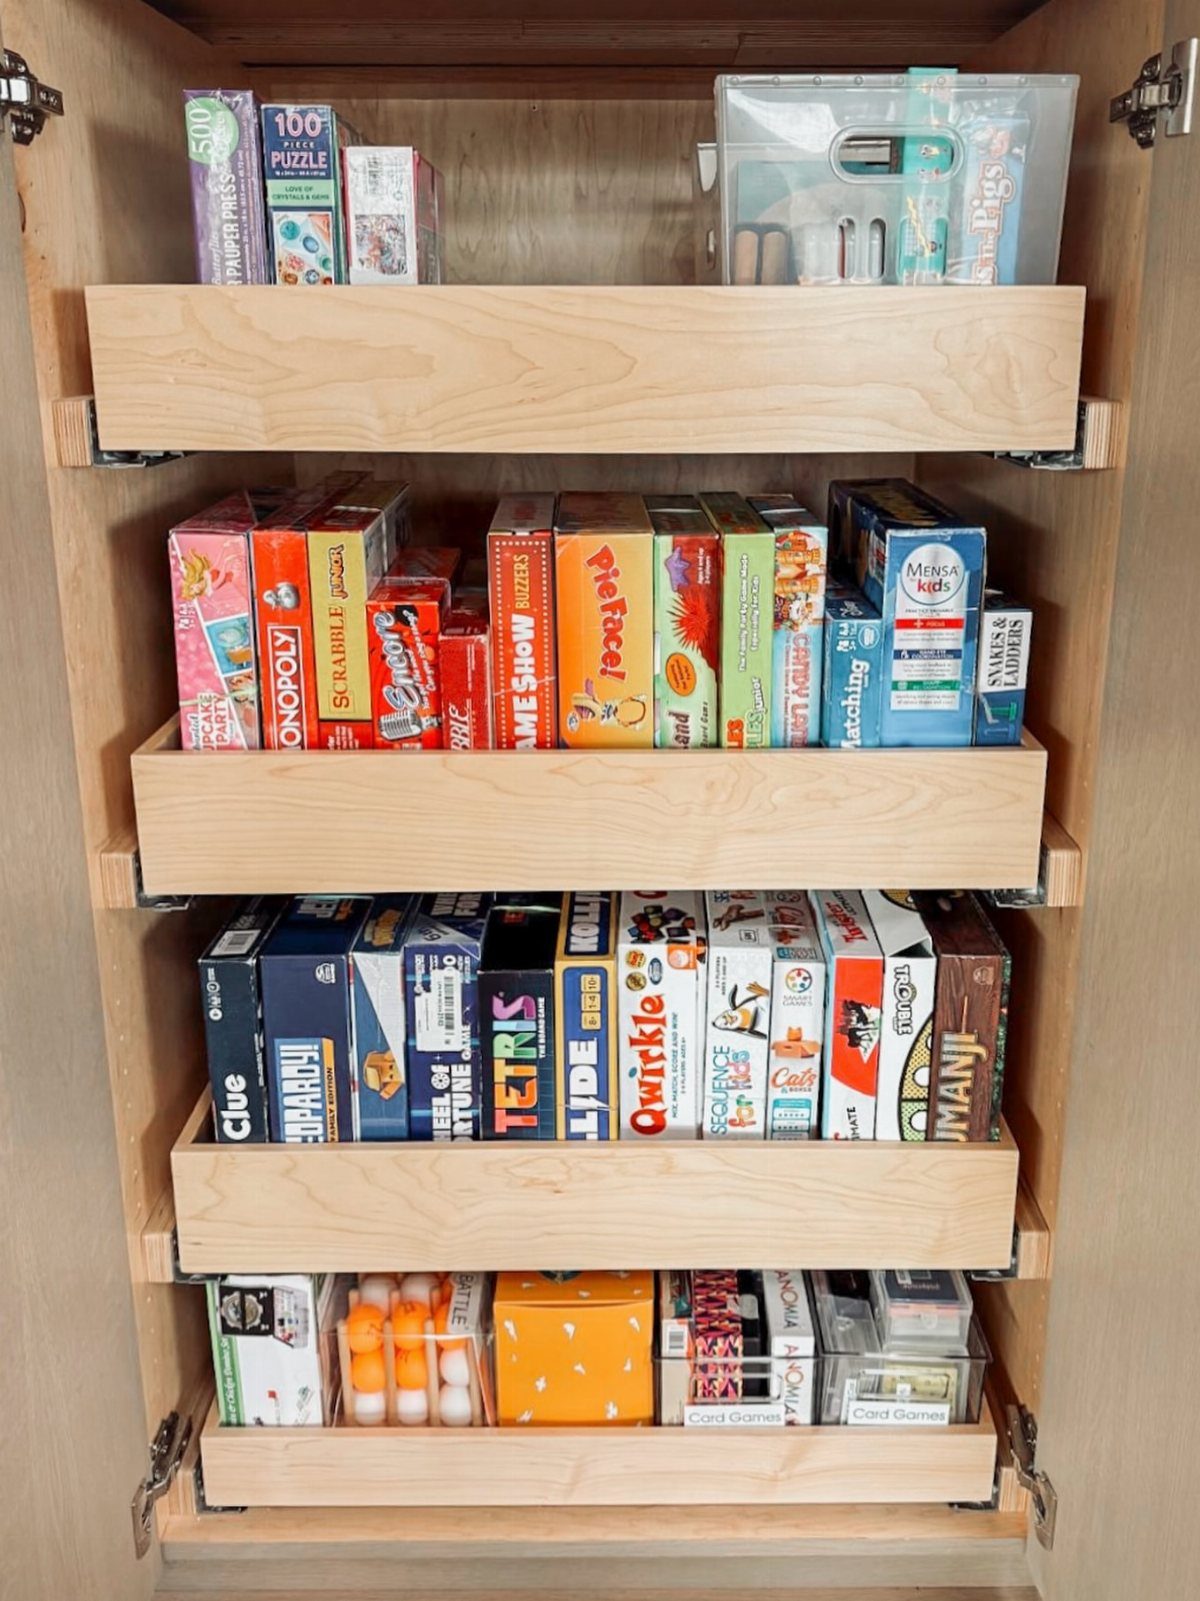
Games stay stacked in a drawer instead of leaning in a pile on a closet shelf.
Group by size: big boxes like Monopoly in the deepest drawer, small card games and puzzles in the shallower ones.
A plastic bin on top holds loose pieces, dice and score pads so they don’t end up in the wrong box.
I like this one for an entryway or hall where nobody wants a game cabinet that looks like one.
2. Fluted IKEA Hemnes Cabinet
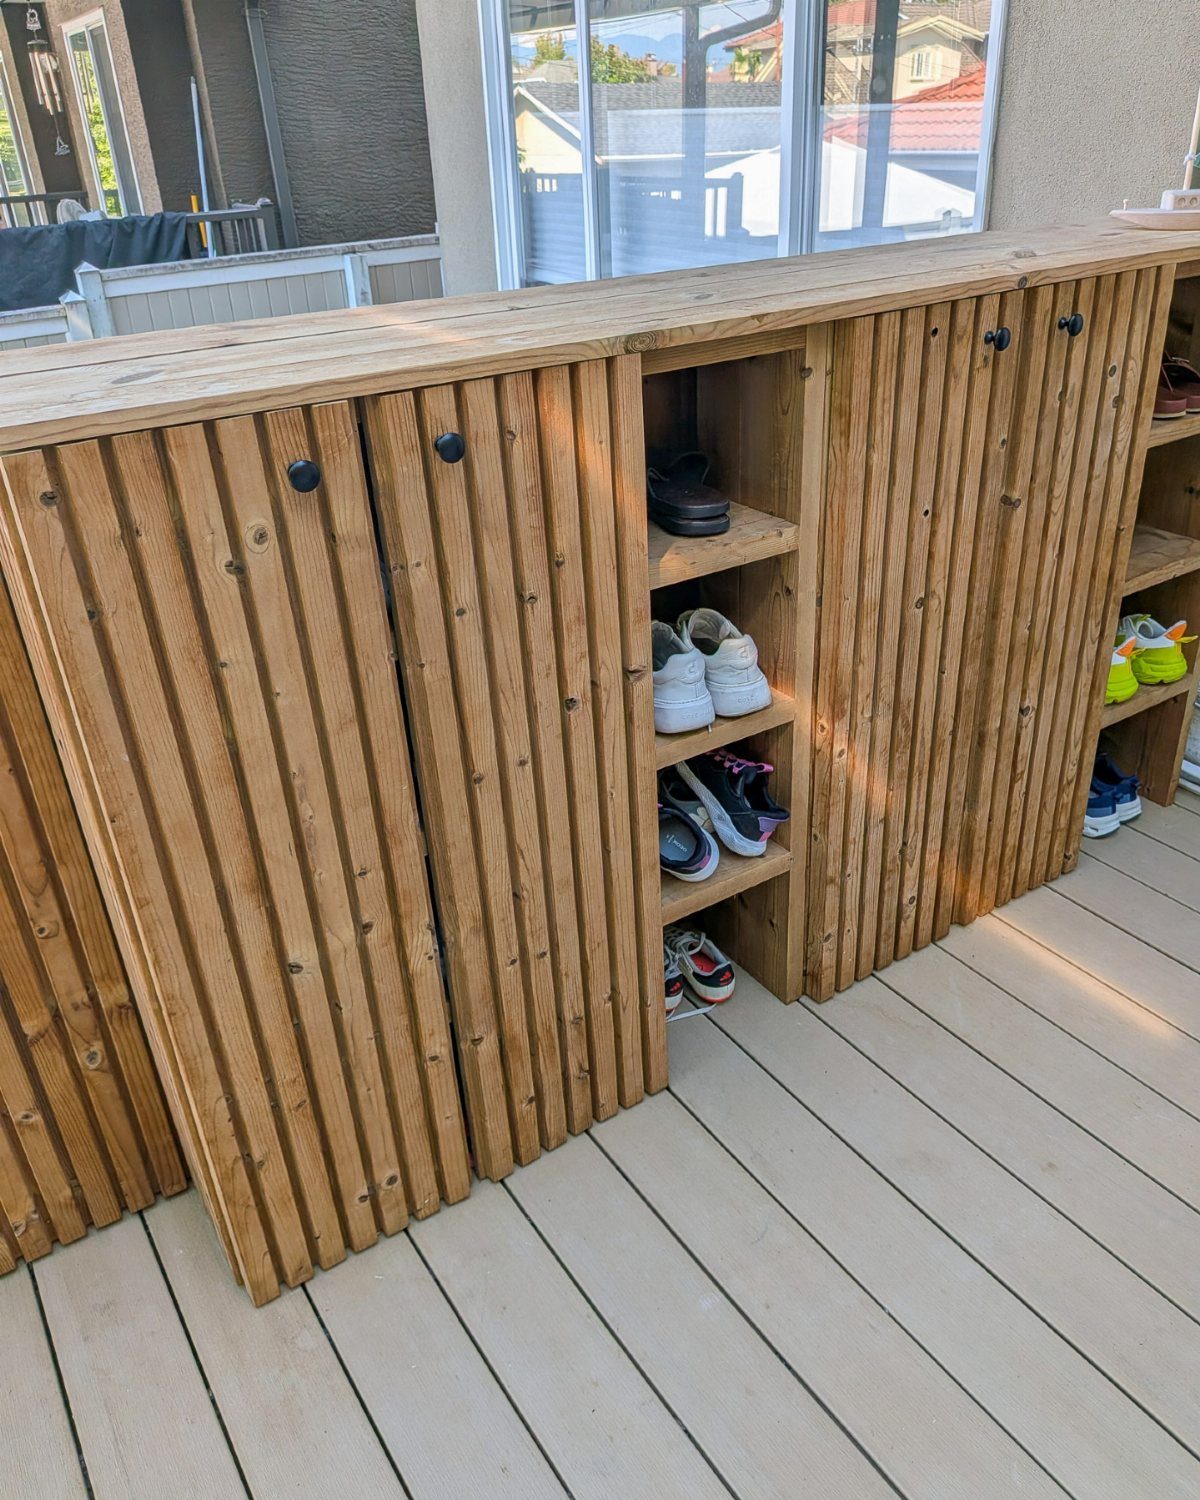
Vertical wood fluting turns a plain cabinet front into something that looks custom, and the open shelves behind it keep the shoes easy to grab.
Hemnes is the base here, so the fluted look is an add-on to a cabinet you can already buy.
Light wood suits a bright spot like a deck or porch entry, and I would keep the shoe selection to a few pairs per shelf so the lines stay the focus.
If open shelving feels messy, put your everyday pairs at eye level and the rest lower.
3. Rustic Shelf Addition
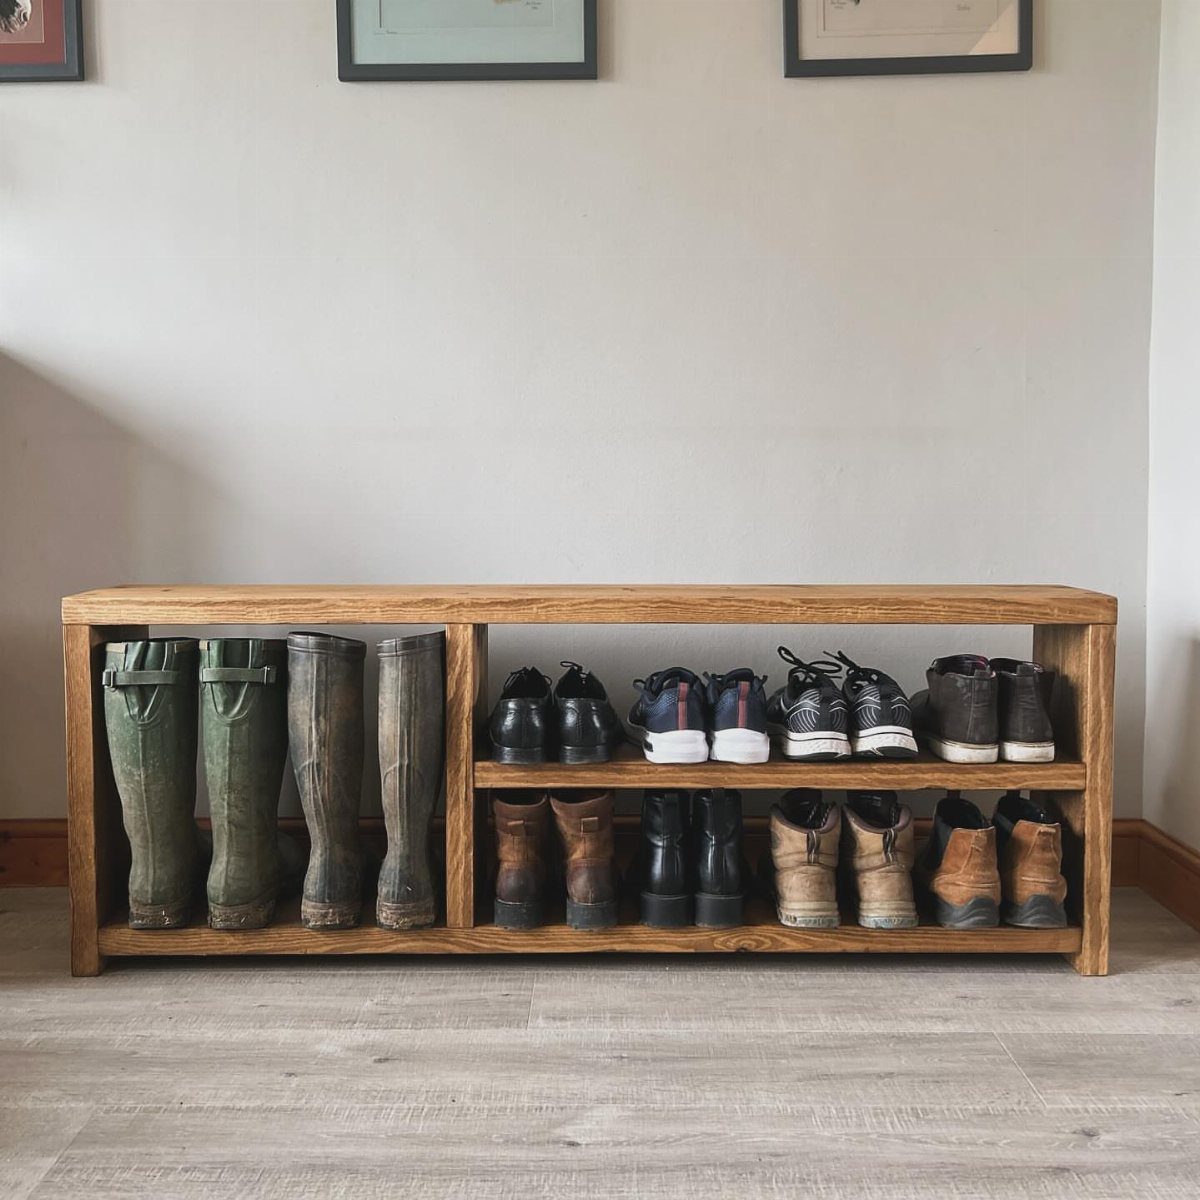
A single natural wood shelf added to a shoe cabinet softens the white wall and gives you a ledge for things that aren’t shoes.
Use the shelf as a landing spot for keys or a small plant, and hang framed art above it to tie the pieces together.
I would choose a wood tone close to the cabinet’s own so the addition reads as planned.
4. Painted Cabinet with Statement Hardware
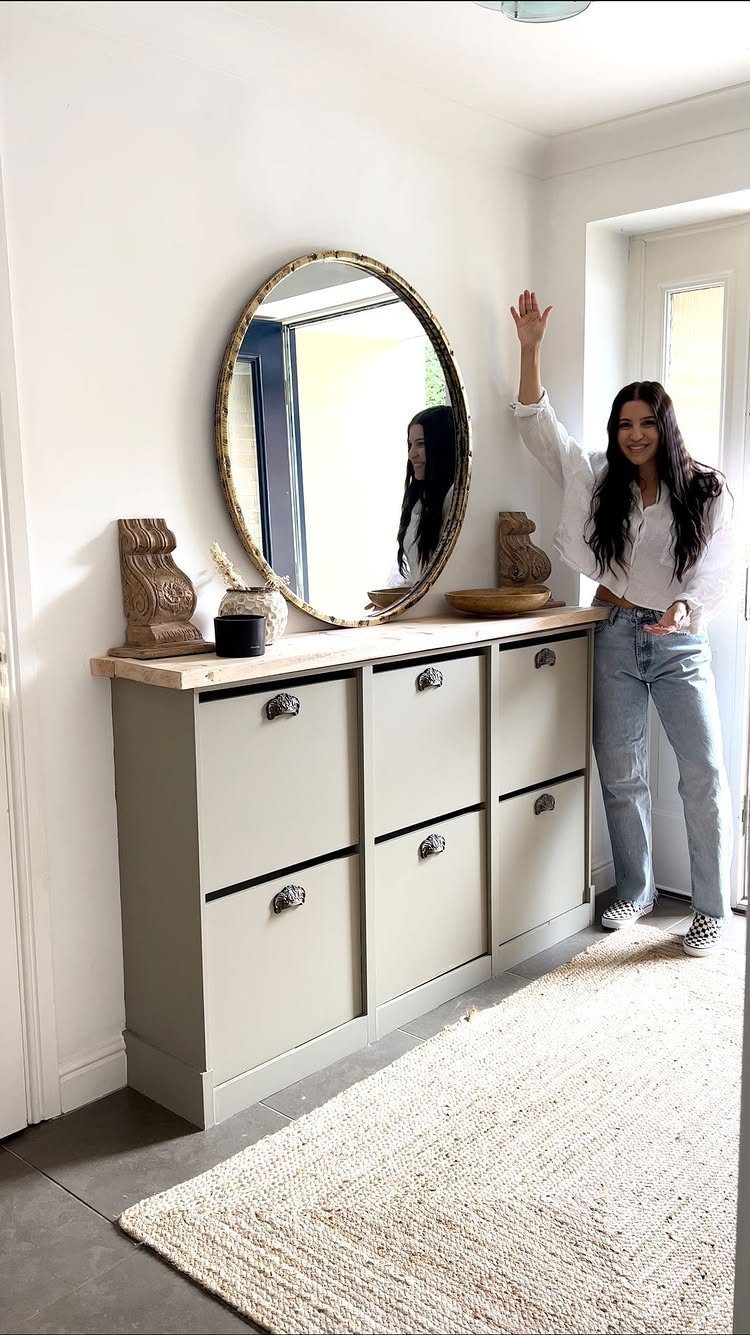
Paint plus one bold piece of hardware is the cheapest way I know to make a basic shoe cabinet look pricier. Light grey is forgiving in a hallway, and a wood top warms it up.
Choose hardware with a metallic finish, gold or brass, to stand out against the grey. Add a round mirror above the cabinet in a matching tone and the whole entryway looks finished.
Paint takes a weekend, mostly drying time, and swapping knobs takes minutes. Sand and prime first so the color holds.
5. Floor-to-ceiling Cabinets for Shoe Storage
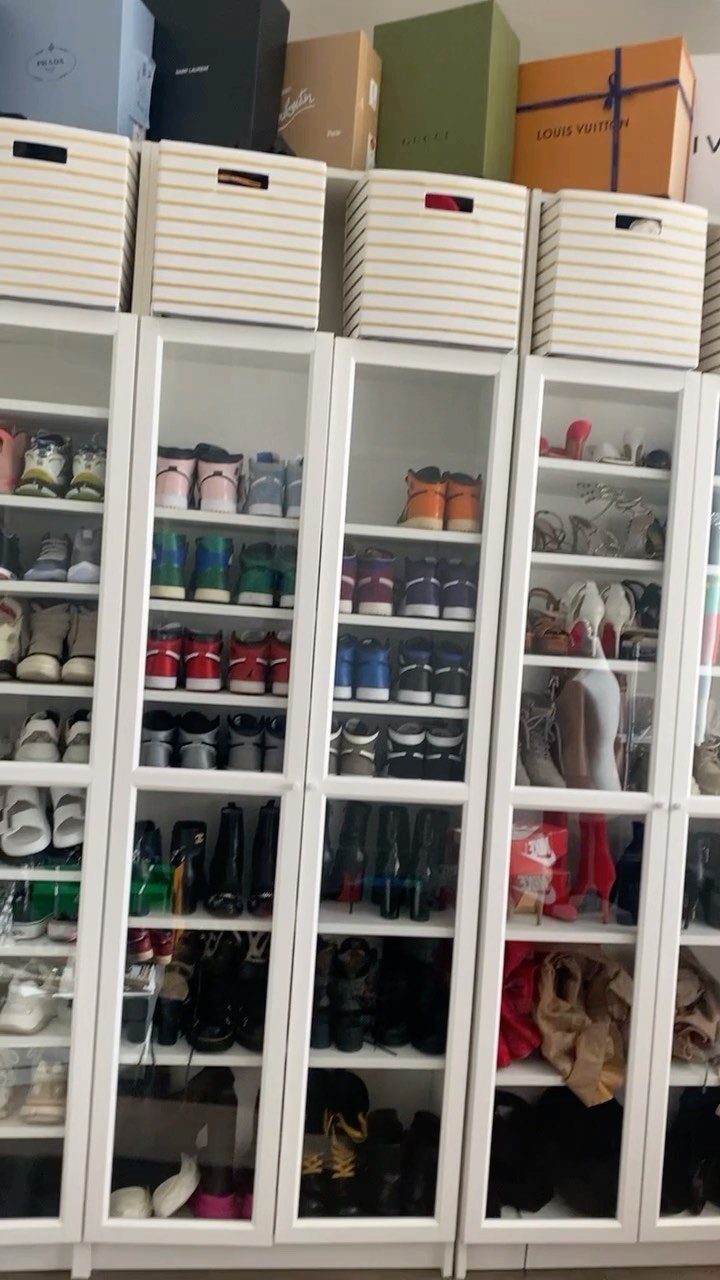
Stacking cabinets to the ceiling gives you far more shoe storage without using any more floor, which is exactly what a narrow hall needs. Glass doors let you see every pair, so you can find shoes without opening anything.
The tops are free real estate: storage bins up there hold off-season items or boxes you want to keep. Reach is the limit, so a small step stool belongs nearby.
For a collection you want visible, this beats solid doors, though glass shows dust and needs wiping.
6. Decorative Feature Wall Shoe Display
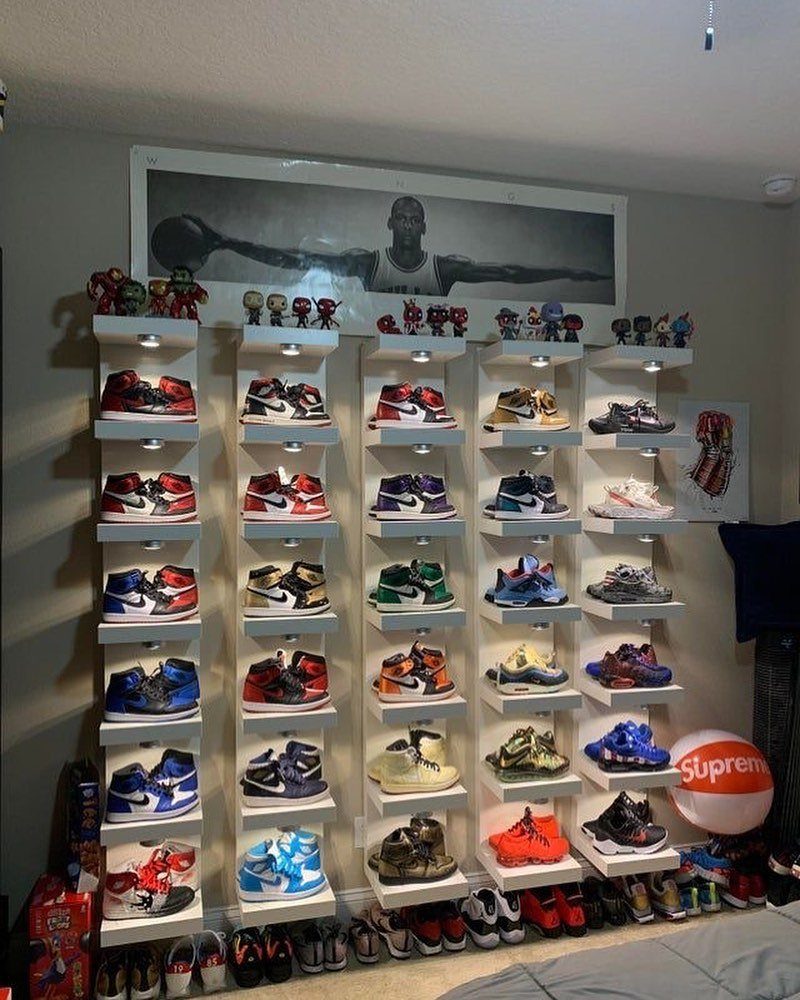
Sneakers earn display space when you mount shelves on the wall at eye level and light them from within. White shelves keep attention on the shoes, and built-in lighting makes the colors show.
The top shelf is useful for small collectibles, as figures or a favorite poster, which turns storage into a personal feature wall. Leave room between shelves so each pair sits without touching its neighbor.
I would keep the floor below the shelves free of clutter, so the wall does the work and the room still feels open.
7. Ribbed Wood Panel Inserts
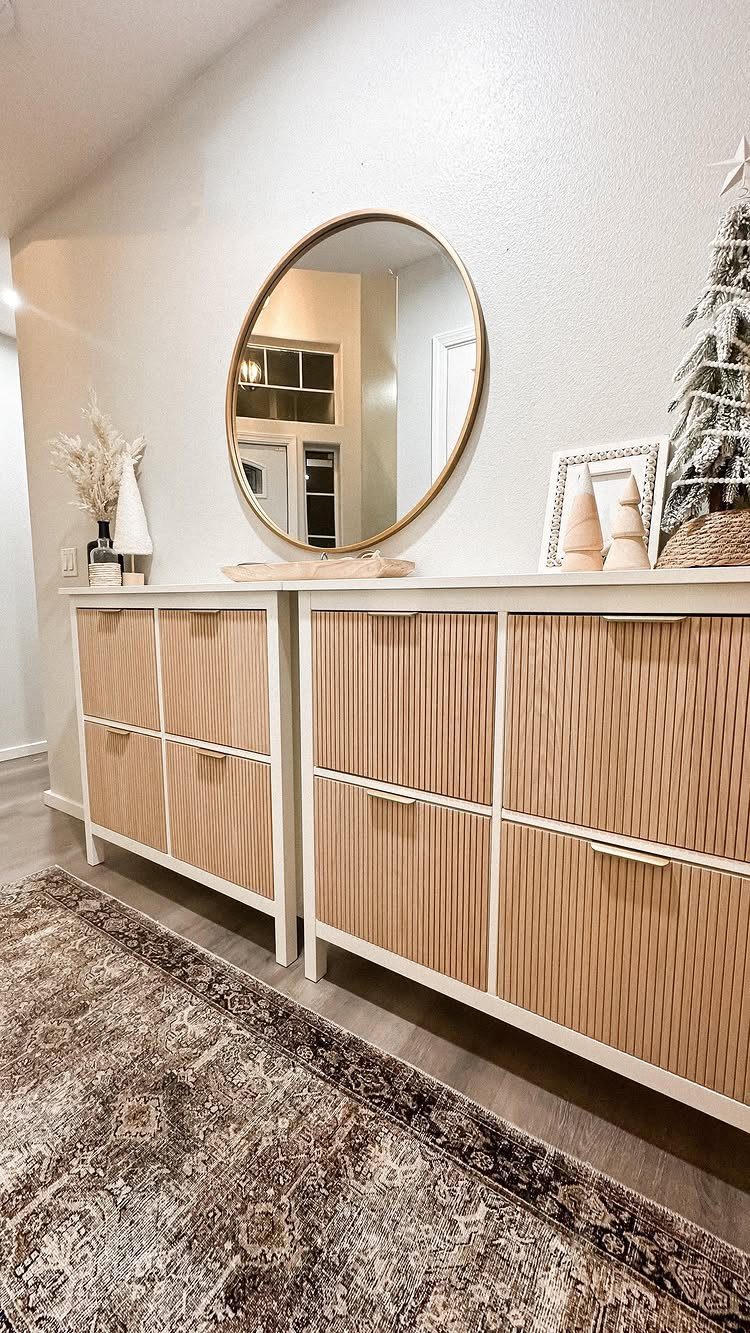
Ribbed wood inserts on the flip-down doors give a plain white cabinet texture without changing its shape.
Light brown ribbing against a white frame stays calm, which makes this a good cabinet for a hall, where it won’t compete with a round mirror or other wall art hung above it.
Cut the panels to fit each door face and glue them on, then check that the doors still flip freely before the glue sets.
A pale oak or birch tone is the safer pick, since a darker stain pulls the whole front away from white and the cabinet starts to look heavy.
8. Wood-grain Wrap with Gold Knobs
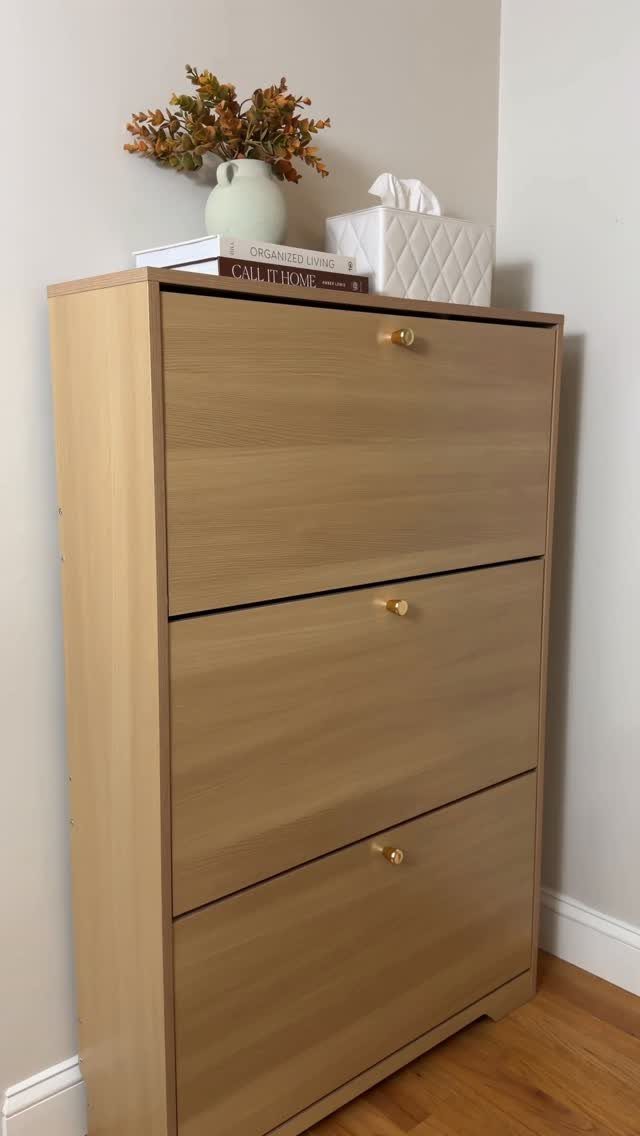
A light wood-grain finish plus three small gold knobs changes a cabinet’s whole personality for very little money. Wood grain brings warmth, and the knobs add a small spark of metal.
Clean and dry the surface before applying any wrap, and smooth it slowly so bubbles don’t form. Keep the knobs small; on a finish this soft, big hardware would take over.
The top holds books and a vase nicely, and I would stop at a few objects so the surface stays tidy.
9. Faux Marble Top Upgrade
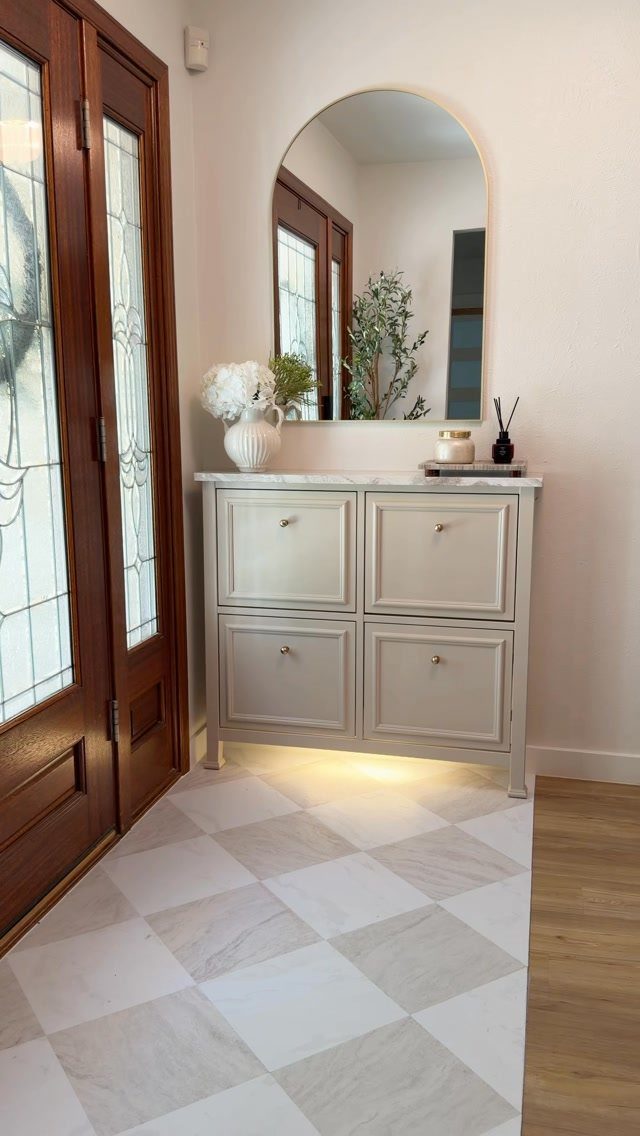
A marble-style top is the quickest way to make a white cabinet look like a furniture-store piece. White with a veined surface keeps the look clean, and an arched mirror above softens the straight lines of the cabinet.
Cut the top to the cabinet’s footprint and set it flat. Because it’s a faux surface, I would choose a subtle vein over a bold one, since subtle reads as more convincing.
A vase of flowers is plenty on top. Tile floors like this one pair well with it.
10. Built-in Mudroom Style Unit
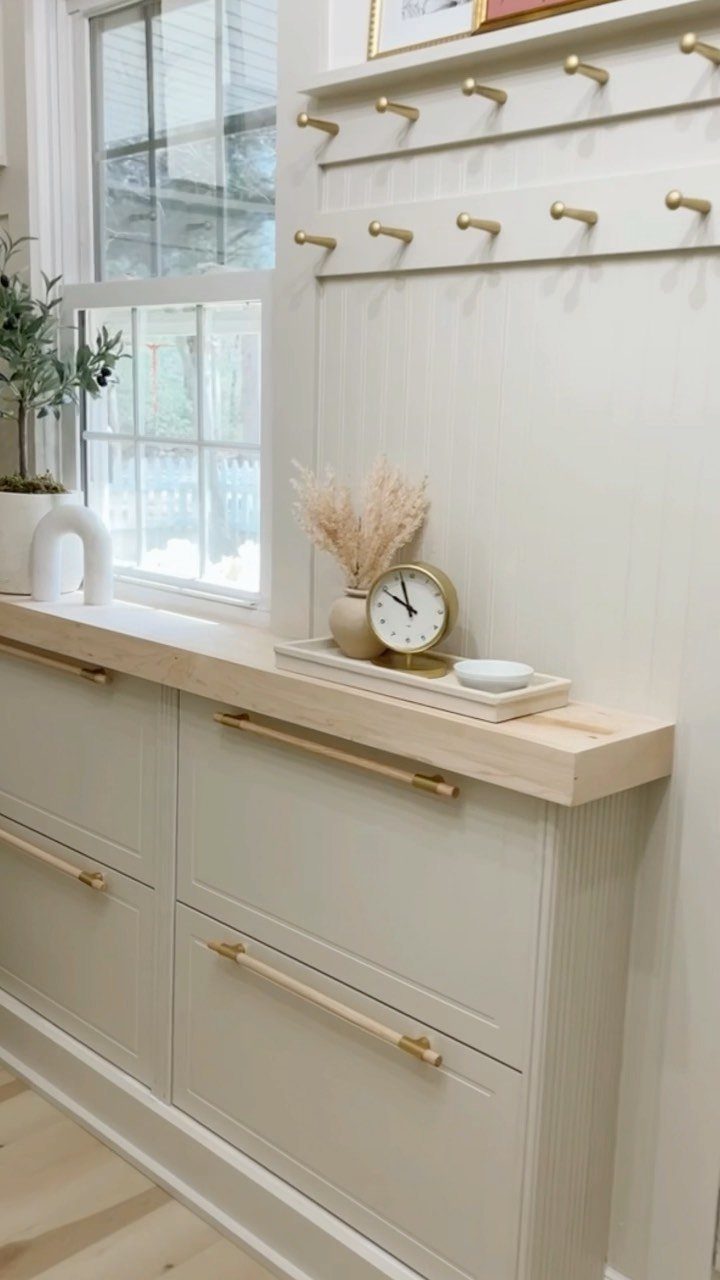
Building a cabinet into the wall, then adding a wood countertop and a row of hooks above, makes a hallway feel like a proper mudroom. Light grey keeps it quiet, and gold hardware ties in with the wood.
Hooks above handle coats and bags, while the cabinet takes the shoes below. I would match the hook finish to the cabinet pulls so the whole unit reads as one piece.
Fit it snug against the wall, and trim any gaps so it looks built in.
11. Decorative Molding Framing Hack
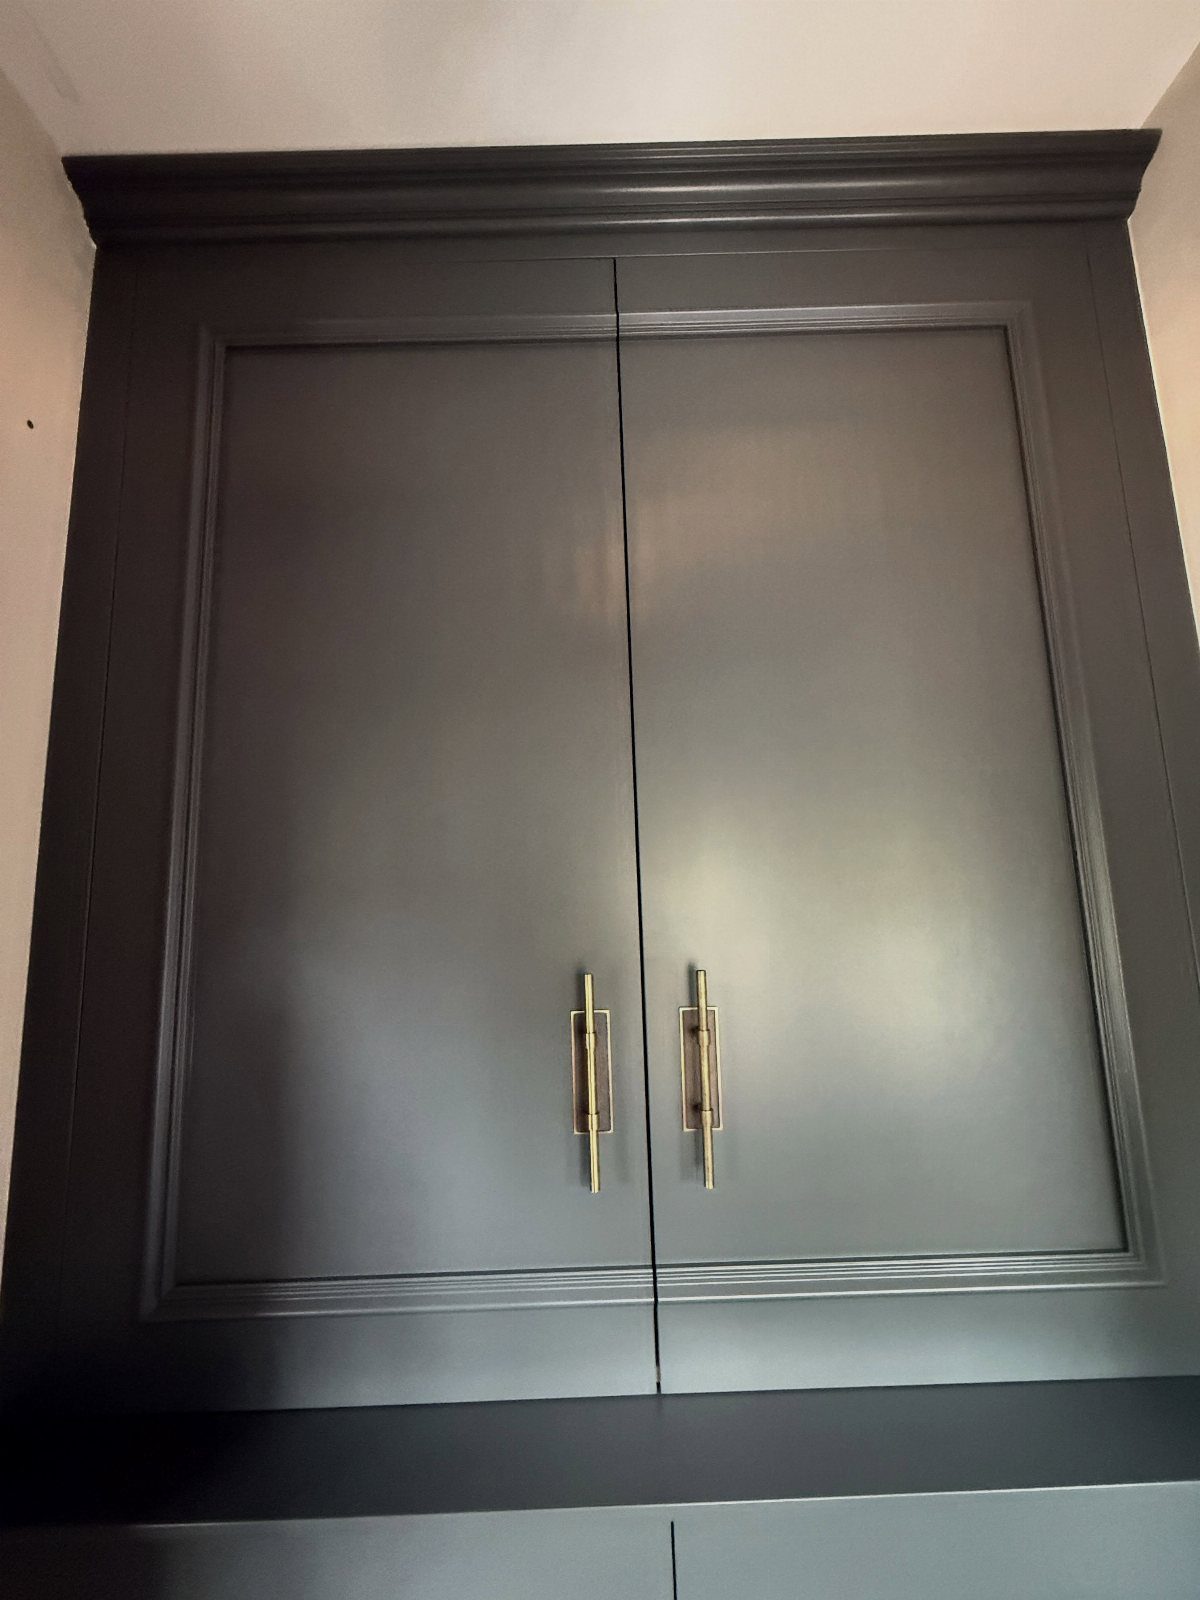
Frame molding glued onto flat doors makes a basic two-door cabinet look like traditional millwork. Dark grey is the color I would choose here, because the shadows in the molding show up best against a deep tone.
Measure each door, cut the molding in matching rectangles, and glue it on before painting everything one color. Crown molding on top finishes the look, and gold handles stand out against the dark grey.
Paint after the molding is on, so the seams disappear.
12. Painted Striped Cabinet Finish
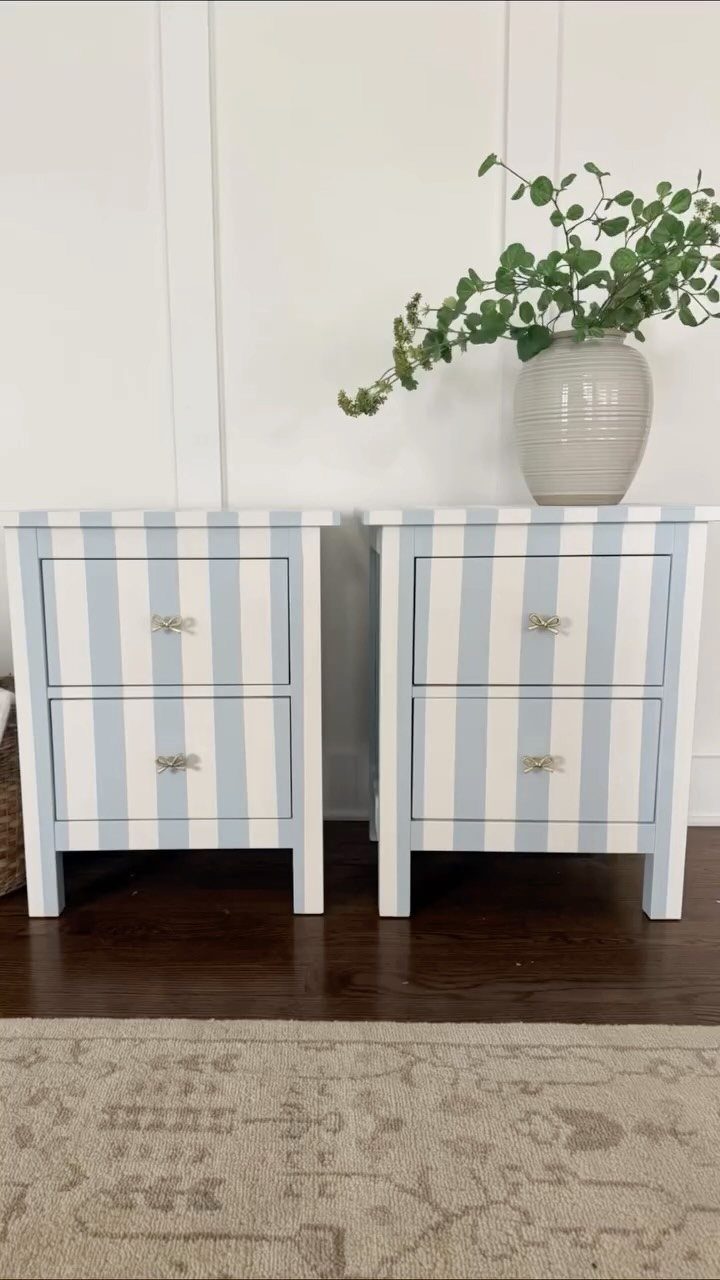
Vertical stripes in white and soft light blue make a pair of small cabinets feel playful without looking childish. Gold bow pulls keep the look polished, and the pale blue stays gentle against a white paneled wall.
Tape off the stripes with painter’s tape, paint the blue, and pull the tape while the paint is still slightly wet for a clean edge. Use equal widths so the pattern looks deliberate.
2 cabinets side by side let the stripes carry across the whole wall.
Tips for Successful Hacks
Measure the cabinet and the space where it will sit first, then buy paint, trim, or hardware.
Flat-pack shoe cabinets are among the smallest and shallowest in the Ikea system, so adding depth with molding or panels can interfere with door swing or flip-down clearance.
Spend the money where hands and eyes land: a good primer, a decent brush, and hardware that feels solid. Cheap materials show most on the surfaces you touch every day.
Pick one change to start with.
Color, shape or texture each shifts a plain cabinet on its own, and combining all three at once usually looks crowded. Make it fit your hall and your habits, not a photo.
Done correctly, IKEA shoe cabinet hacks can add value to the starter piece and this stylish project epitomizes this.
Common Challenges with IKEA Products
EKET is the model to approach with caution. Its assembly is finicky, there is little room to square the cabinet up, and the doors are inset, so even a slight lean shows.
The hinges are small pins at the top and bottom of each door, which leaves almost no adjustment.
Read the reviews on any cabinet before you commit, and take the complaints about assembly seriously.
Whichever you choose, build it on a flat floor and check for square before you tighten everything. Fixing a crooked frame afterward is far harder than getting it right early.
Sustainable Living Considerations
The most sustainable cabinet is one you already own.
A plain white IKEA piece that has sat in a hall for years is a good candidate for new paint, new knobs or a wrap, and none of that sends it to the curb.
Secondhand furniture works the same way. A scuffed cabinet from a thrift store or online listing costs little, and a coat of primer and paint covers most flaws.
A bamboo bath mat can add texture when you mount it as a panel or use it to line a drawer. Look around the house for leftover materials before buying new ones.