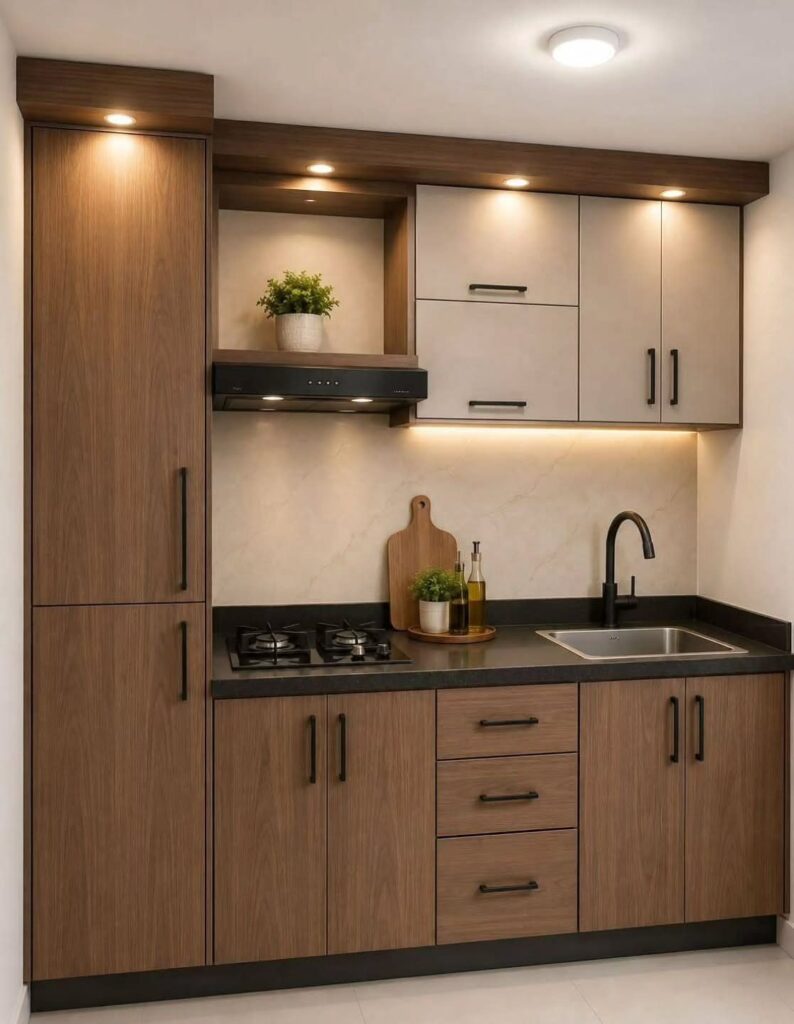
Whether you rent or own decides most of this list: a renter can get the look from Vertical Wall Baskets held by a few screws, a Door-Mounted Spice Rack or a fresh coat of paint on the cabinets, while an owner can take on Upgrade Your Cabinets, an Integrated Panel-Ready Refrigerator or a rebuilt layout.
In a tight room, the layout comes before any finish.
1. Open Shelving
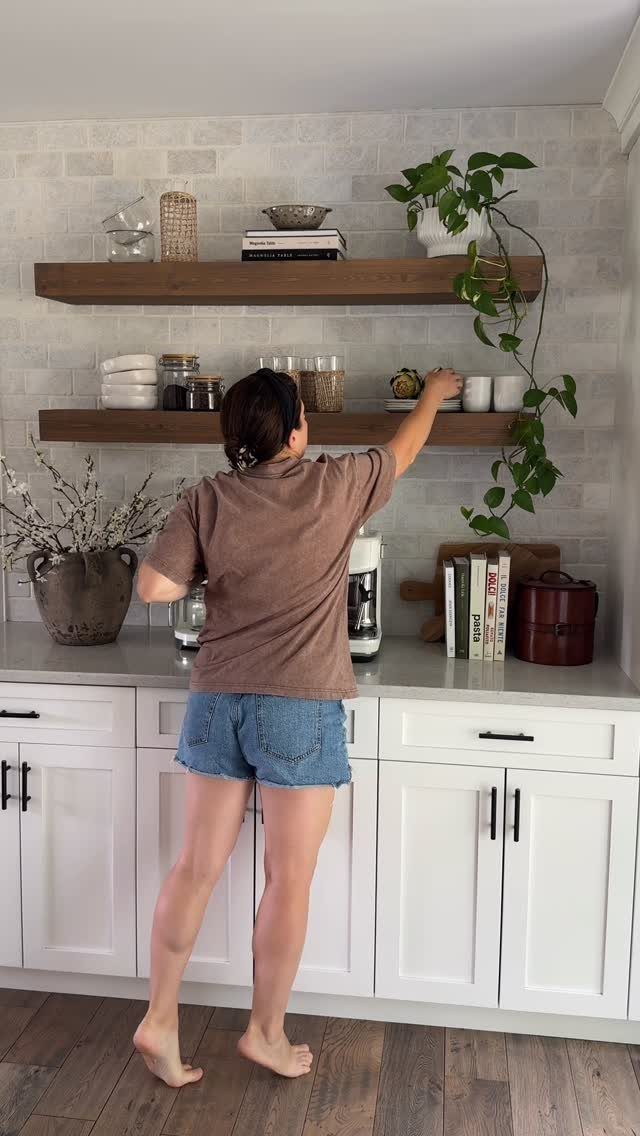
Taking down the upper cabinets and hanging 2 wooden shelves in their place is the fastest way to make a cramped kitchen feel wider. Dark wood against white lower cabinets gives the wall some weight without adding bulk.
I’d keep the lower shelf for everyday cups and plates, since that’s what you reach for daily.
Anything you use less often can go up top or stay in a base cabinet. Open shelving only looks calm when the contents match, so stick to one or two dish colors.
2. Install a Pull-Out Pantry
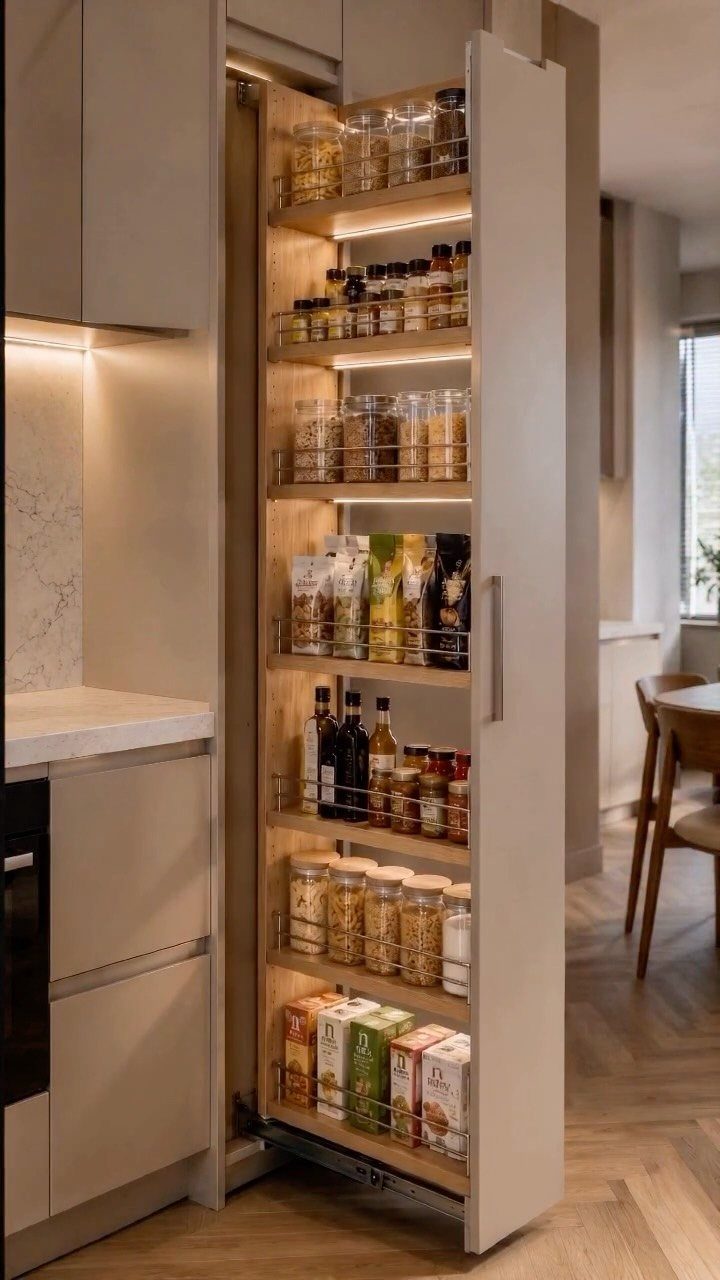
A pull-out pantry turns a cabinet gap only a few inches wide into real storage.
Wire shelves slide out so you can see jars and boxes from the front and the side, and nothing gets lost in the back like it does on a fixed shelf.
For a renter or first-time owner, this is a good place to spend part of a budget, because it replaces a cabinet you already have.
Keep tall items on the sturdy lower shelves and use the upper ones for light boxes.
3. Light Walls and Cabinets
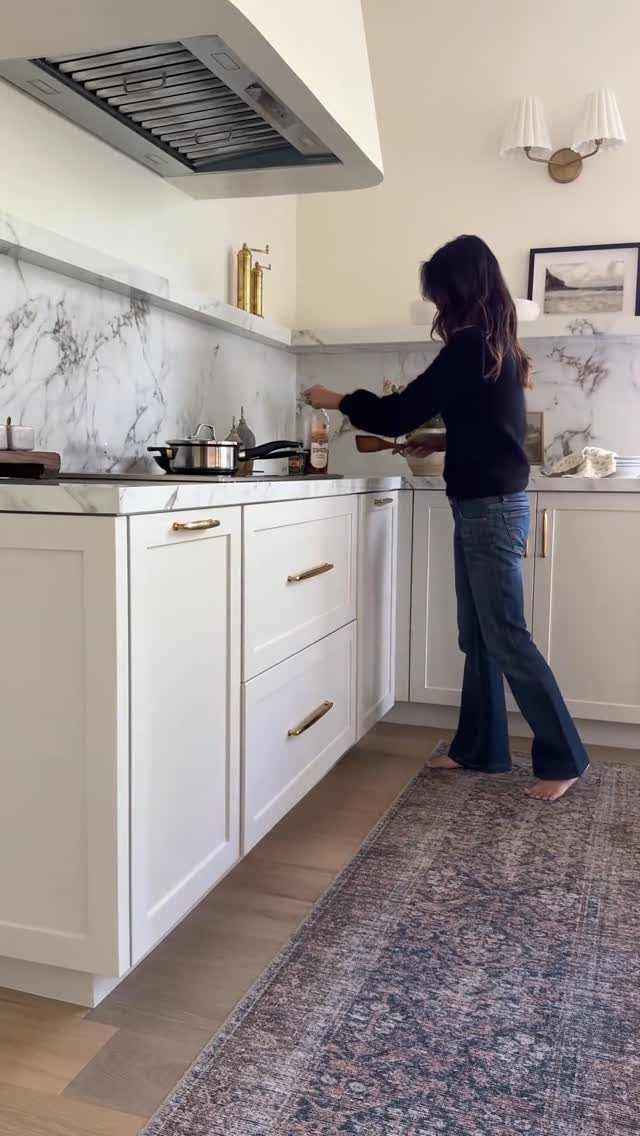
White cabinets, pale walls and a marble backsplash all bounce light around the room, and that is what makes a tight kitchen read as bigger. Painting is the cheapest route, and it fits a weekend.
I’d keep the palette to one white family so nothing breaks the line of the room. Marble-look backsplash tile gives the same effect as stone for less, and it keeps a light kitchen from looking flat.
4. Upgrade Your Cabinets
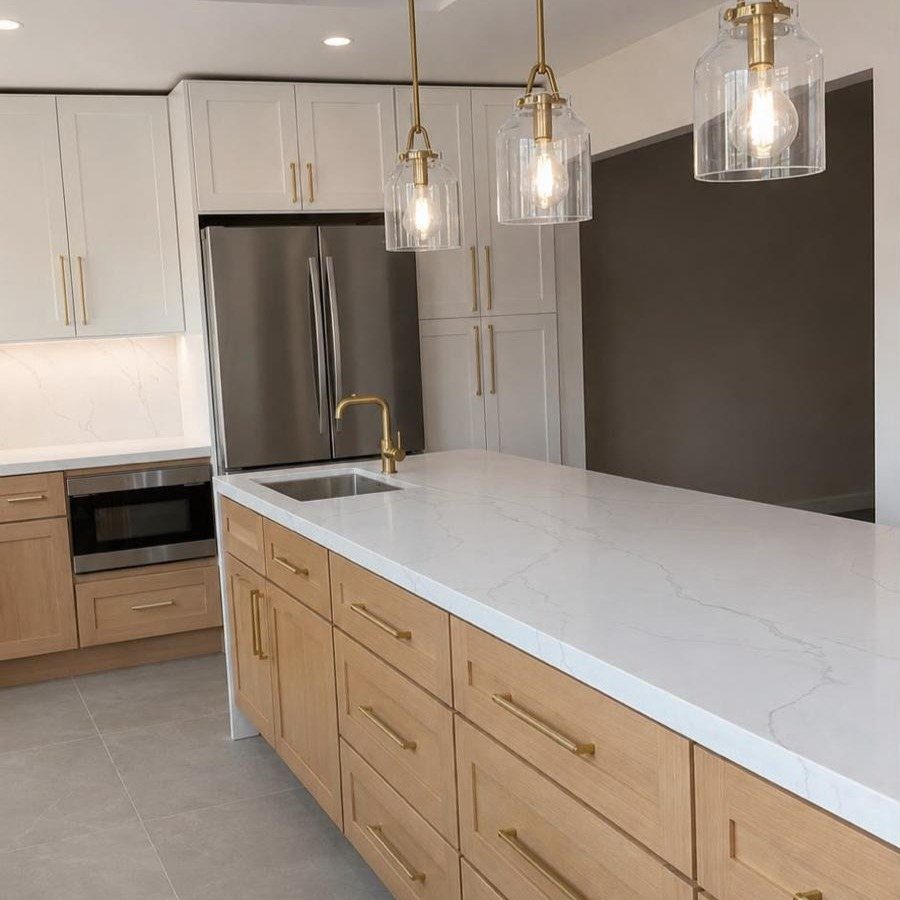
Replacing cabinets is the biggest change you can make to a kitchen, and a two-tone scheme like white uppers over light wood lowers keeps it from feeling boxy. Gold hardware adds warmth against the marble-look counters.
Refacing costs less than new boxes if your current cabinets are sound, so check that first. If the budget is tight, new doors and pulls alone can change the whole look.
5. Bold Tiles
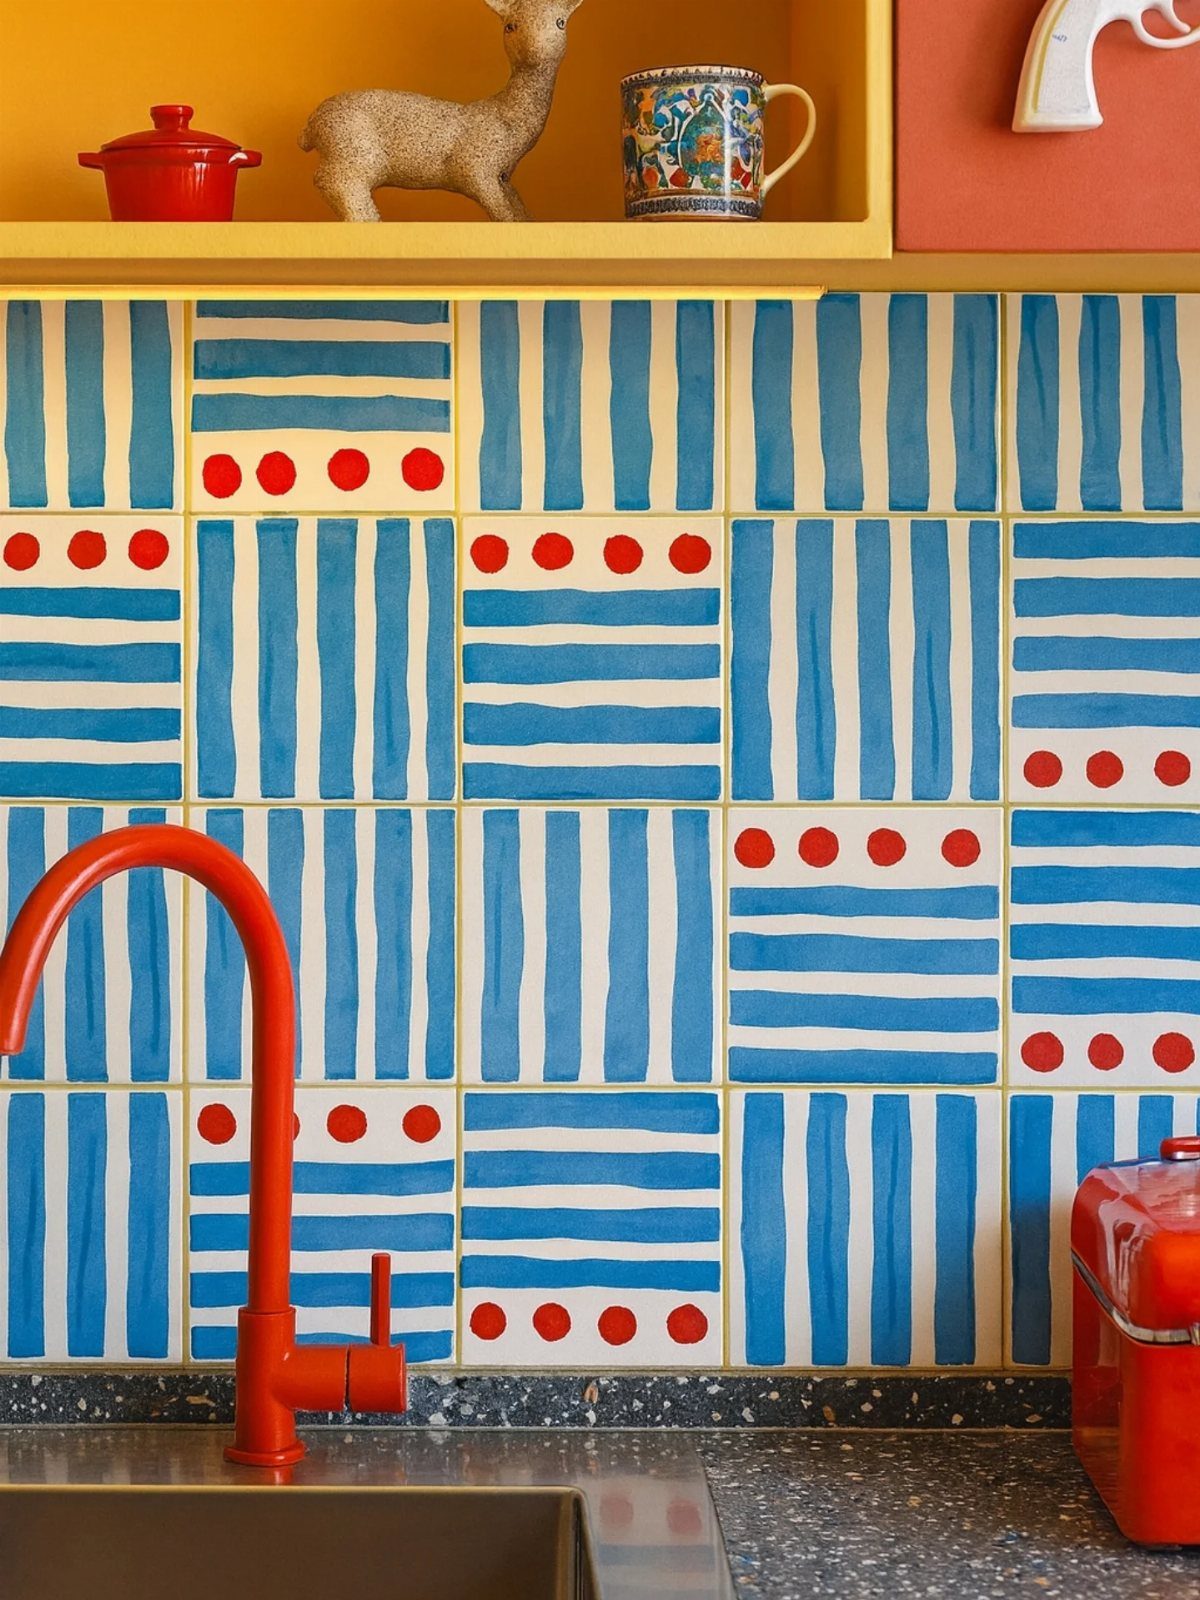
One wall of patterned tile can carry an entire kitchen, and a blue and white pattern is a safe bold choice because the two colors settle into each other.
Keep the rest of the room plain so the tile does the talking. In a cramped kitchen, tile only the backsplash, not the whole wall, and the pattern stays lively instead of overwhelming.
6. Use a Reflective Backsplash
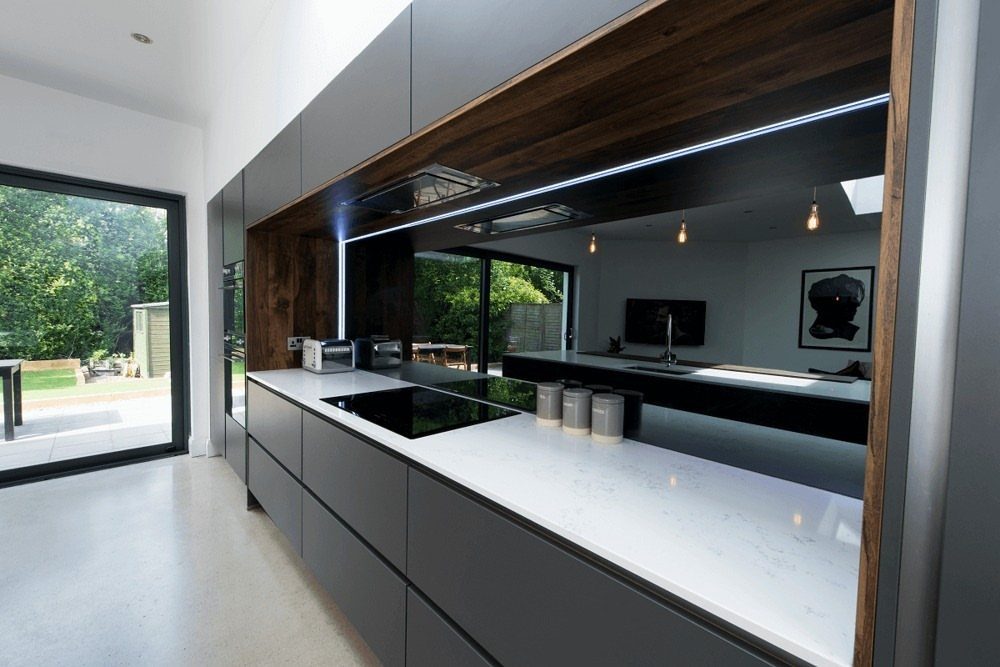
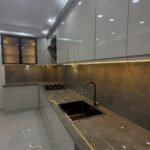
A black reflective backsplash does 2 jobs: it picks up daylight from a glass door and it doubles the sense of depth behind the counter. Glass is easier to wipe than grout lines, which I like in a cooking zone.
White countertops keep the black from feeling heavy. Fingerprints and splatters show on shiny black, so plan on a quick wipe after cooking.
7. Task, Ambient, and Accent Lighting
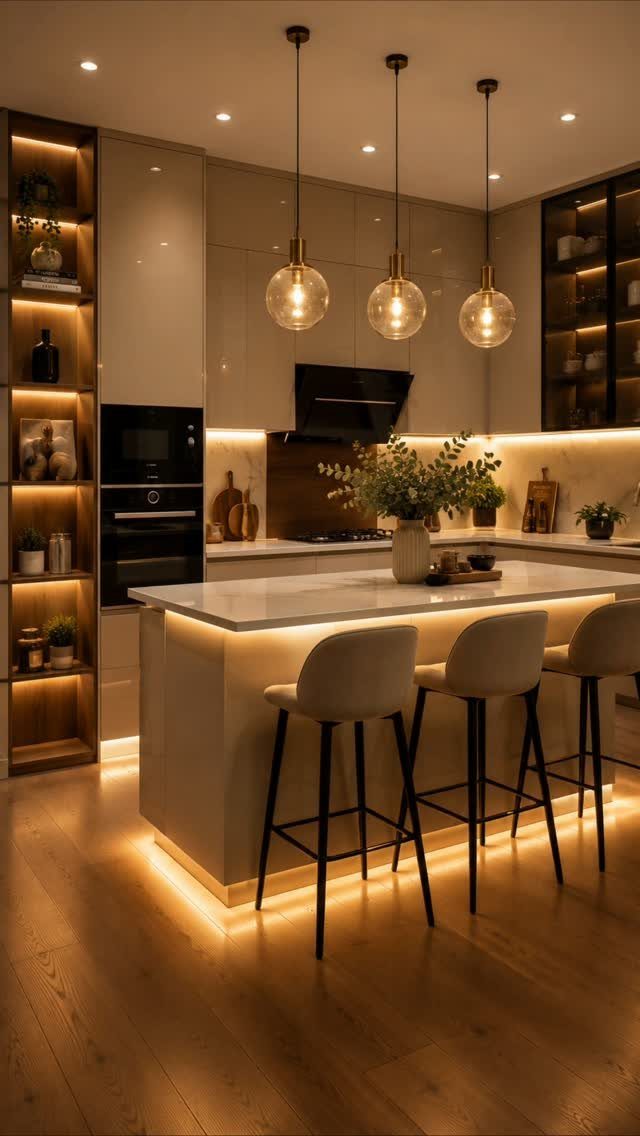
Three kinds of light do three different jobs here: pendants over the island for general glow, strips under the wall cabinets for the counter, and lit shelves for a soft accent.
A single ceiling fixture leaves shadows right where you chop.
I’d start with the under-cabinet strip, since it fixes the darkest spot for the least effort. Then add pendants over an island or bar if you have one.
Globe shades spread light evenly and keep a small room from feeling busy.
8. Install a Pot Rack
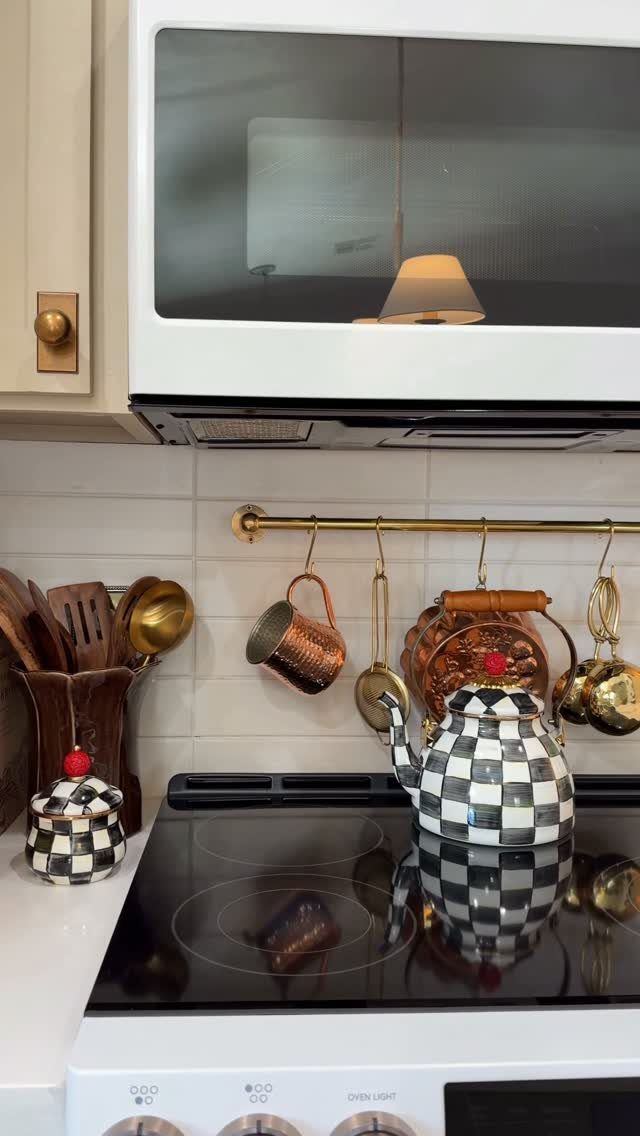
A hanging rail with hooks moves pots, mugs and utensils off the counter and onto the wall, which matters most in a kitchen with barely any surface to spare.
Gold with copper cookware reads warm, and I like that the metals stay in one family. Hang only what you use weekly, or the rail starts to look cluttered.
Keep the heaviest pans closest to the wall anchors, and leave clear space above the stovetop so nothing swings near a burner.
9. Paint the Cabinets Two Different Colors
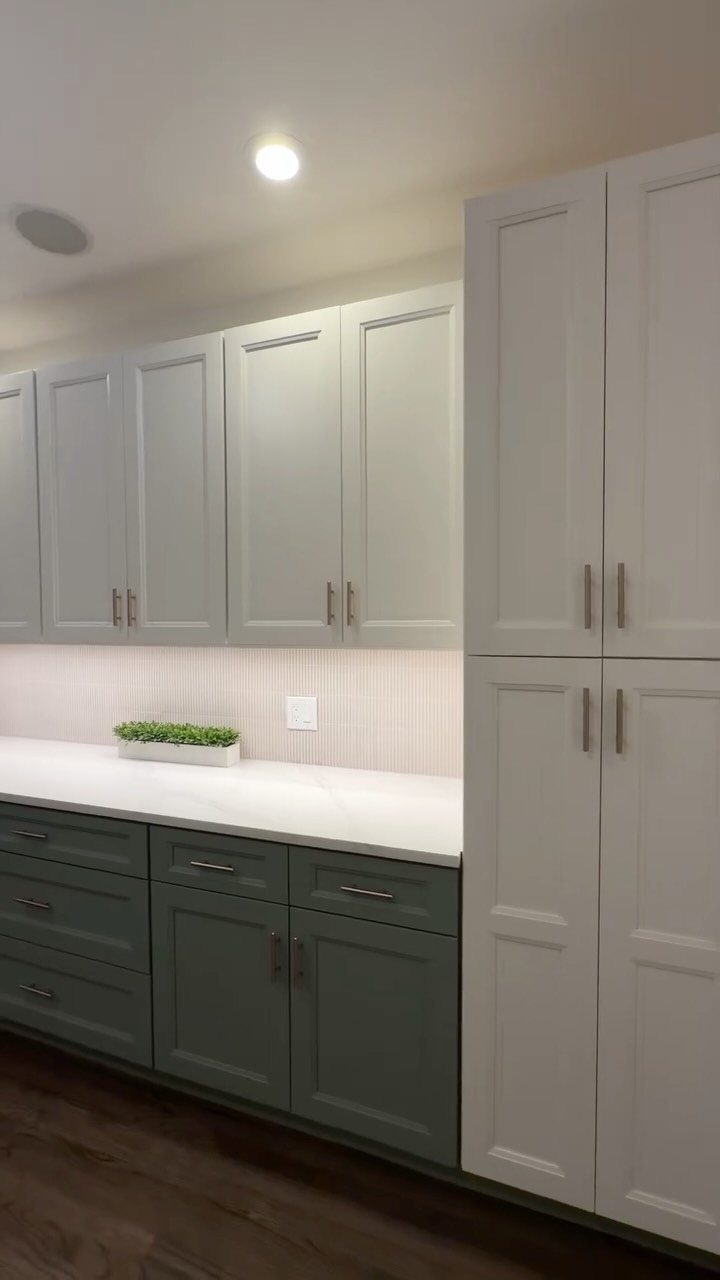
White uppers over sage green lowers give a one-wall kitchen two layers of color without making the room feel smaller. The light color stays at eye level, and the green grounds the base.
Clean and degrease the doors, sand lightly, prime, then use cabinet-grade paint.
10. Install a Slim Island
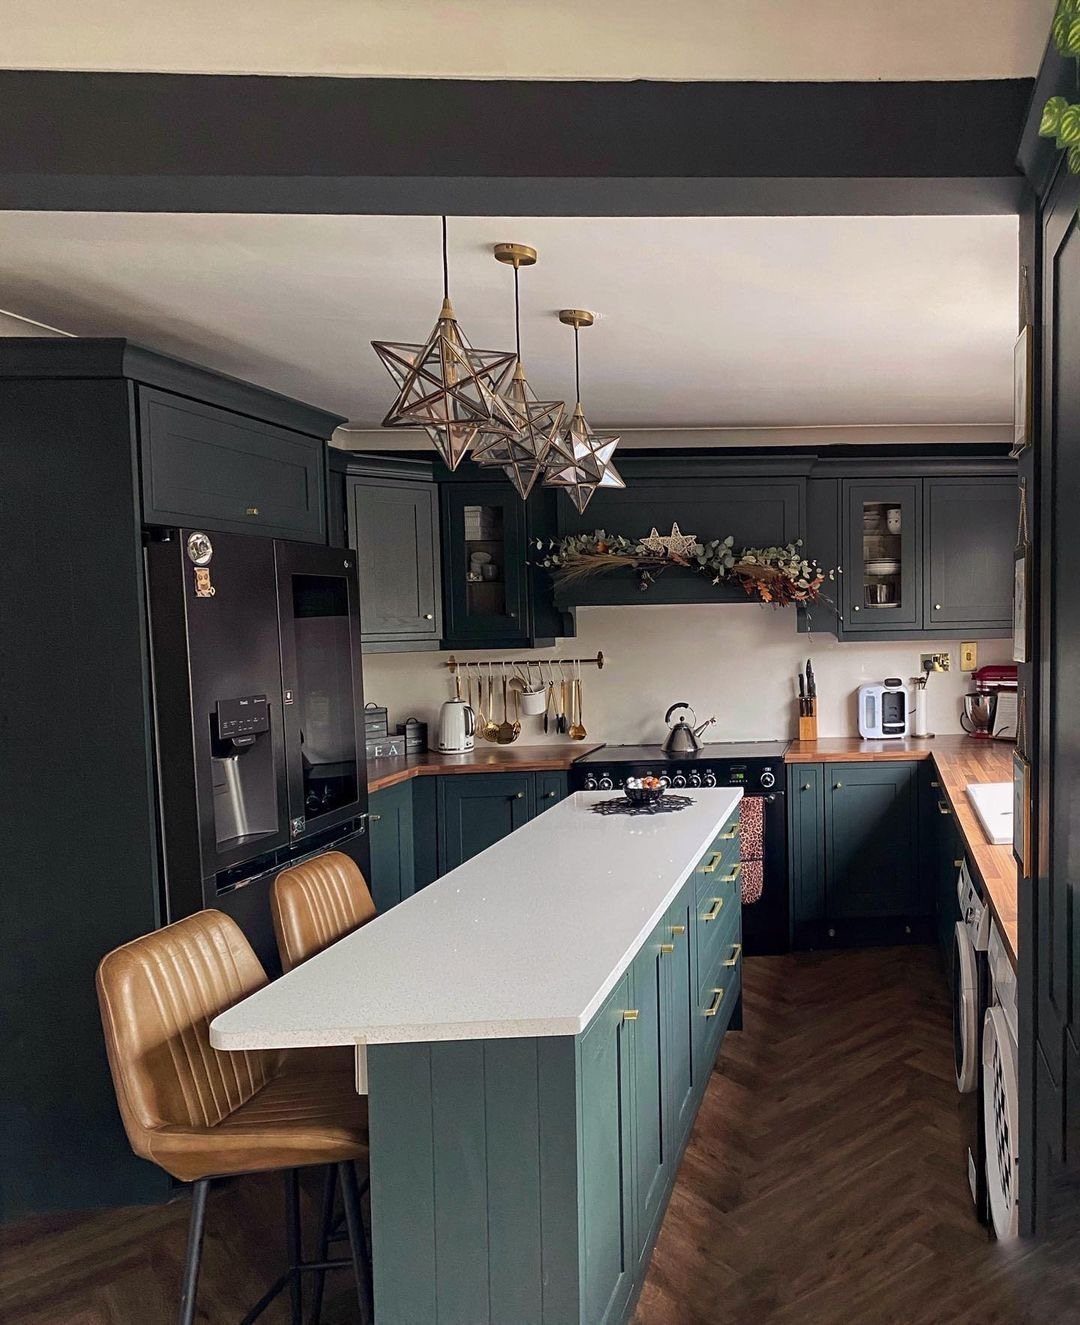
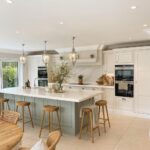
A narrow island adds prep surface and a place to sit without eating up the floor.
Before buying, tape the island’s footprint on the floor and walk around it with a drawer and the oven open. If you can’t pass comfortably, shrink it or choose a rolling cart instead.
Stools that tuck fully under the counter keep the walkway clear.
11. Consistent Materials
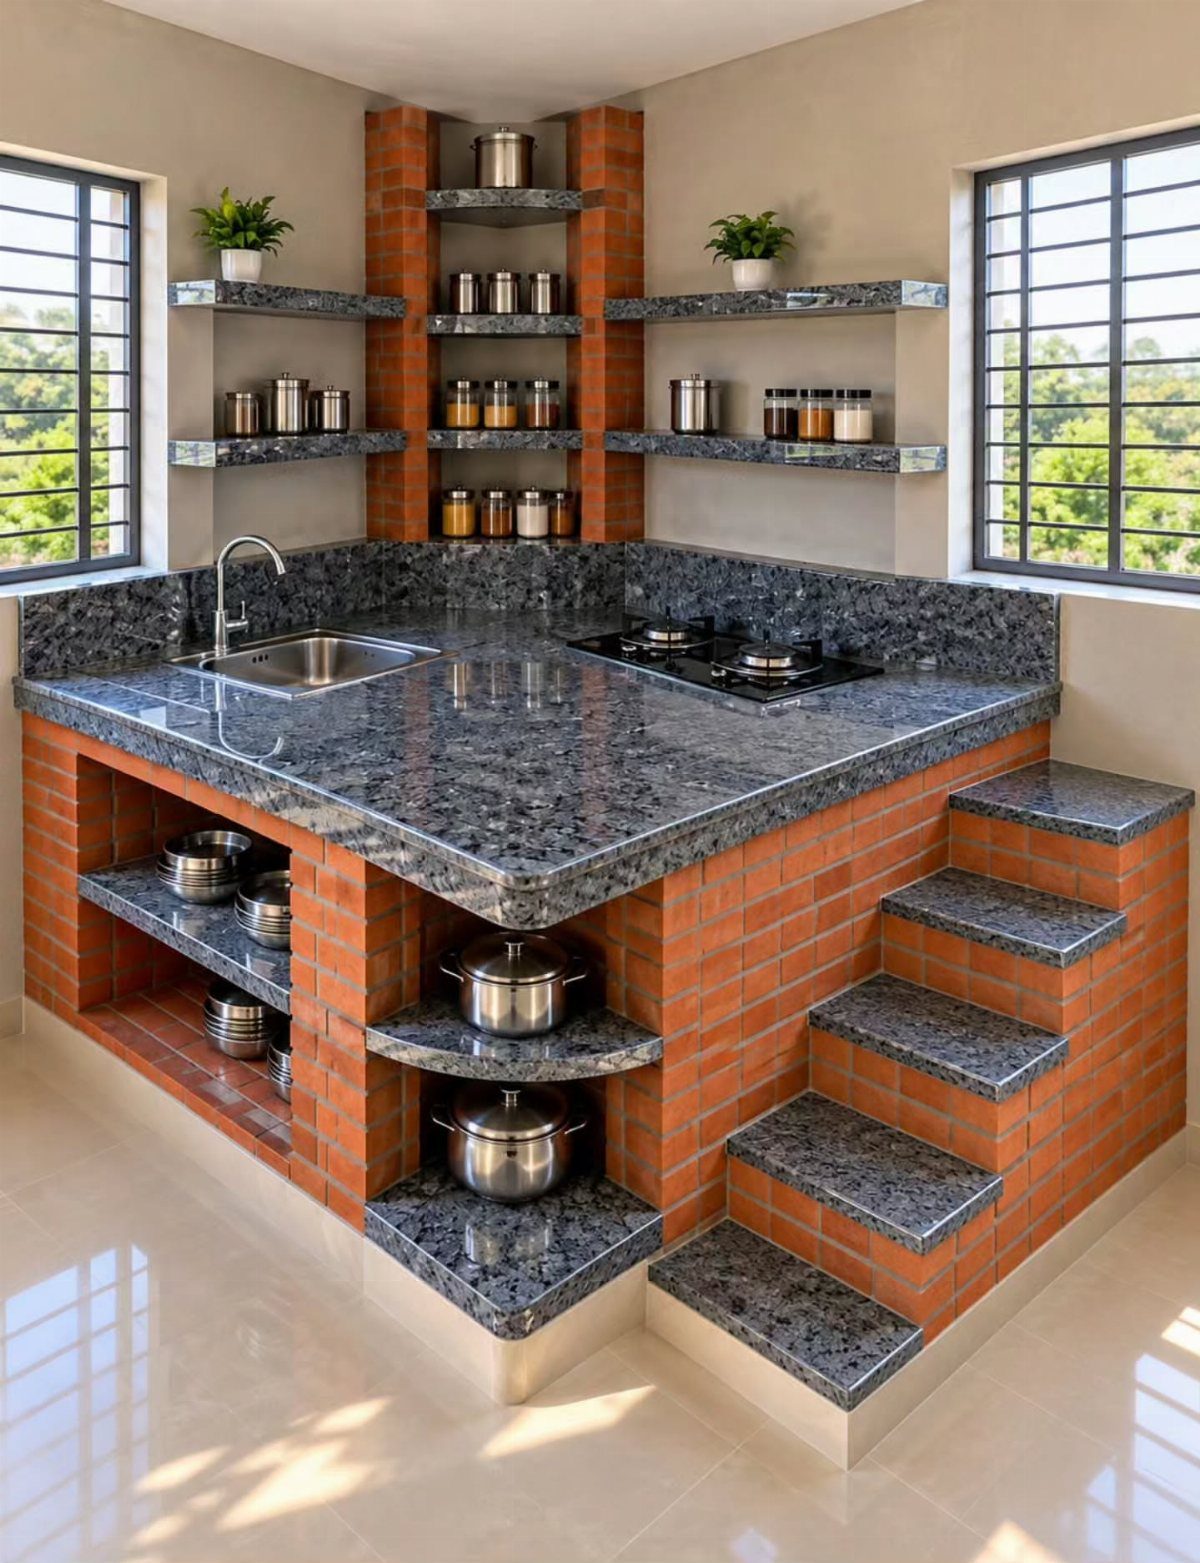
Repeating one material in several spots, like the same wood on a shelf, a cutting board and a stool seat, makes the whole space look planned rather than pieced together.
Here the brick shows up in the walls, shelving and supports, and the speckled granite stays the same across every counter run.
I’d pick one hero material and let one more play a supporting role. Three or more competing textures crowd a tight room fast.
If brick isn’t an option, brick-look panels or paint can echo it.
12. Use Natural Materials
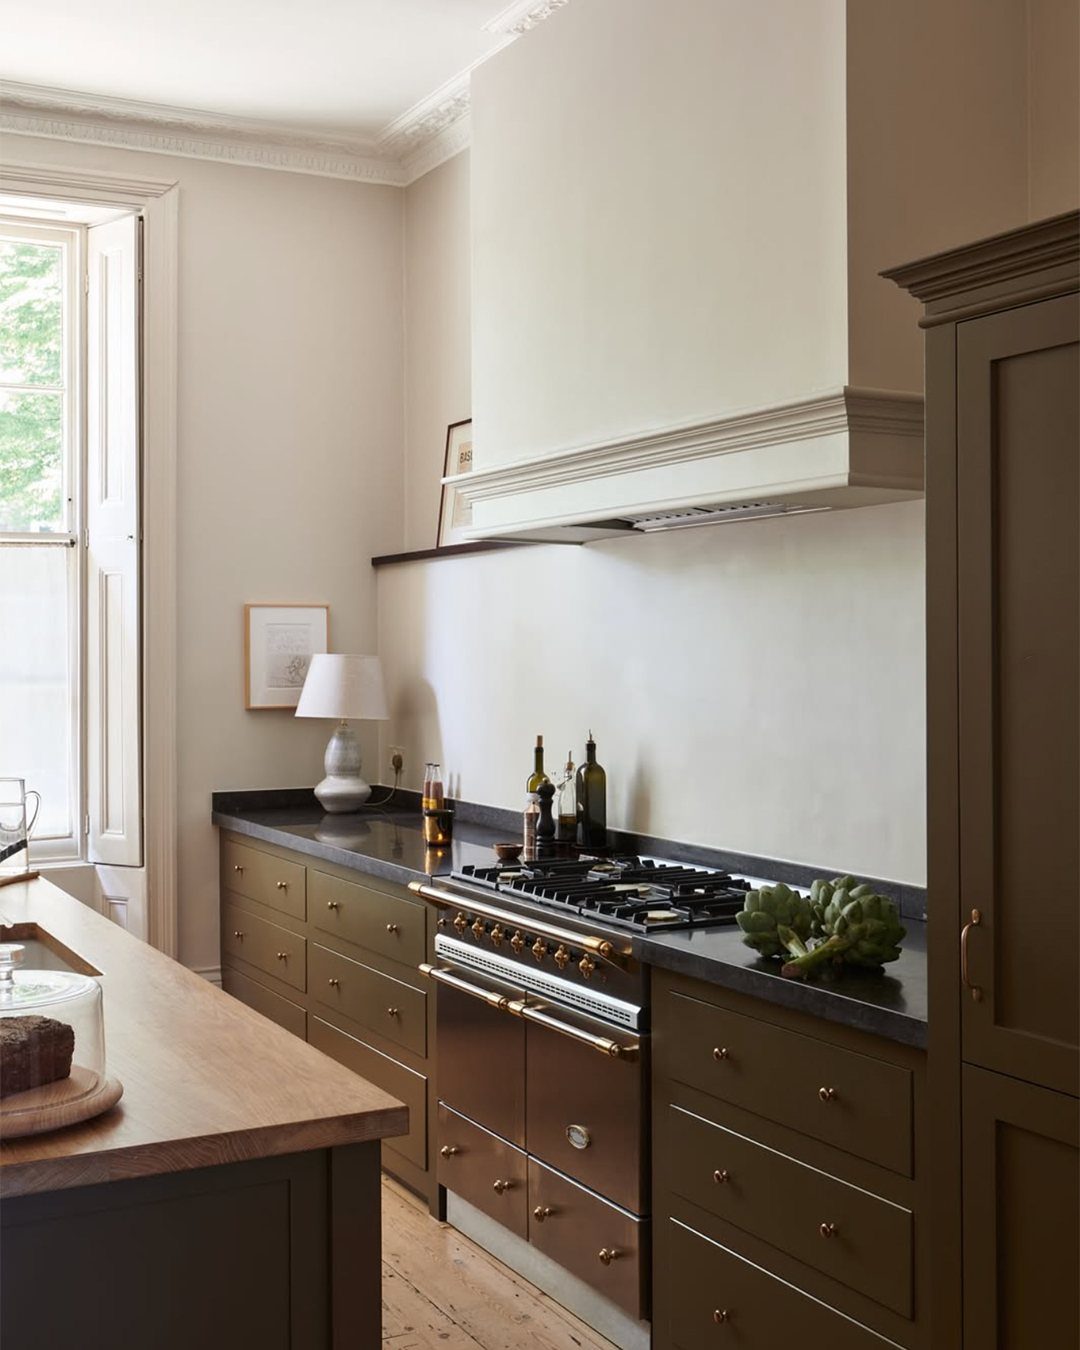
Wood and stone bring warmth to a kitchen that leans dark. A wooden island top against olive cabinets softens the color and stops the space from feeling cold.
I’d choose wood for the surface you touch most and keep the perimeter counters a darker, harder stone. Wood needs occasional oiling and care around water, so it suits the island better than the sink run.
If a full wood top is too much, a wood cutting board or open shelf adds the same warmth.
13. Bench Seating Nook
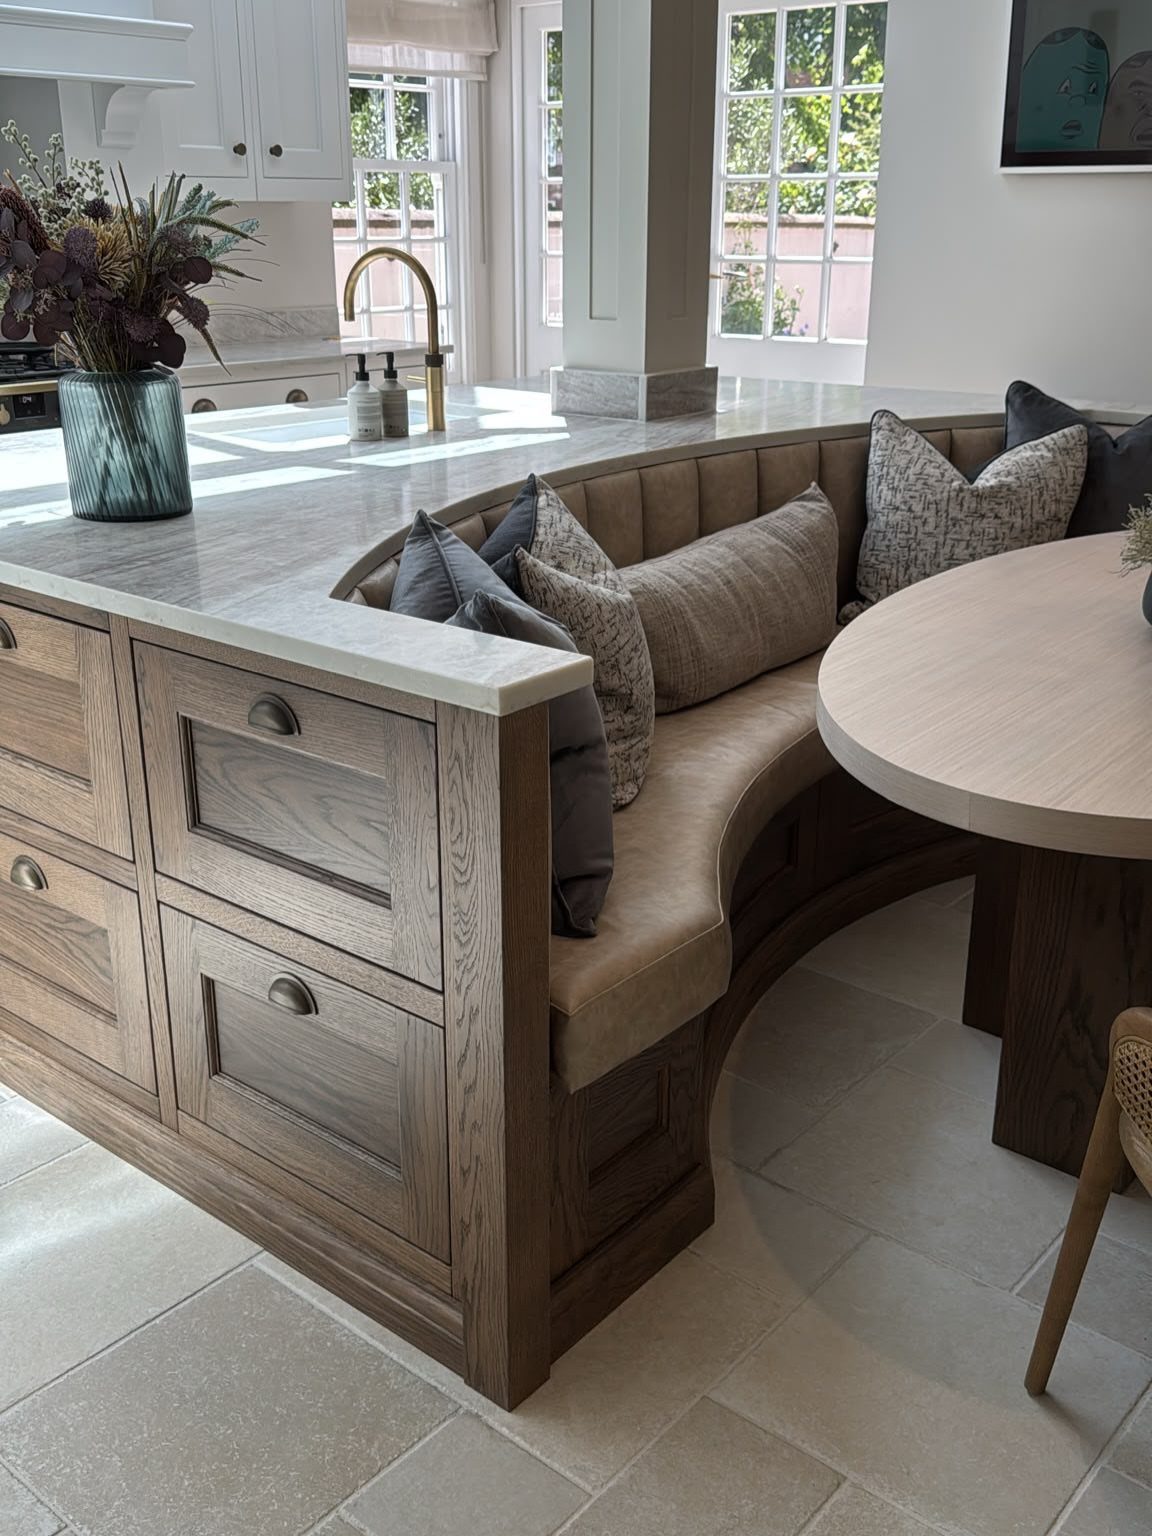
A curved built-in bench tucked against a round table gives you a dining spot without the bulk of a full set of chairs.
Seating along the wall uses corner space that usually sits empty, and a round table has no corners to bump.
I’d choose cushions in a tan or neutral shade so the wood stays the star. Washable covers matter here, since this is where crumbs land.
If a built-in is out of reach, a straight bench pushed against a wall gets you most of the way.
14. Add Personal Touches
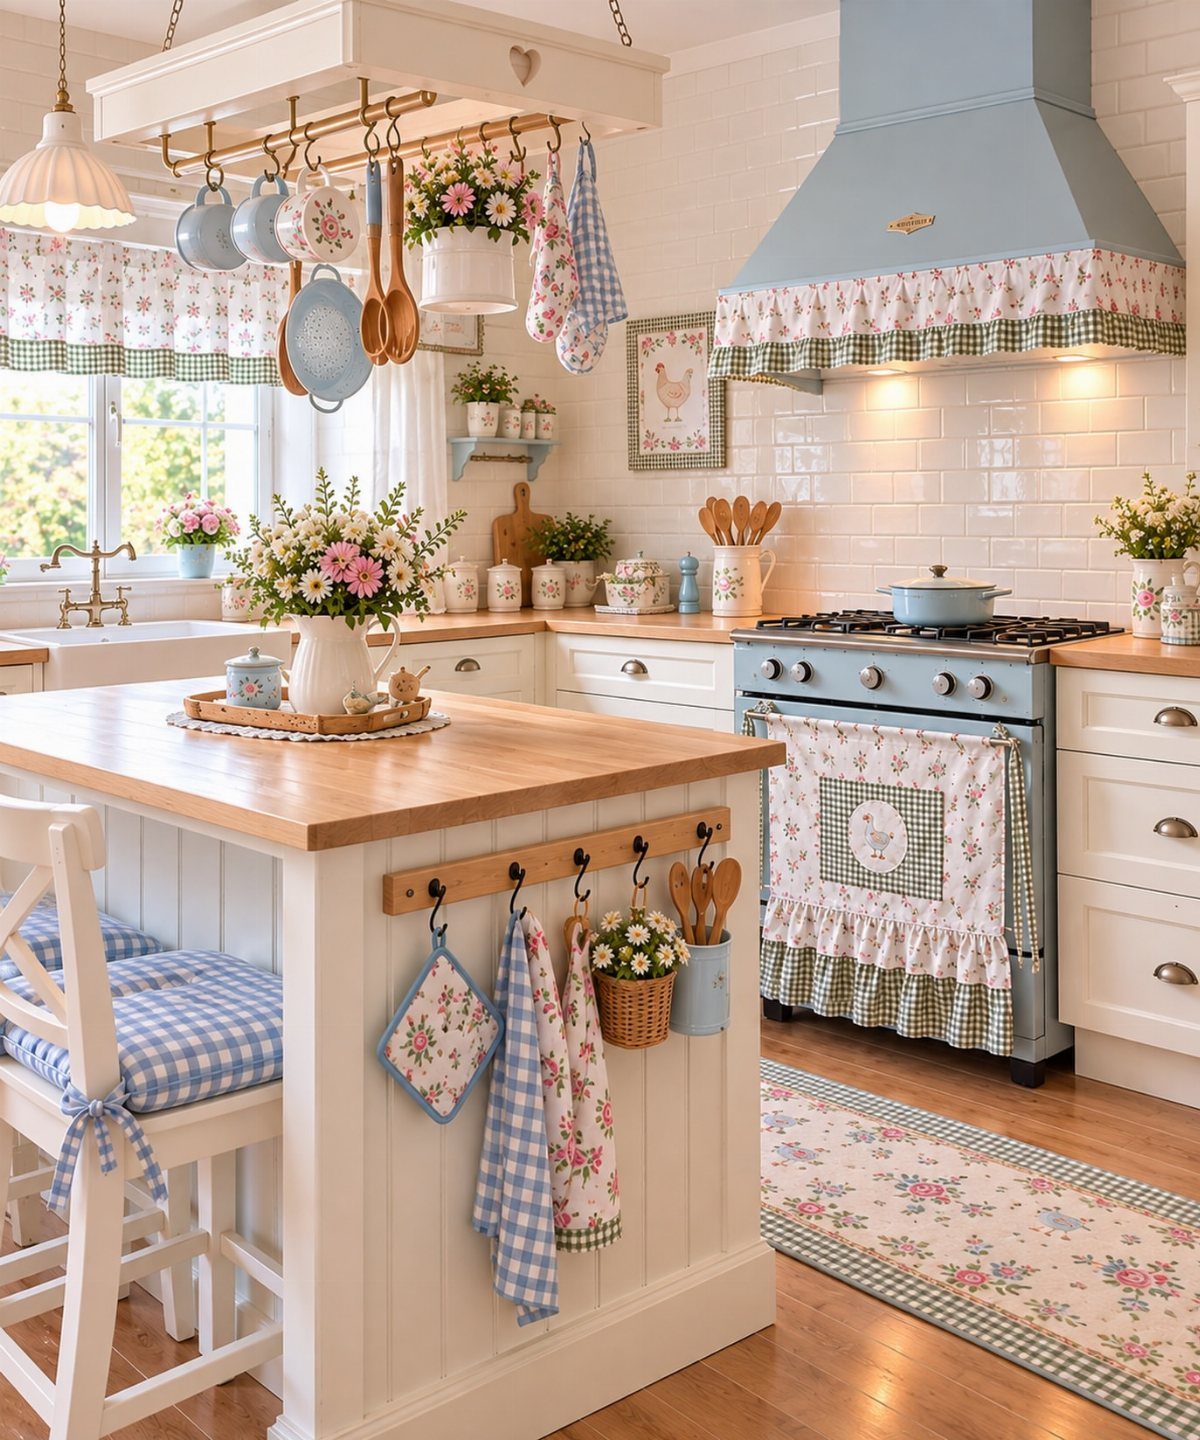
Floral fabrics, checkered towels, hanging pots and a few plants make a kitchen read as yours, even when the cabinets and layout came with the place. Fabric and small decor are also the cheapest layer to change, which suits renters.
Pick 2 patterns and repeat them, as florals and checks do here, so the room feels collected instead of cluttered. Let the cabinets stay plain white.
A pale blue appliance is a big commitment, so I’d get the same color through a kettle or canisters first.
15. Dark Colors
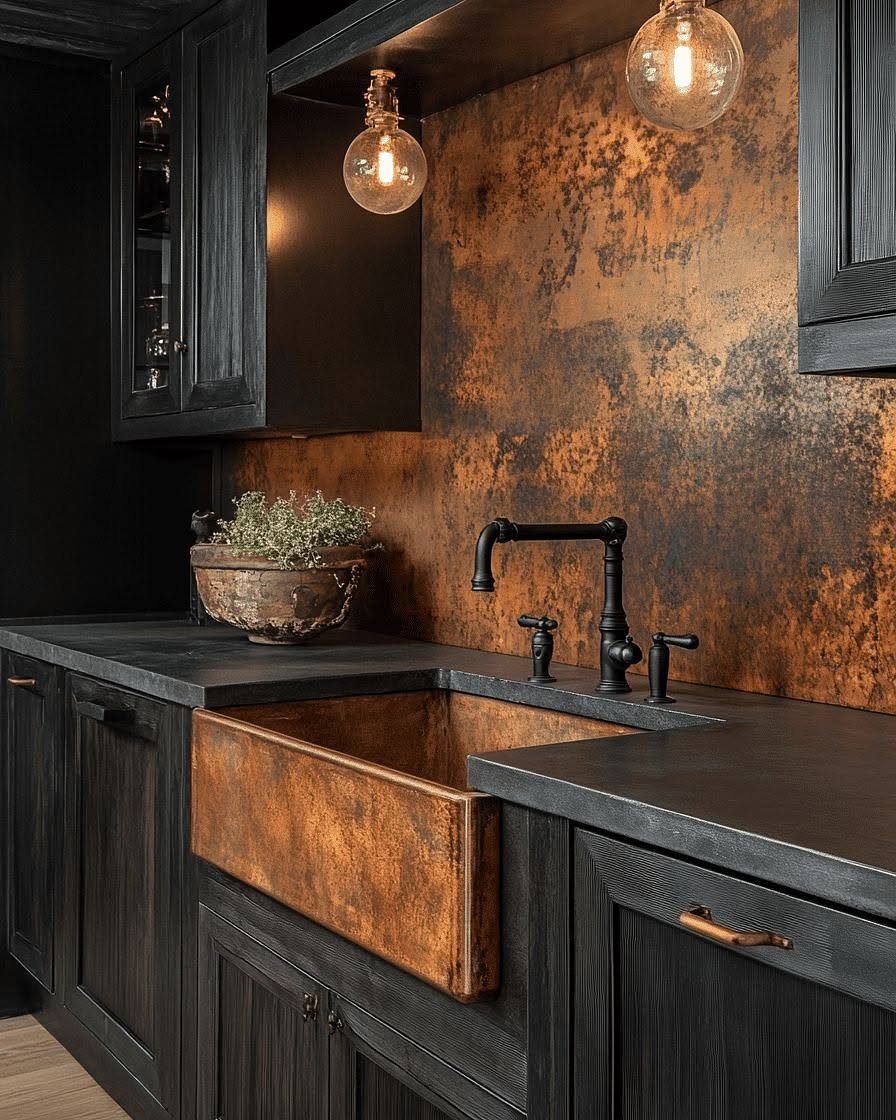
Black cabinets and a dark countertop can look rich in a compact room, as long as something catches the light.
I’d use dark colors on one run of cabinets and bring in warm metal to keep the space from closing in. Bare bulbs on hanging cords add small points of light without taking up room.
Black shows dust and water spots, so keep a cloth handy.
16. Coffee Station
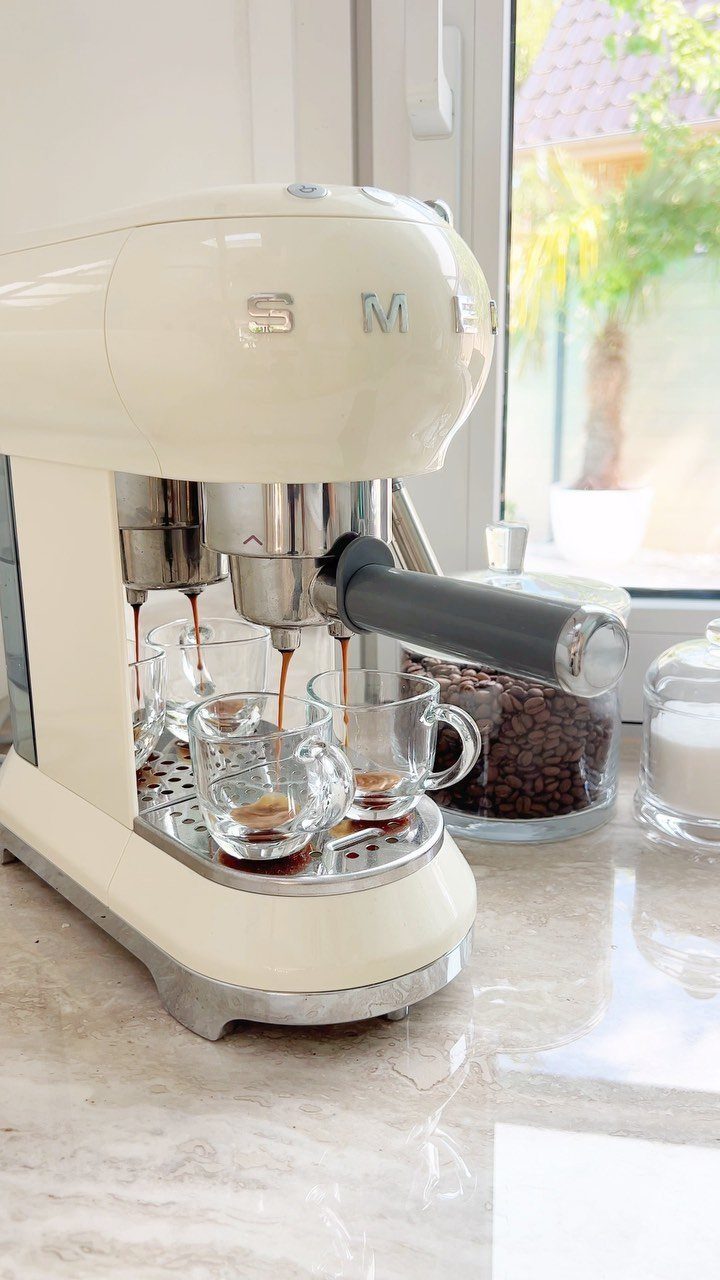
A coffee station is one clear stretch of counter where the machine, beans and cups live together, so the morning routine stops spreading across the kitchen.
A marble counter makes a handsome spot for it, and a cream espresso machine becomes part of the decor.
Anything more and the corner turns into clutter.
Place it near an outlet and away from the stove, so one person can make coffee while another cooks.
17. Hidden Appliance Garage
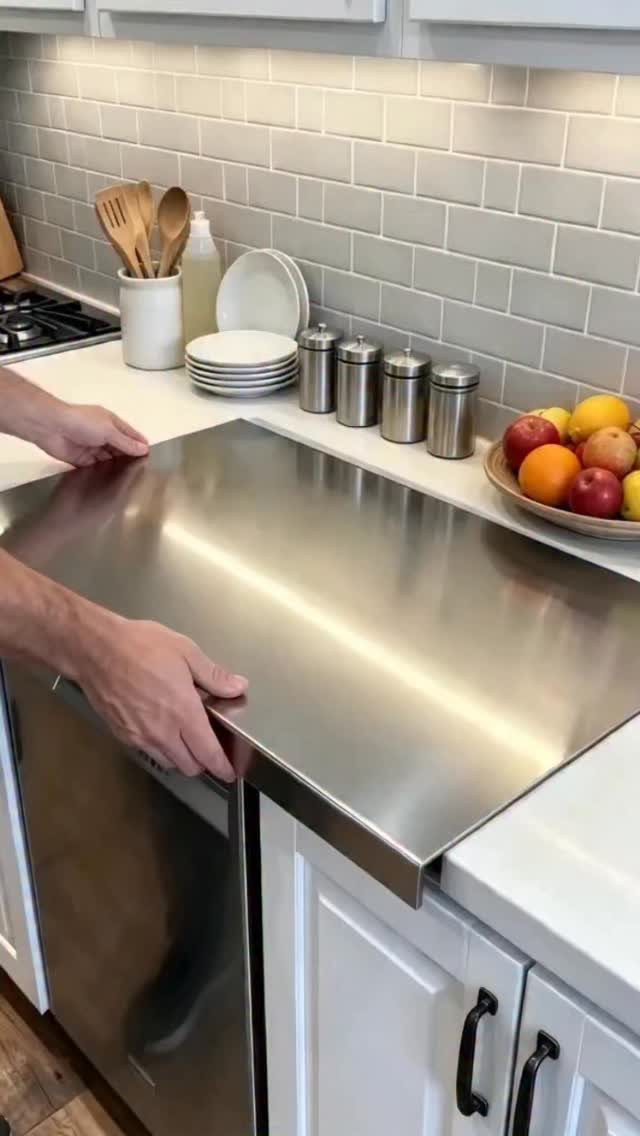
A sliding stainless steel cover turns a counter spot into a hidden home for an appliance, so the surface looks clear when you’re not cooking.
In a small white kitchen, that means fewer things sitting out and a calmer line along the backsplash.
I like it because it costs you nothing in counter space: slide it open when needed, close it when done. Measure your tallest appliance before choosing a cover.
Leave room to pull the appliance out easily, or you’ll stop using the setup.
18. Door-Mounted Spice Rack
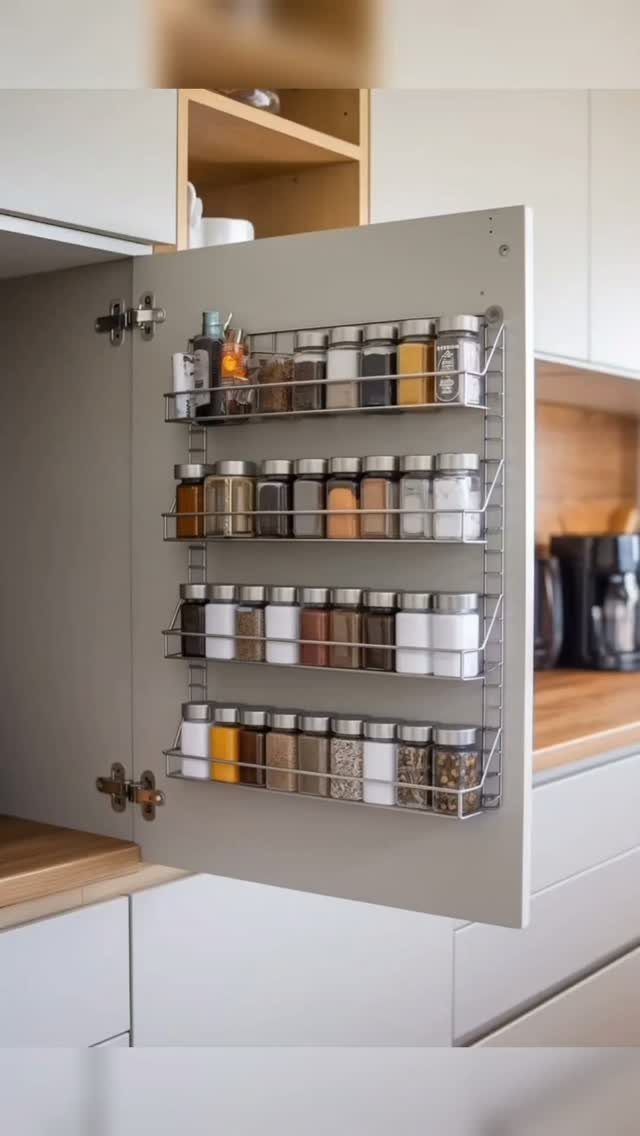
A multi-tier metal rack on the inside of a cabinet door puts spice jars at eye level and frees up shelf space. It uses the one surface in a tight kitchen that otherwise does nothing.
Before buying, check how much clearance the cabinet has behind the door. Jars that hit the shelves will keep the door from closing.
I’d choose a rack with a lip on each tier so jars don’t slide when the door swings. Keep the spices you use weekly up front and store the rest elsewhere.
19. Efficient Galley Kitchen Layout
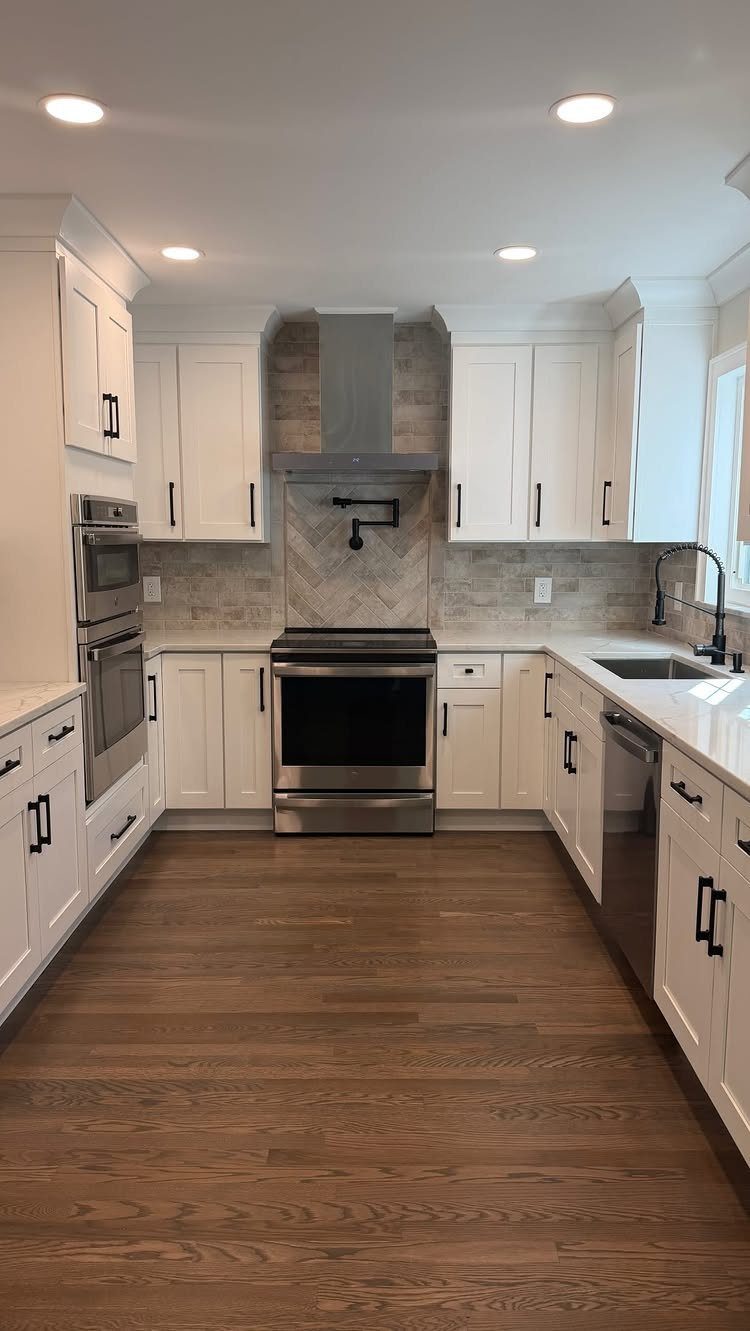
Two parallel runs of white cabinets leave a galley kitchen with one clear walkway and everything within a step or two.
Stainless appliances and a plain white surface keep the room from looking busy, and the herringbone backsplash adds pattern without taking floor space.
I’d keep the counters between the stove and sink clear, since that is where prep happens. Keep the walkway free of rugs and carts so anyone can pass without turning sideways.
20. Curved Breakfast Bar Island
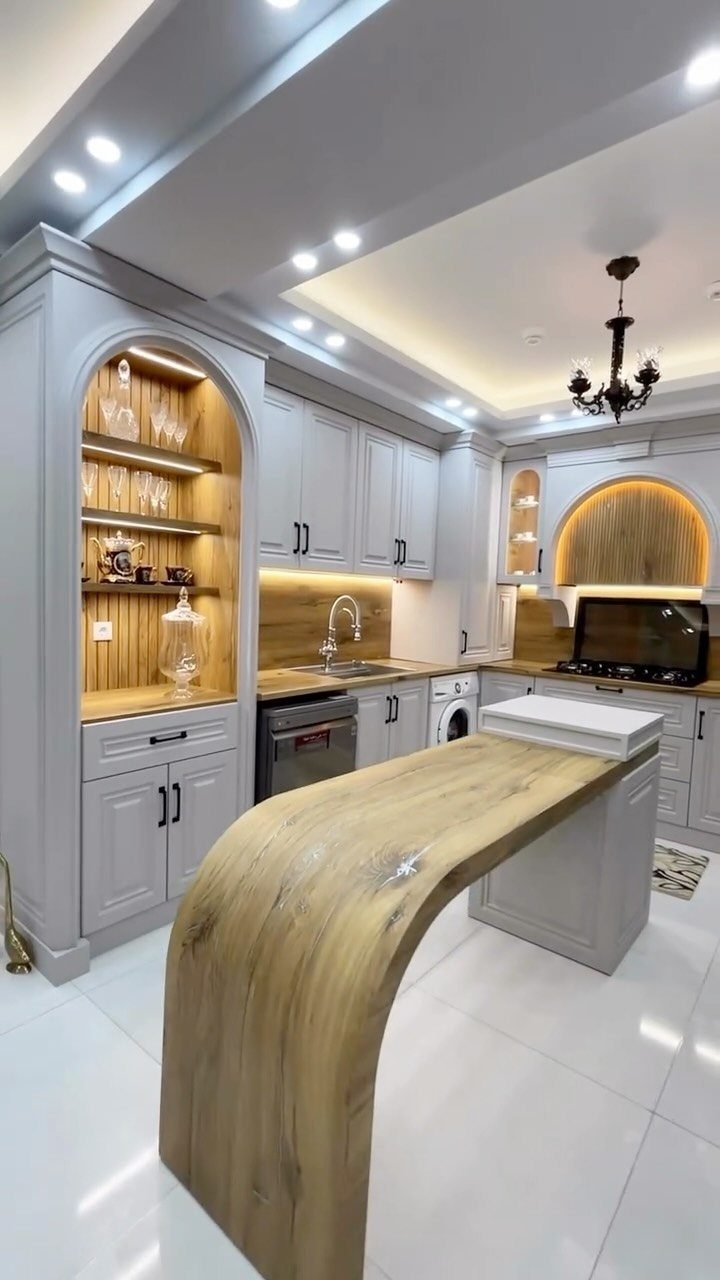
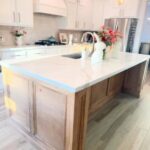
A curved island edge removes the sharp corner that sits right at hip height in a tight kitchen. Light wood against light grey cabinets stays soft, and the rounded end lets you walk past without a bump.
I’d use the curve on the seating end only and keep the work side straight, so prep space stays practical.
21. Wooden Slatted Ceiling Accent
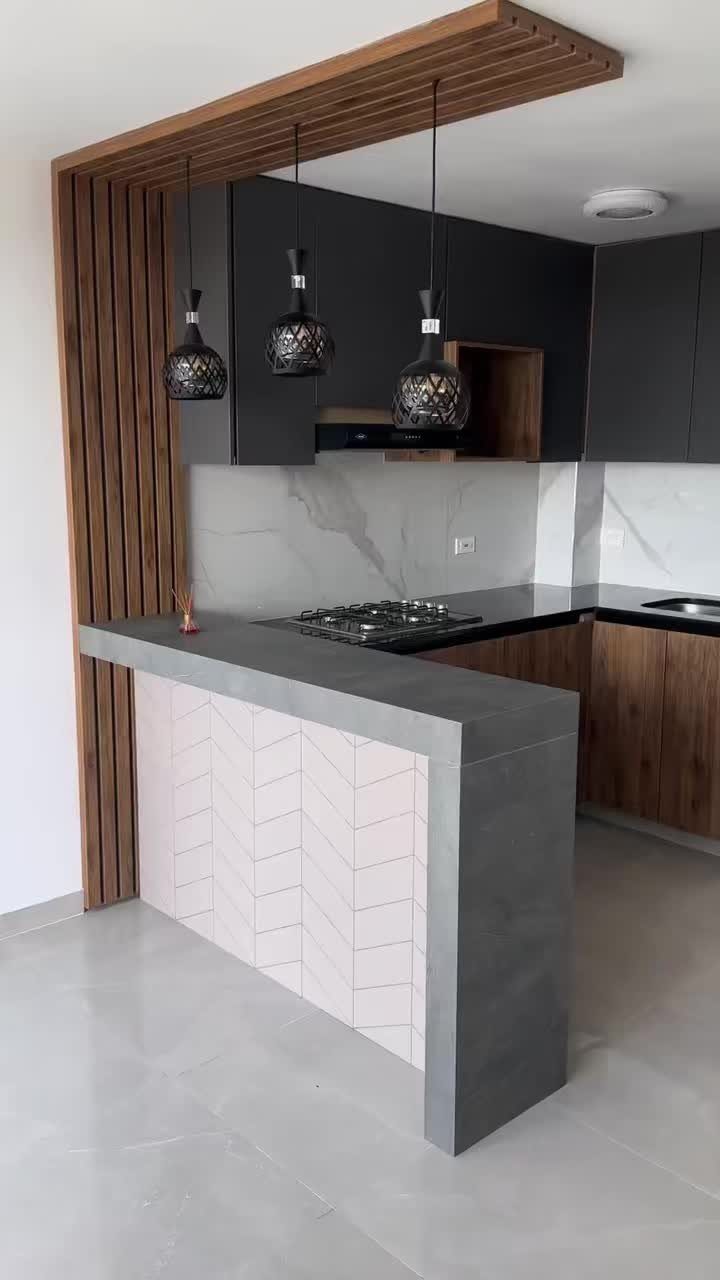
Wood slats across the ceiling pull the eye up, which helps when the floor area is small. Running them over the island marks that spot as the center of the room, and black pendants hang cleanly against the warm wood.
I’d keep the cabinets and island quiet, as grey does here, so the ceiling is the only texture competing for attention. A lightweight slat panel or a few painted boards work for a renter-minded budget.
22. Custom Drawer Organizers
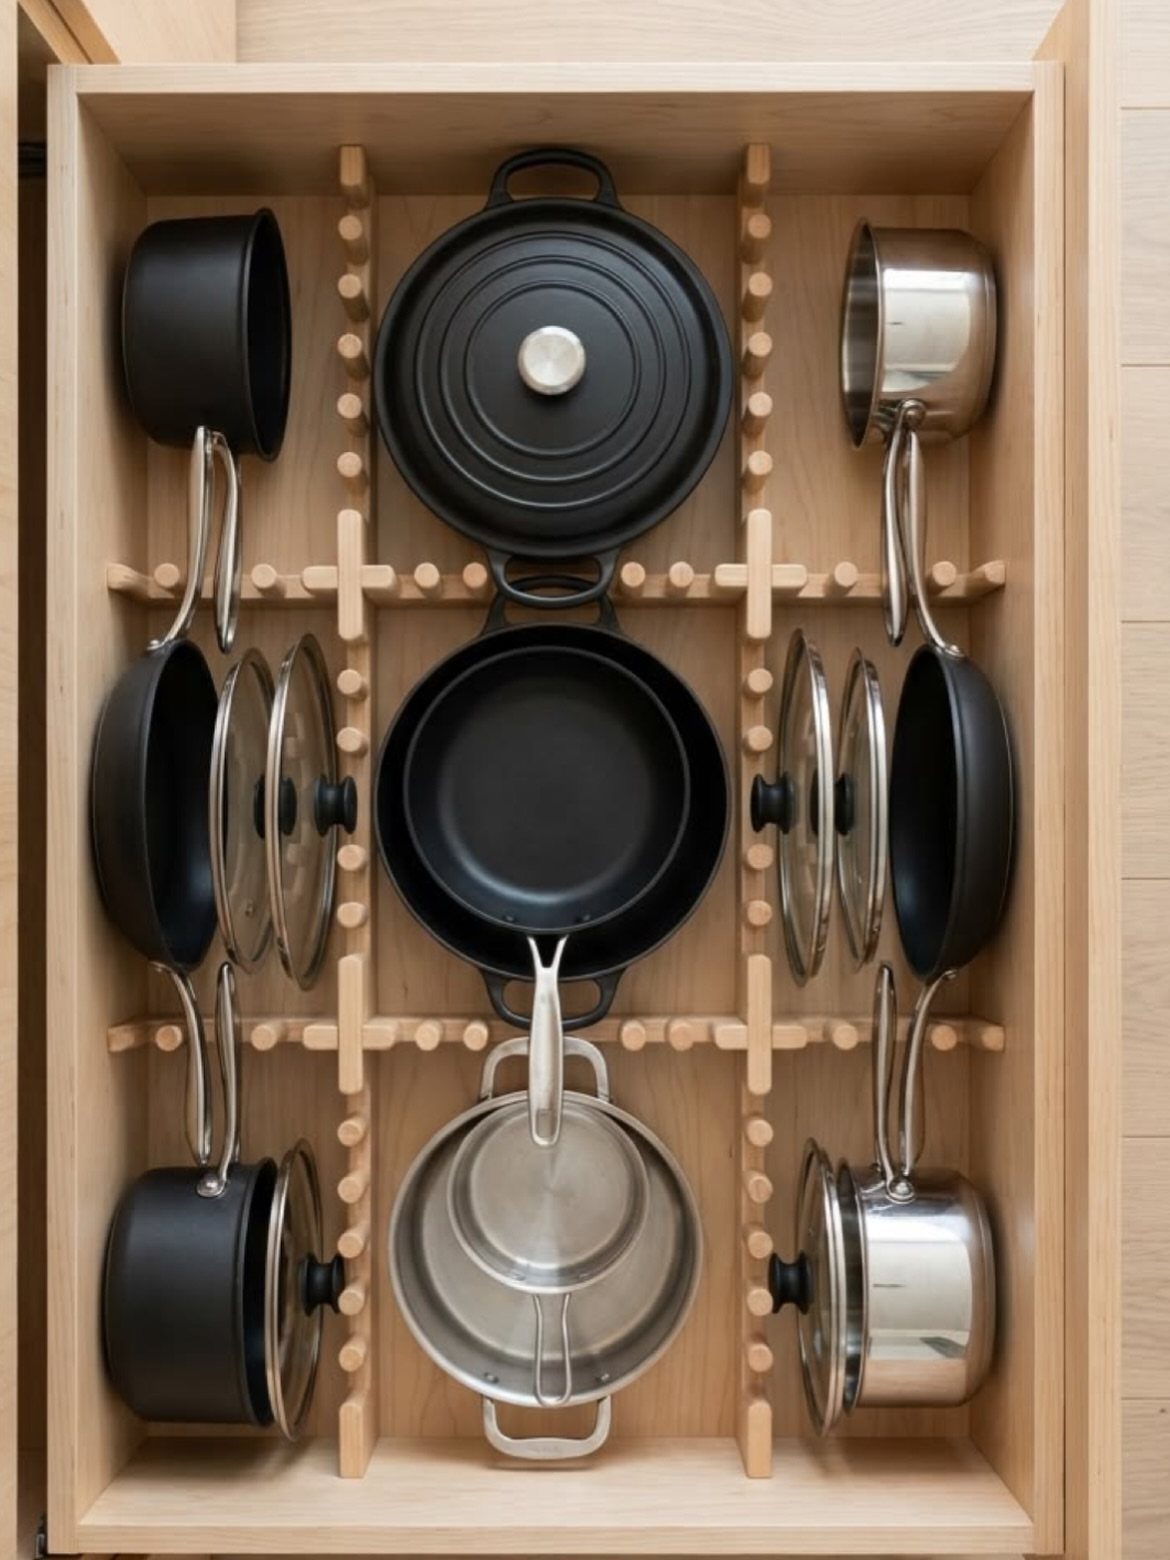
Dividers cut to fit a deep drawer keep pots, pans and lids standing in their own slots instead of stacking into a noisy pile. Wood dividers also look finished when the drawer is open.
Measure the drawer’s width, depth and height first, then lay out your largest pan before the smaller pieces. I’d give each lid its own slot beside its pot, so you never dig for a match.
Adjustable dividers cost less than custom cuts and suit a renter.
23. Vertical Wall Baskets
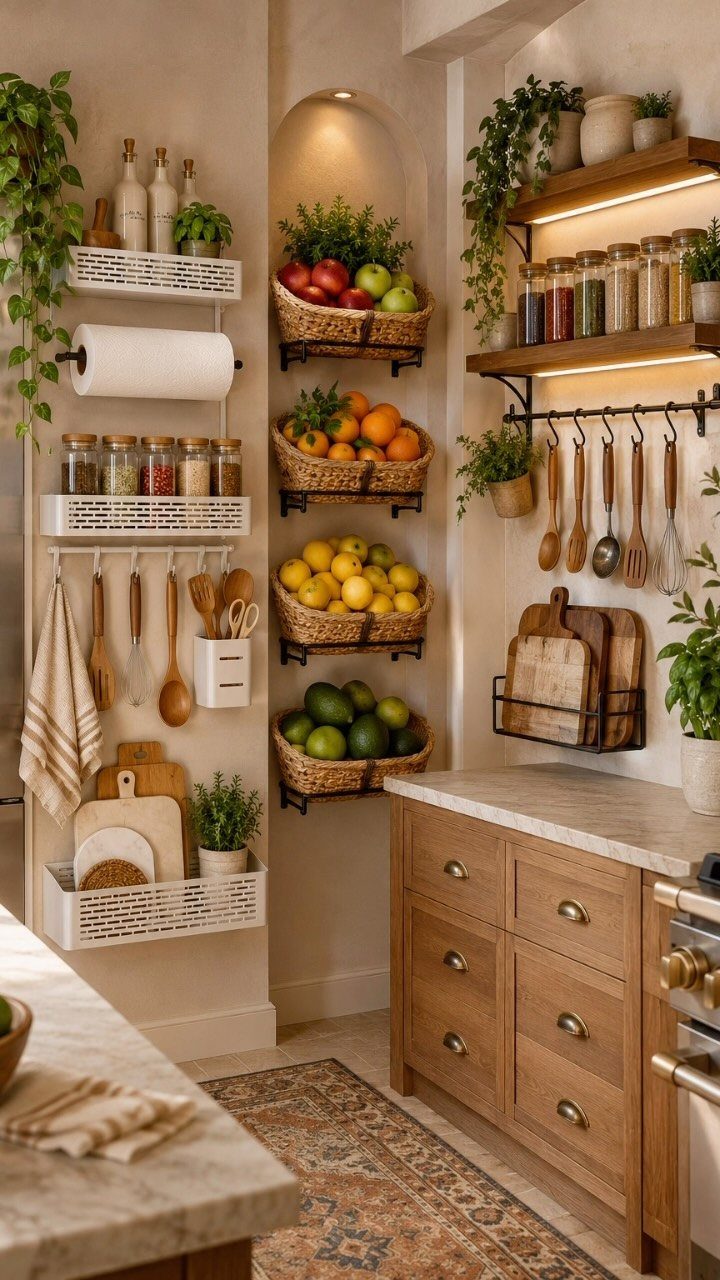
Walls hold more than most small kitchens use. A recessed niche fitted with woven baskets keeps fruit within reach, and hanging utensils free up drawer space.
I’d keep produce in baskets that let air through, and hang only the tools you grab daily.
Wire baskets on the wall suit renters, since they need only a few screws. Pick a spot beside the counter you actually use, so nothing needs a trip across the room.
24. Herringbone Wood Flooring
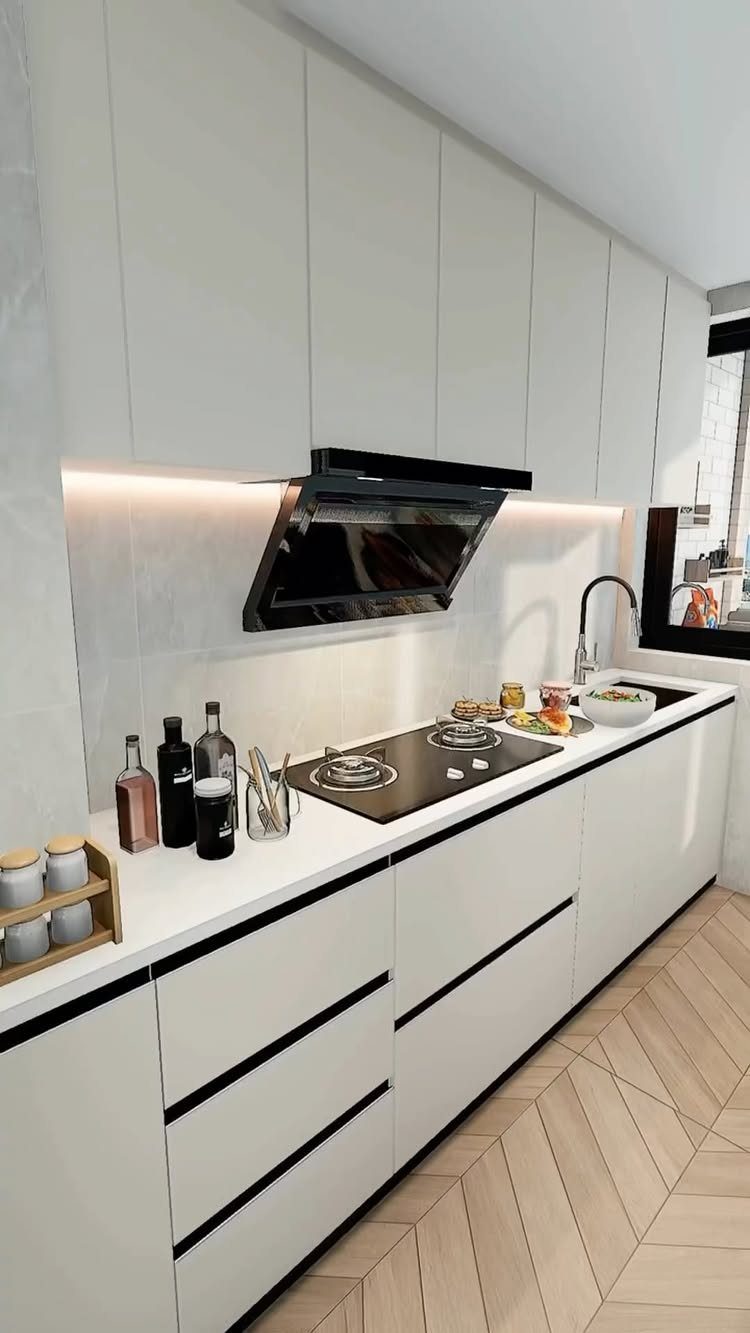
Herringbone flooring gives a small kitchen texture from the ground up, and light wood keeps the pattern from shrinking the room. The zigzag draws the eye along the planks, which adds depth where there is little floor to show.
Pair it with plain white cabinets, as here, so the floor is the one pattern in the room. Dark pieces like a black stovetop sharpen the contrast.
Peel-and-stick planks in a herringbone layout are one renter-friendly route.
25. Warm Butcher Block Countertops
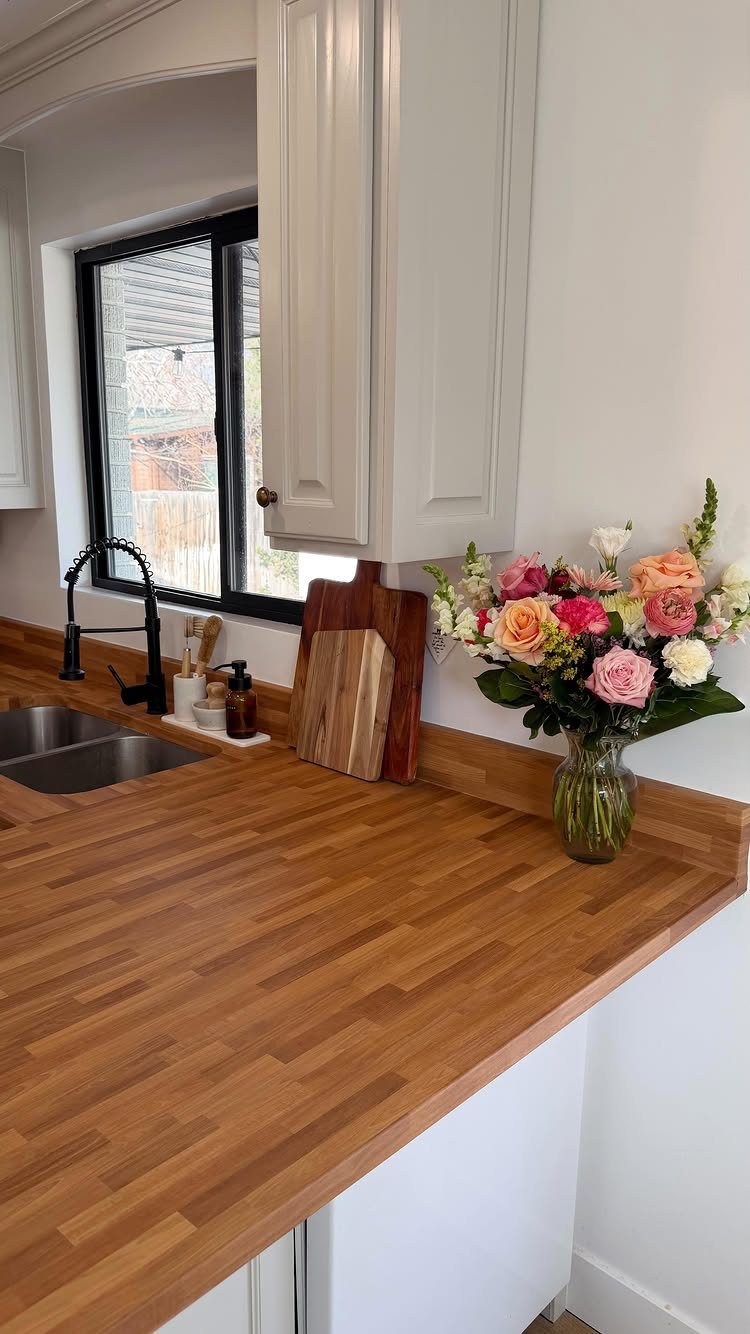
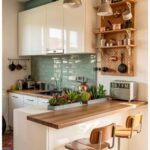
Butcher block gives a small kitchen a warm counter at a lower cost than most stone.
With white cabinets on one side and a black faucet on the other, the butcher block is the only warm surface, and the eye lands on it first.
Keeping everything else this quiet lets the grain do the talking. Wood near a sink needs a sealed finish and a quick wipe after splashes, so dry the area around the faucet.
Fresh flowers on it, as in this kitchen, add color without crowding the counter.
26. Integrated Panel-Ready Refrigerator
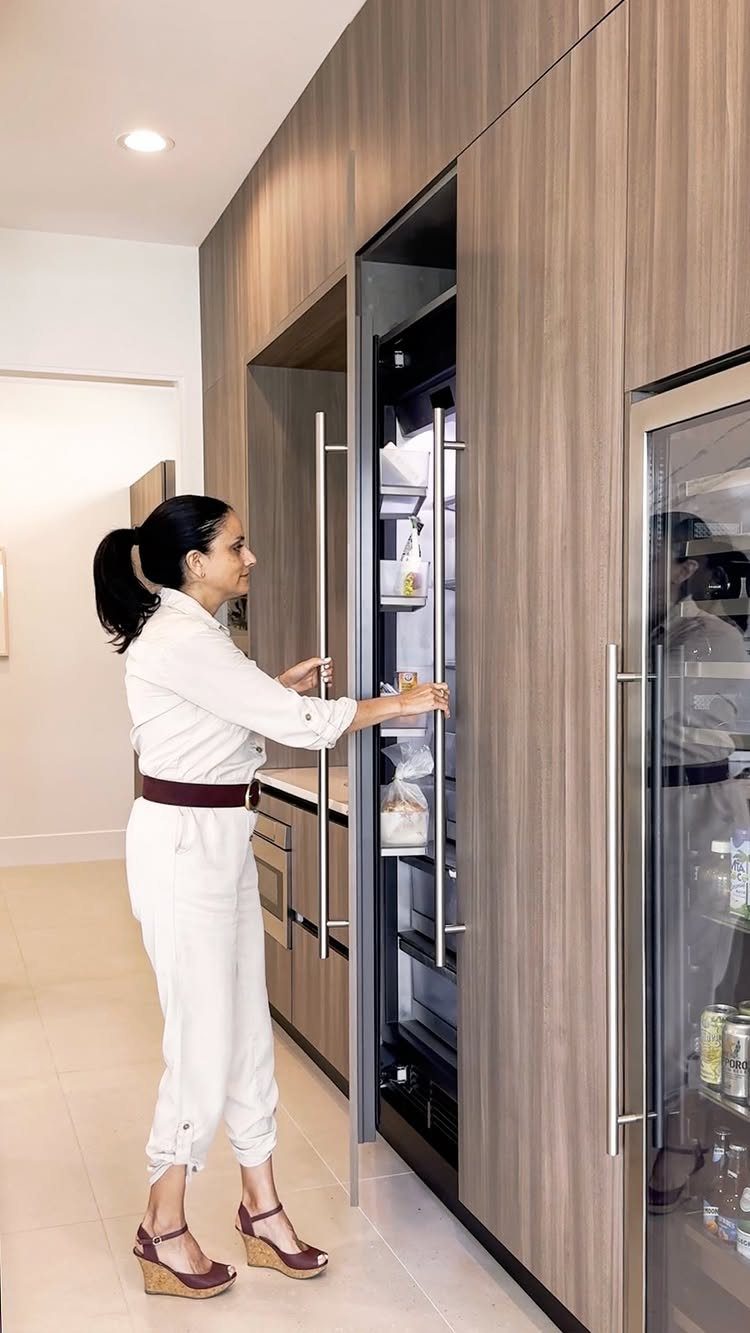
A panel-ready refrigerator takes a cabinet-matched front, so the tallest appliance in the room reads as one more cabinet door.
In a small kitchen that removes the big steel block that breaks up the wall, and light wood keeps the run calm.
I’d match the panel to the cabinets exactly, grain and finish, or the trick shows. This is a custom-fit appliance, so it costs more than a standard fridge and suits owners over renters.
Renters can get part of the look by choosing a fridge in a color close to the cabinets.
Budgeting for a Remodel
Split the budget with the 50/30/20 rule: 50% for needs, 30% for wants, 20% for savings.
Needs are the essentials, meaning cabinets, countertops and appliances. Wants are the extras you can add last, such as backsplash tile and nicer light fixtures.
The 20% is a cushion for surprises, and in a remodel something always turns up behind a wall or under a floor. Leave it alone until you truly need it.
Before you spend anything, plan on paper.
Plan storage one zone at a time, and fill each area completely before you start on the next. Sketch a lighting plan that works with the electrical setup you already have, since moving wiring eats money fast.
Then check each appliance’s specs against where it will sit: how much power that spot has, and how often you’ll use it.
Choosing the Right Layout
Layout decides how a small kitchen works, so settle it before choosing finishes. Galley, L-shaped and U-shaped are the three to weigh first.
In a tight room, a galley layout wins: two parallel runs, no wasted corners, and everything within a step or two. An L-shape gives you more counter space and stays flexible if the kitchen opens to the next room.
A U-shape wraps three sides around the cook, which works well when one person does most of the cooking.
In a narrow room, I would put everything on one wall, with the sink, range and fridge in a single line.
An island gives the room a center and still leaves it open, but only when the floor has room to walk around it.
I’d pick by how many people cook at once: one cook, U-shape; two cooks, galley or L.
Fortunately, if you do have a small kitchen, there are plenty of ways to maximize the space you have for efficiency and style.
Appliance Selection
Appliance size is where small kitchens gain or lose the most floor and counter space. A 24-inch dishwasher cleans as well as a full-size one, and a counter-depth fridge stays flush with the cabinets instead of sticking into the walkway.
A combination microwave-convection oven replaces two machines with one. An induction cooktop can sit over drawers, so the storage underneath stays usable, and induction is 90% energy efficient compared with gas or electric.
For very tight spaces, look at drawer-style dishwashers or refrigerators. A microwave drawer in an island frees counter space, and a wall oven at an accessible height can replace a range.
Look for the blue Energy Star label on appliances, since those models use less electricity and water.
A compact range hood still clears the air without taking over the room, and a small cooktop, whether induction, radiant electric or gas, covers everyday cooking.
Frequently Asked Questions
What are the trends for small kitchens in 2026?
Smart layouts, light colors and multi-functional islands lead the trends for small kitchens. Pale cabinets and walls reflect daylight back into the room, which is why a tight kitchen looks wider in white, cream or soft greige.
A slim island, even 16–20 inches deep, gives you extra prep room and a spot for two stools without eating up the walkway.
What popular kitchen trend is dying right now?
Open shelving is the one losing ground, as more homeowners choose closed storage.
I still like it in a small kitchen when the shelves hold matching dishes in one or two colors. Keep everyday cups and plates on the lower shelf, and put anything you rarely use in a base cabinet.
What does a typical small kitchen remodel cost?
Cost swings widely with materials and scope, so getting estimates is the only reliable way to find your number.
Whatever total you land on, I’d split it 50/30/20: half for needs like cabinets, countertops and appliances, 30% for wants like backsplash tile and better lighting, and the last 20% as a cushion for surprises.