Fixes here run from free to a few dollars at the hardware store, from DIY storage solutions and shallow bins to wall-mounted shelves and a pot rack that needs studs.
Your space decides which of these fits: a renter can take a bookshelf pantry along at move-out, while drilled-in pieces like a magnetic knife strip or a pot rack stay behind.
1. Install Pullout Shelves
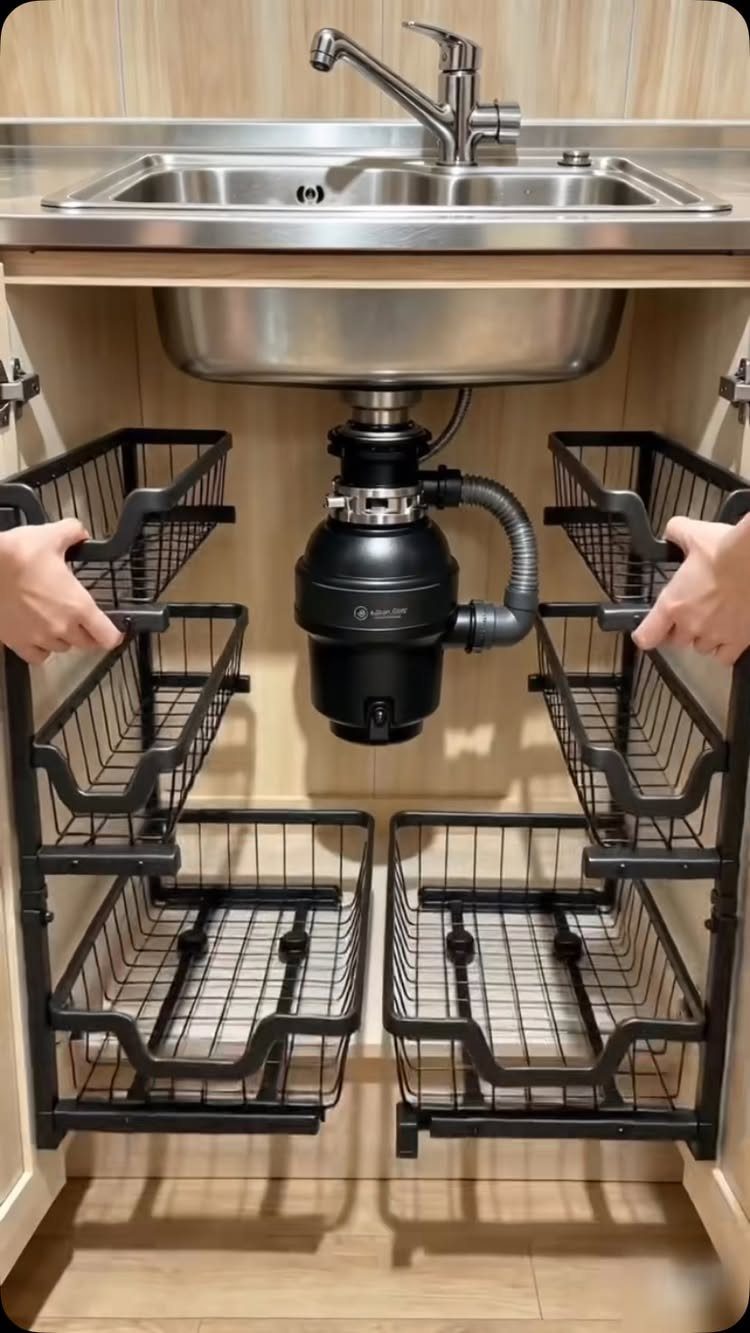
Under-sink cabinets are the worst offenders for lost space, since everything you own ends up behind the pipes.
Black wire pullout baskets slide the whole contents toward you, so a sponge bin or a bottle of dish soap at the back is no longer a blind reach.
Measure the cabinet opening and the depth before buying, and note where the drain sits, because the baskets need to clear it. Wire holds up to damp conditions better than a solid shelf you would have to wipe dry.
2. Drawer Organization
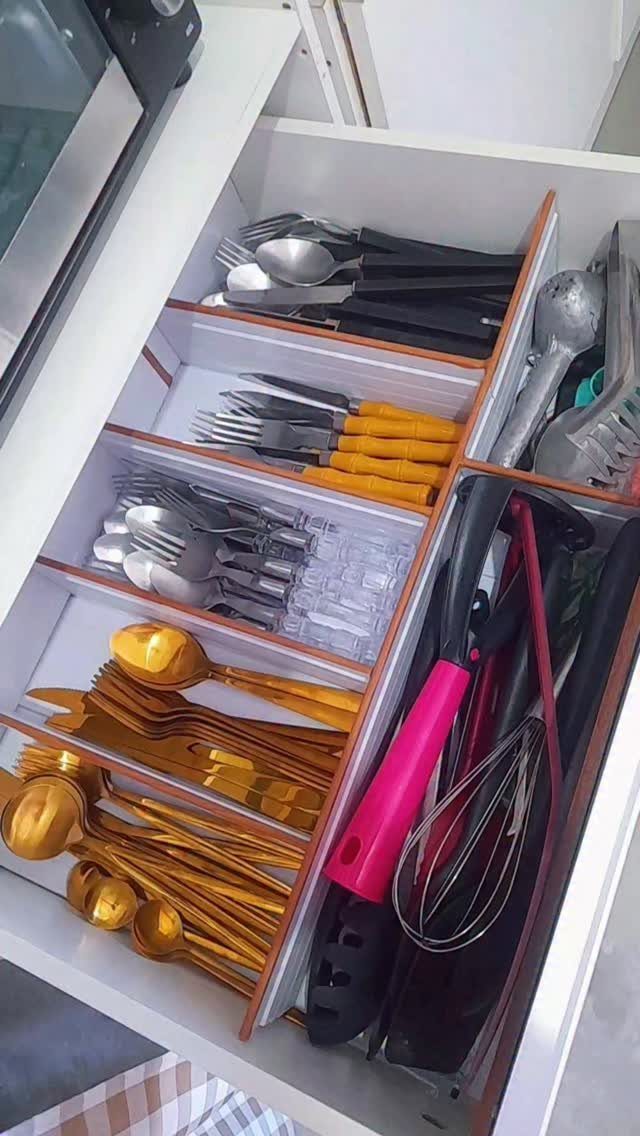
Wooden dividers cut to fit a drawer turn a jumble into a map: forks here, tongs there, a whisk in its own lane.
Custom-cut pieces beat a stock plastic tray in an odd-sized drawer, because they leave no wasted gap along the edges.
Measure the drawer’s inside length, width, and height first, then sort what you own before you cut anything.
Group by how often you reach for it, and put daily cutlery at the front. Tall tools like a whisk need their own wider slot.
3. Wall-mounted Shelves
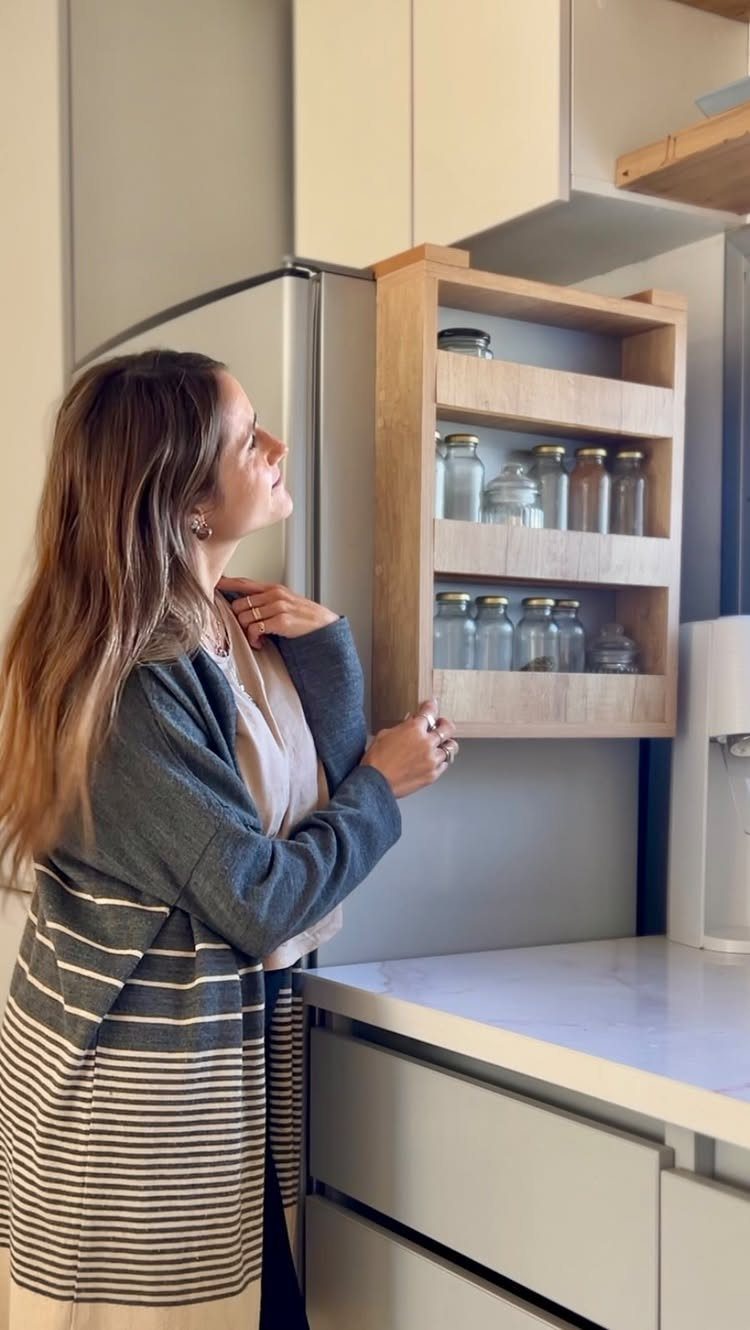
A light-wood shelf with a row of glass jars puts flour, pasta, and grains at eye level and frees up a cabinet shelf below.
Wall space is the cheapest square footage in a small kitchen, and a shelf costs far less than another cabinet.
Anchor into studs where you can, or use rated wall anchors, since filled jars get heavy fast. I would keep the shelf to everyday items so it stays tidy rather than cluttered.
4. Small Racks Inside Cabinet Doors
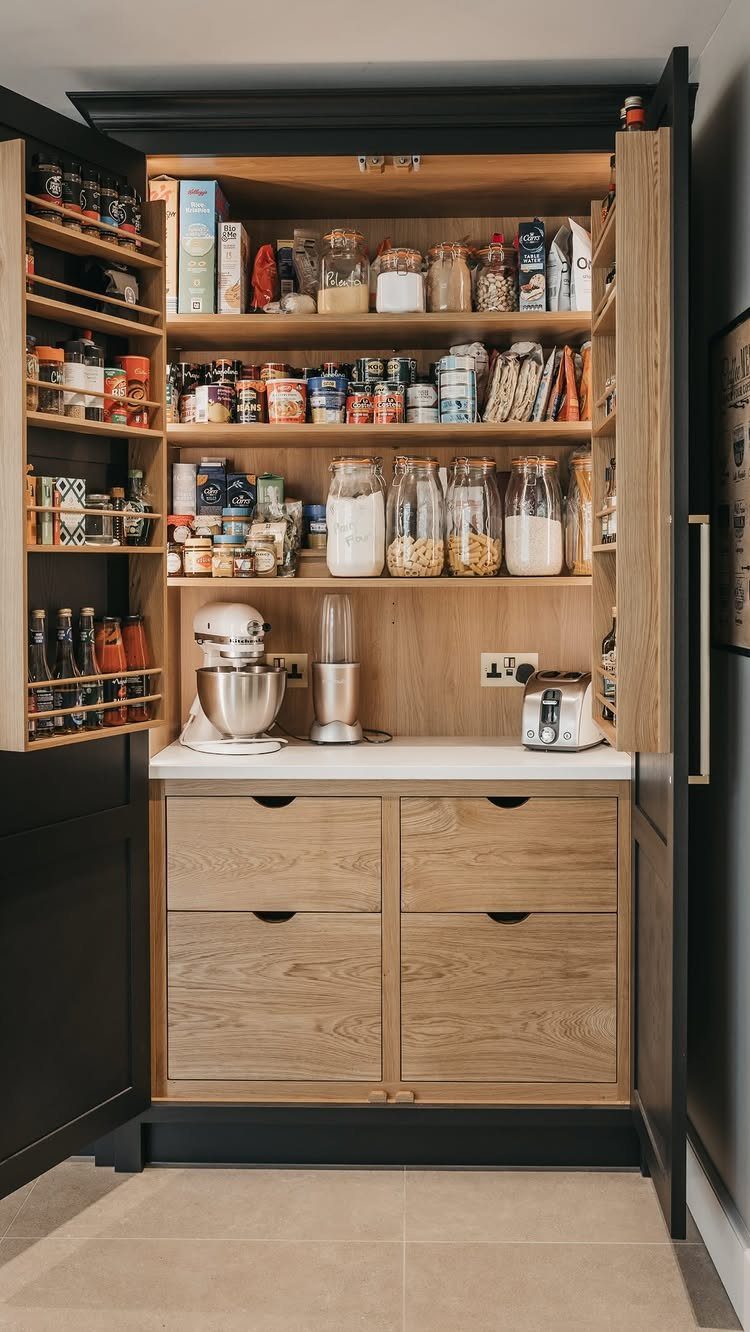
Inside a pantry door sits a strip of space most people leave empty.
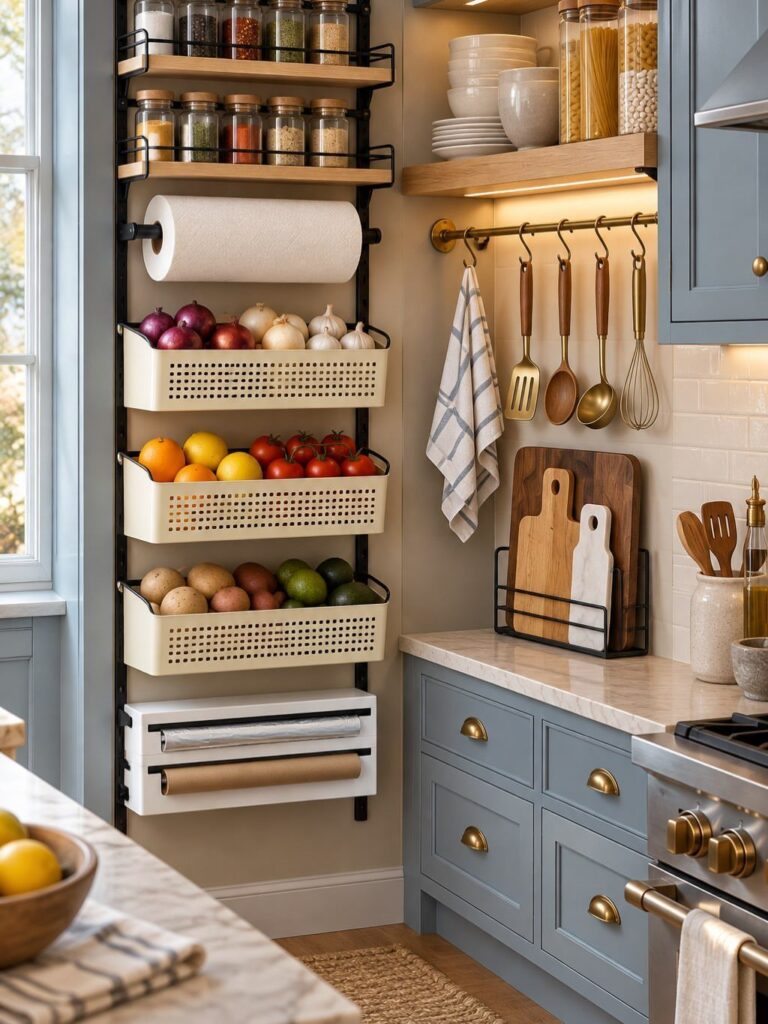
Narrow racks mounted there hold spice jars and small bottles in a single row, so you can read every label at once instead of digging through a shelf.
Check how far the door swings and how deep the shelves behind it run before screwing anything in. A rack that is too deep will hit the jars on the shelf and keep the door from closing.
5. Shallow Bins for a Snack Drawer
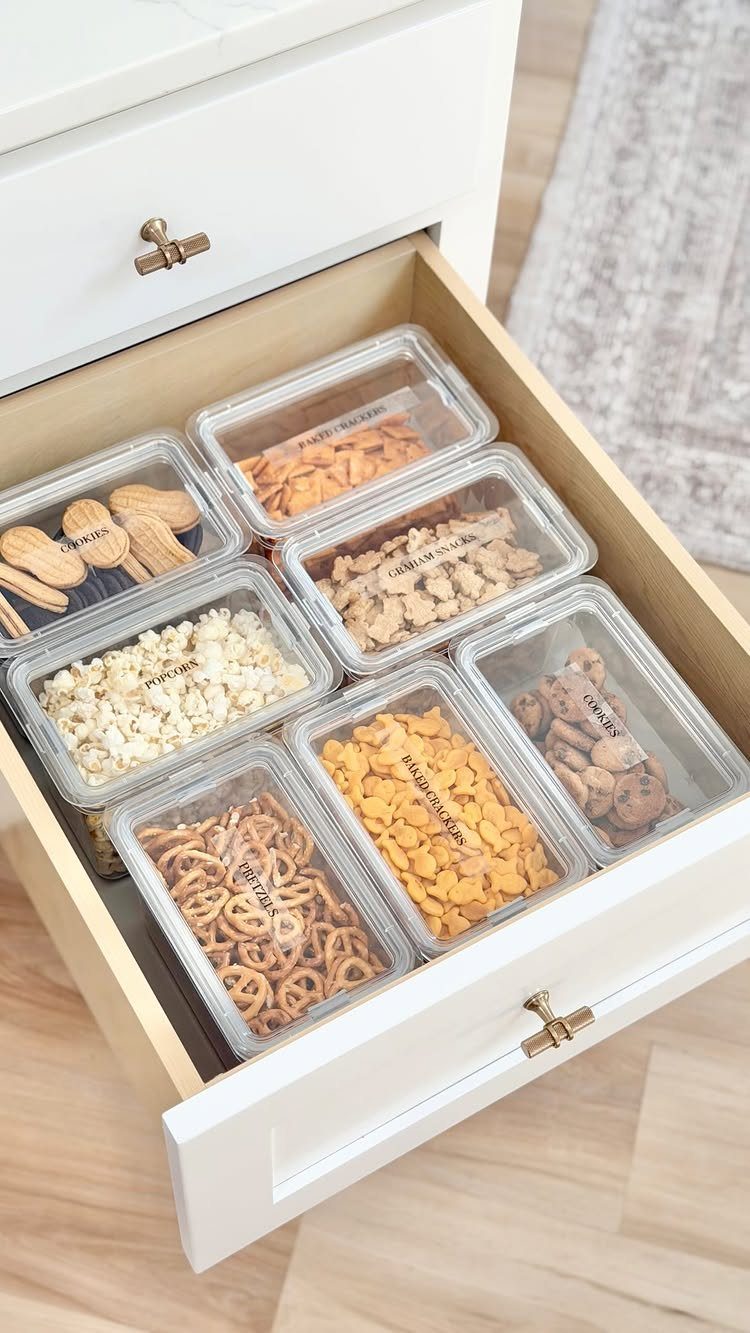
Kids grab what they can see, and a drawer of shallow clear bins makes snack choices easy to reach and easy to put back.
Each bin holds one item, such as popcorn, pretzels, or cookies, so a bag never gets crushed under another.
The maker of these bins says they are BPA-free with an airtight lid to keep snacks fresher longer. I would add a label to each bin so even younger kids can return things to the right spot.
6. Pot Rack to Hang Pots and Pans
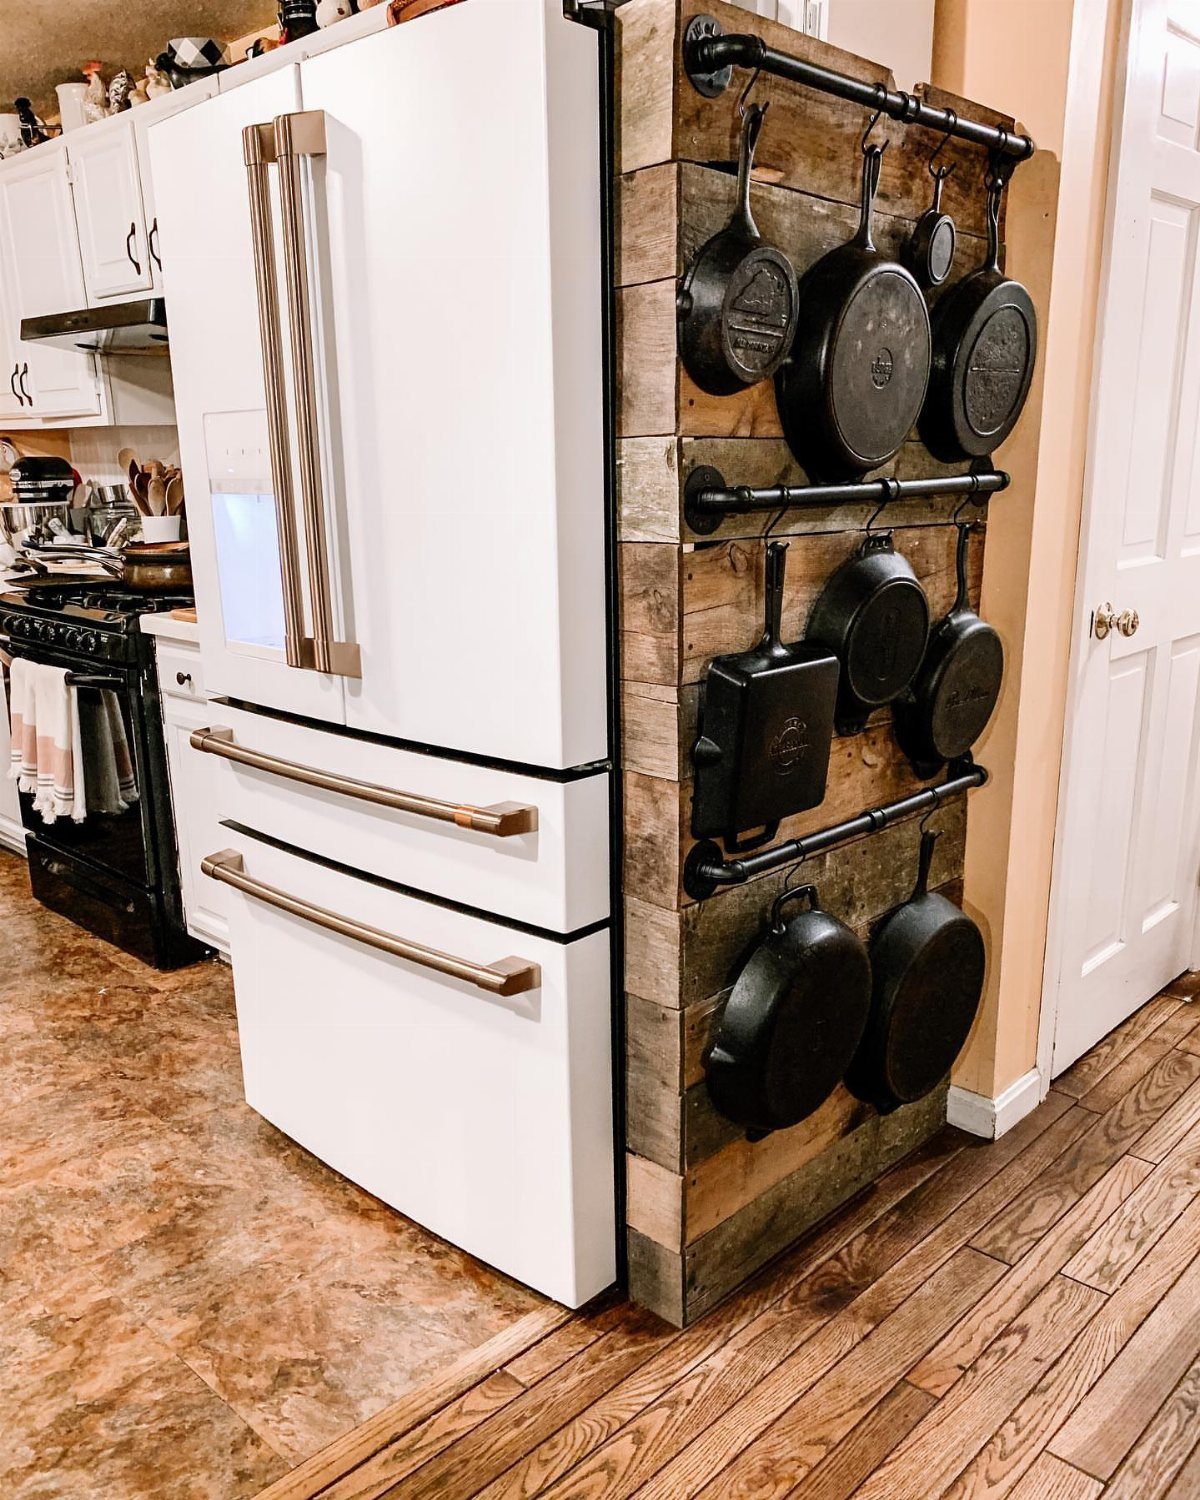
3 black pipes mounted on a wooden wall make a pot rack that costs little and suits cast iron, which is heavy and awkward in a cabinet.
Hanging the pans keeps them in reach beside the stove and clears a whole shelf.
Fasten the pipes securely to the wall, ideally into studs, since a few full pans add up to a lot of weight.
7. Use Tiered Shelf Risers
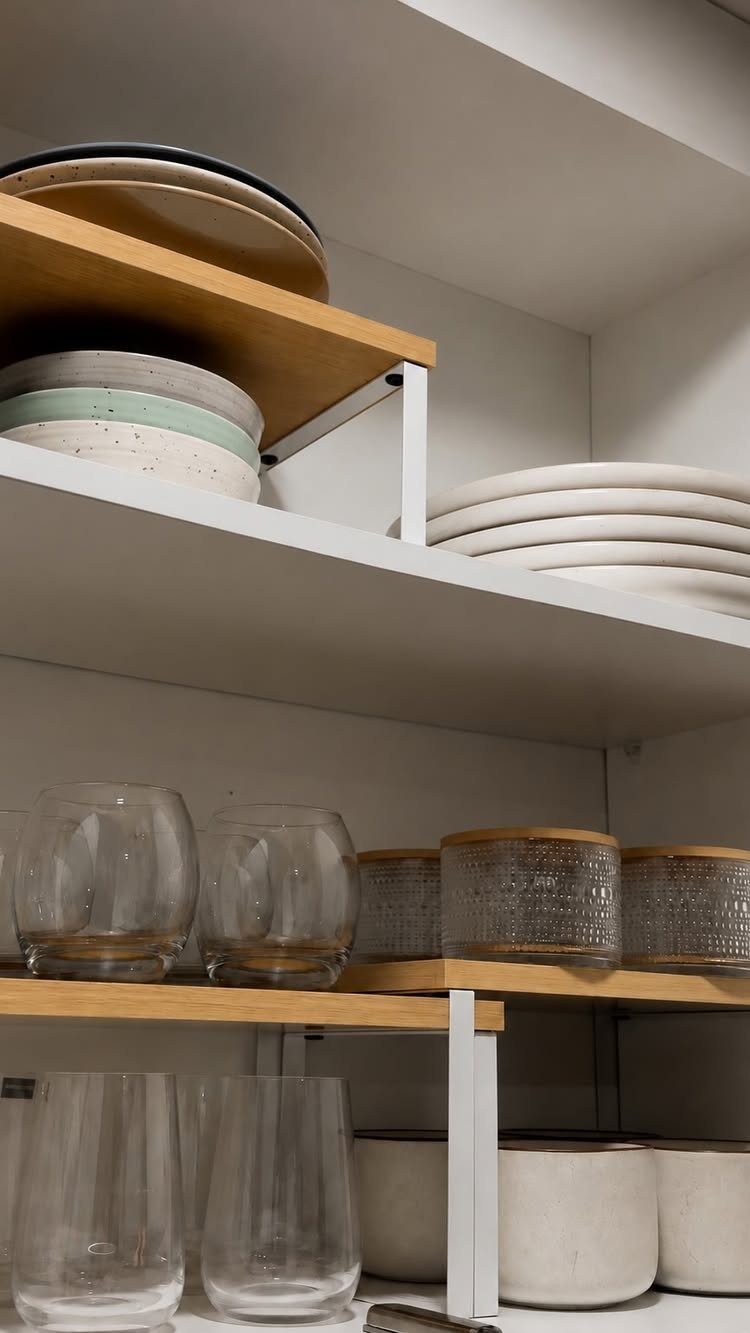
Plates stacked flat bury the bottom ones, and a wooden riser fixes that by lifting the back row so every plate and glass shows at once. Nothing has to come out to reach what sits behind.
Measure the shelf height before buying, leaving room for the riser plus whatever stands on top. I prefer wood in a white cabinet, since it adds warmth and doesn’t look like a plastic add-on.
8. Create a Pantry from a Bookshelf
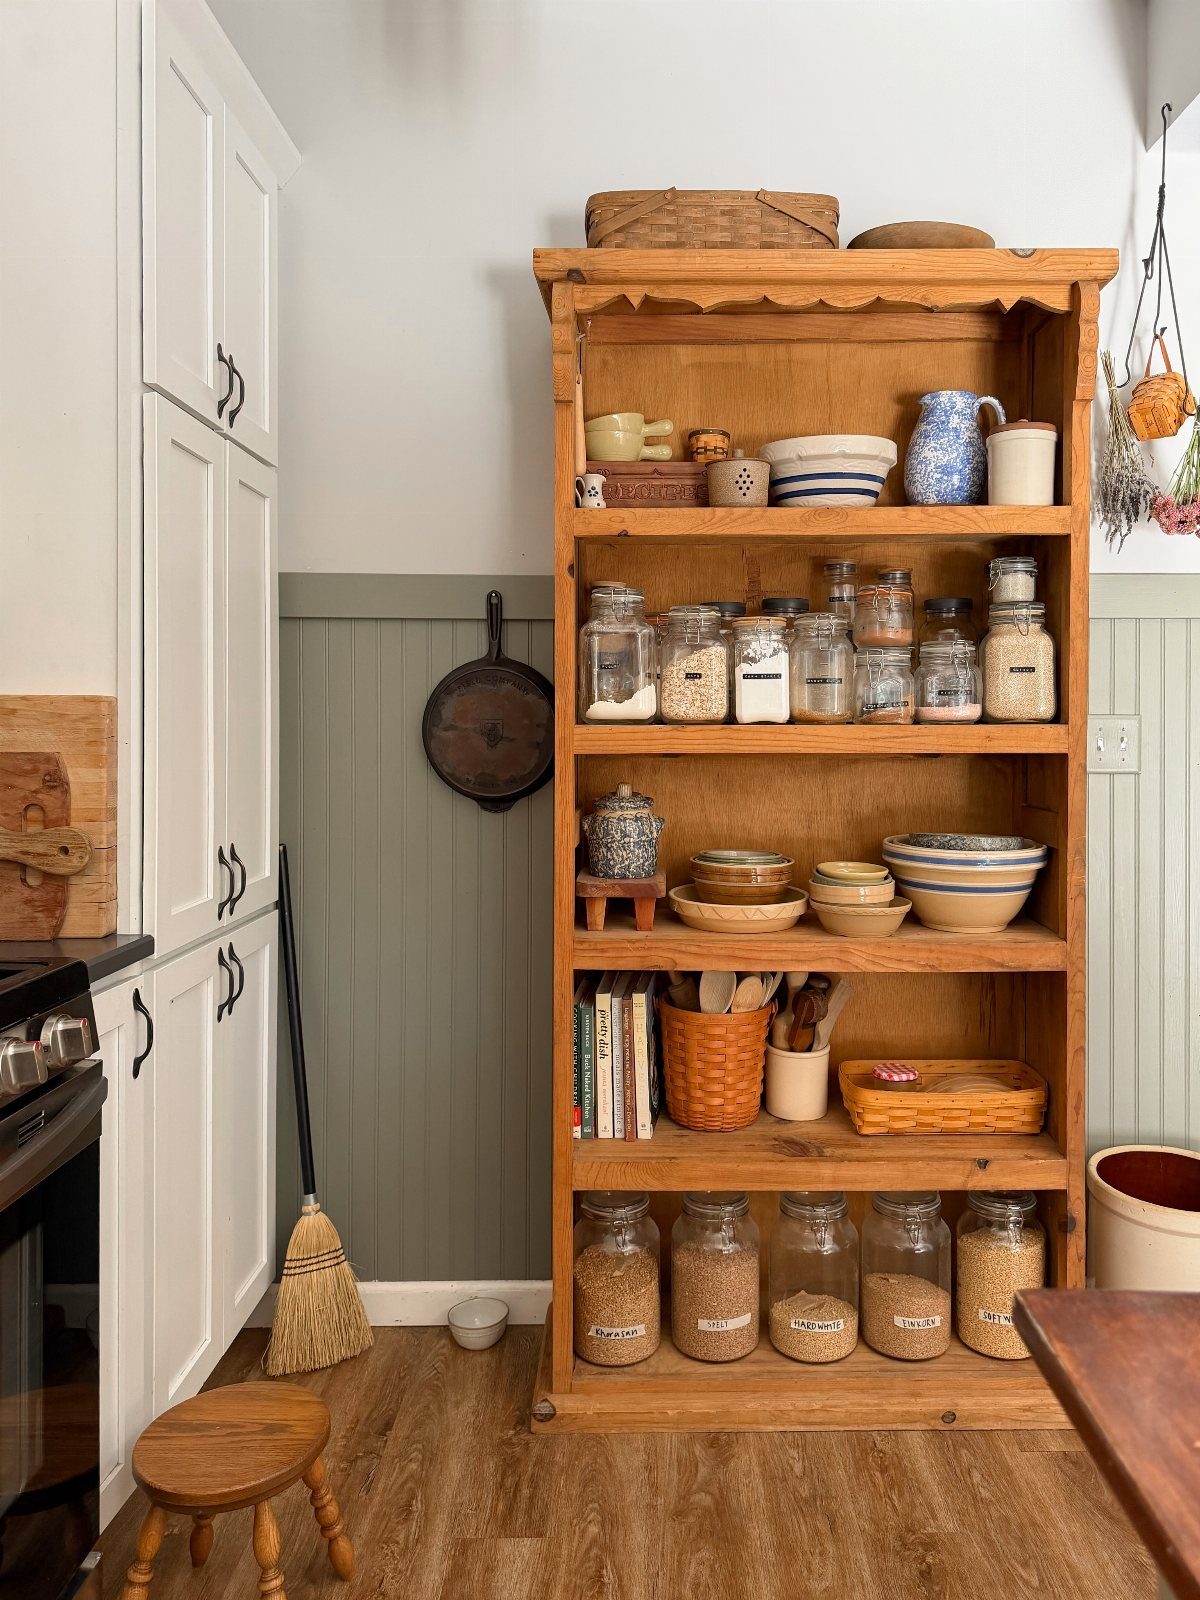
A freestanding wooden bookshelf can do the work of a pantry in a kitchen that never had one. Deep shelves suit jars and bowls, while baskets hide the packaging that looks messy in the open.
Put heavier jars on the lower shelves and light items up high.
Set the shelf against the wall nearest your prep area, and anchor it to the wall so it can’t tip. A renter can take it along when moving.
9. Labels on Bins and Containers
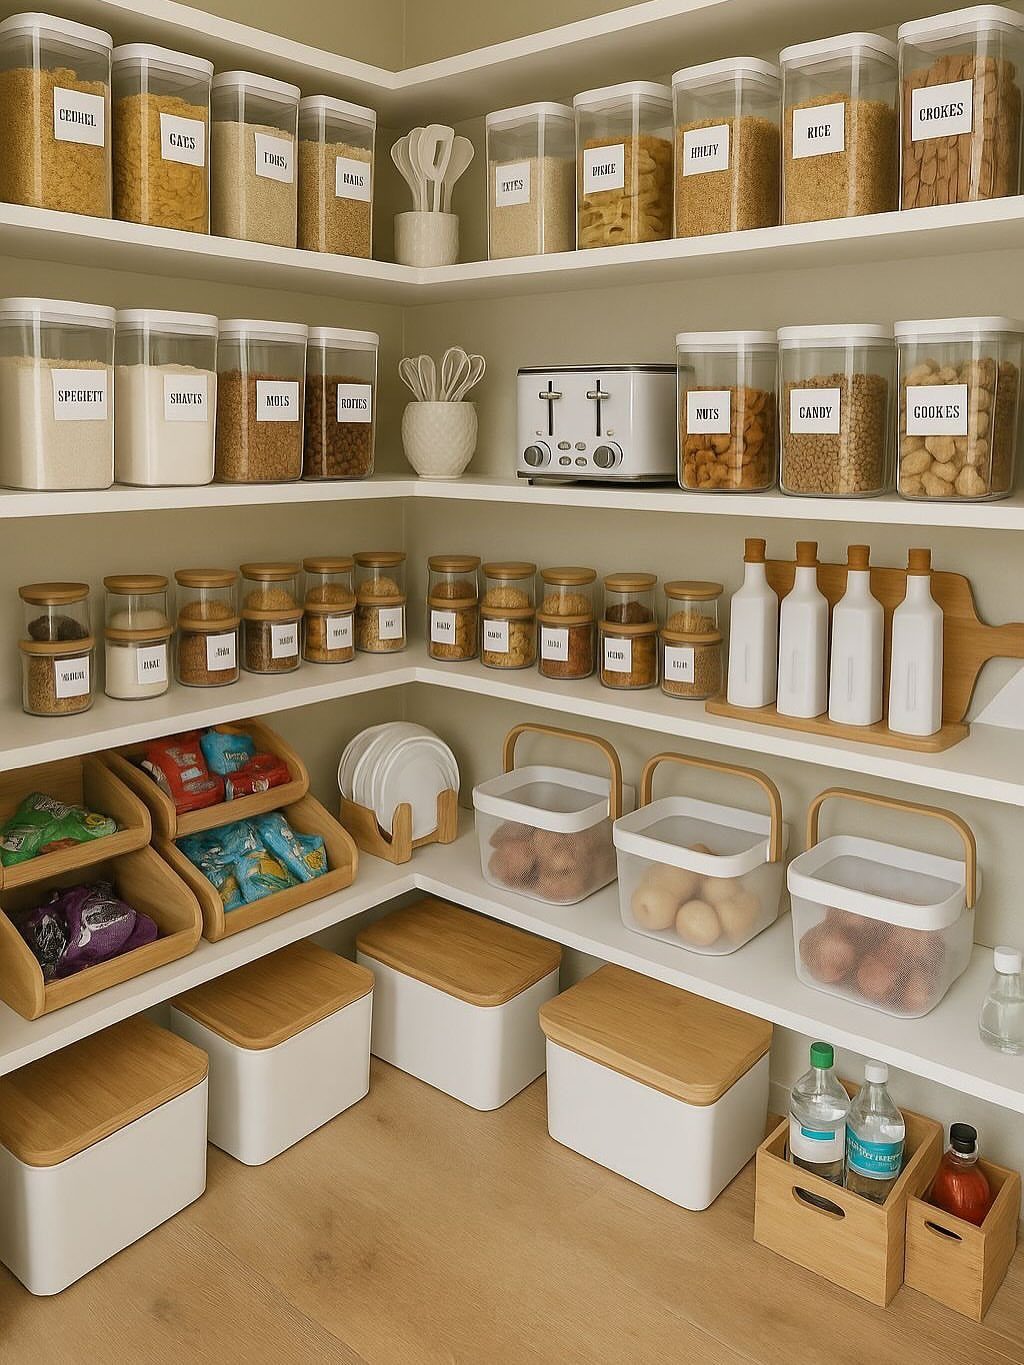
A label turns a clear container into a system anyone in the house can follow. Short, plain words like "Cereal" or "Rice" in capital letters read fastest from across the room.
Label the container itself, not the shelf, so the name travels with the contents when you rearrange.
Adhesive labels are cheap and quick for a weekend. I would stick to one style throughout, because mixed handwriting makes a tidy pantry look chaotic.
10. Use Clear Containers
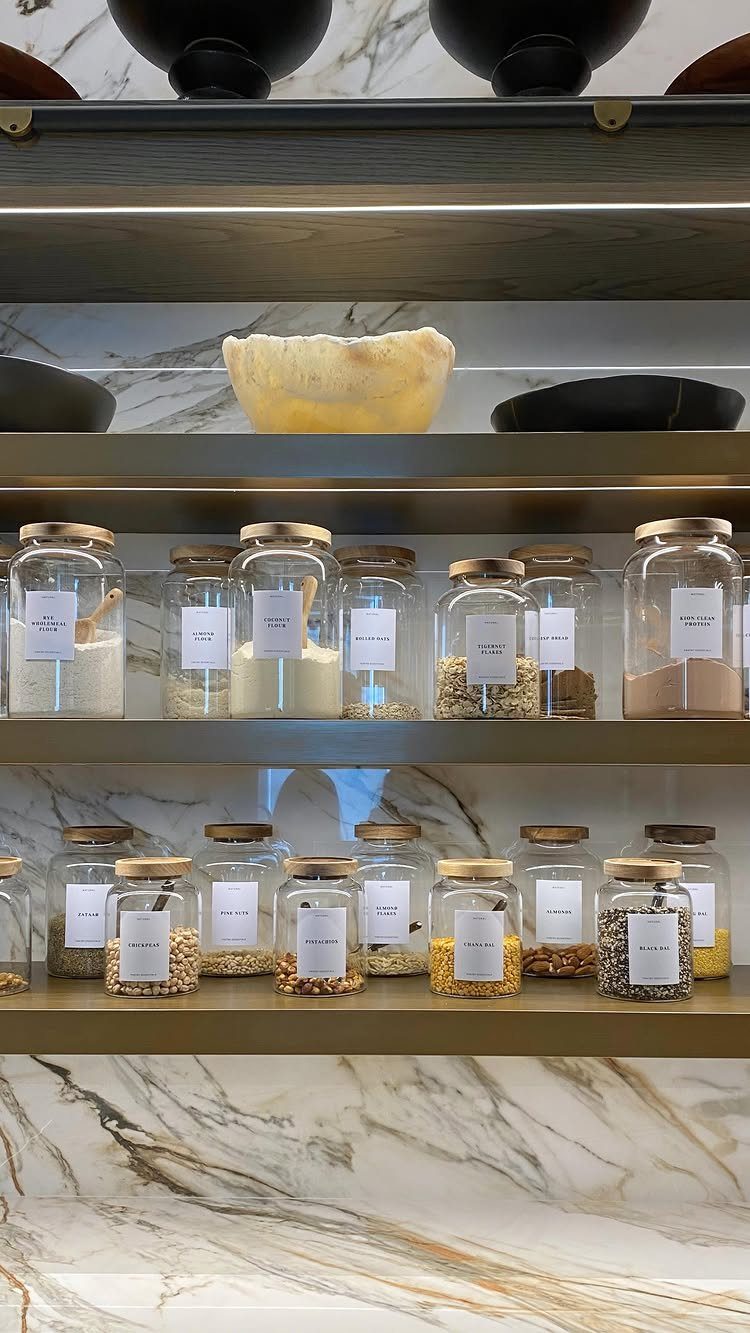
Glass jars with white labels let you see how much rice flour or chickpeas are left before you run out. Matching jars also stack the visual noise of mismatched bags into one calm row.
Decant staples as you buy them, and write the name on each label so similar flours don’t get confused. Jars cost more than bags, so I would start with the items you use weekly and add more over time.
11. Use a Rolling Cart
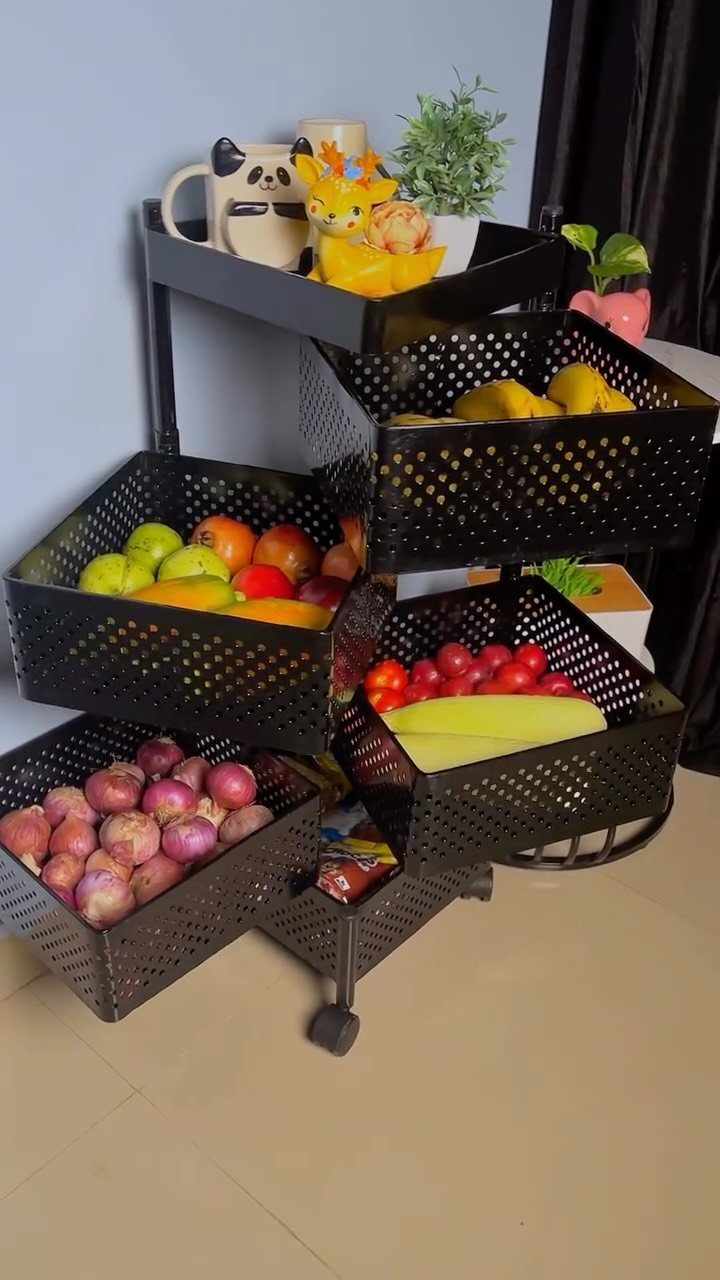
A narrow metal cart on wheels gives a small kitchen a movable pantry.
Roll it beside the counter while you cook, then park it against a wall. Pick a cart narrow enough to leave a walkway; if it blocks the path, it will end up shoved in a corner and unused.
12. Install a Magnetic Knife Strip
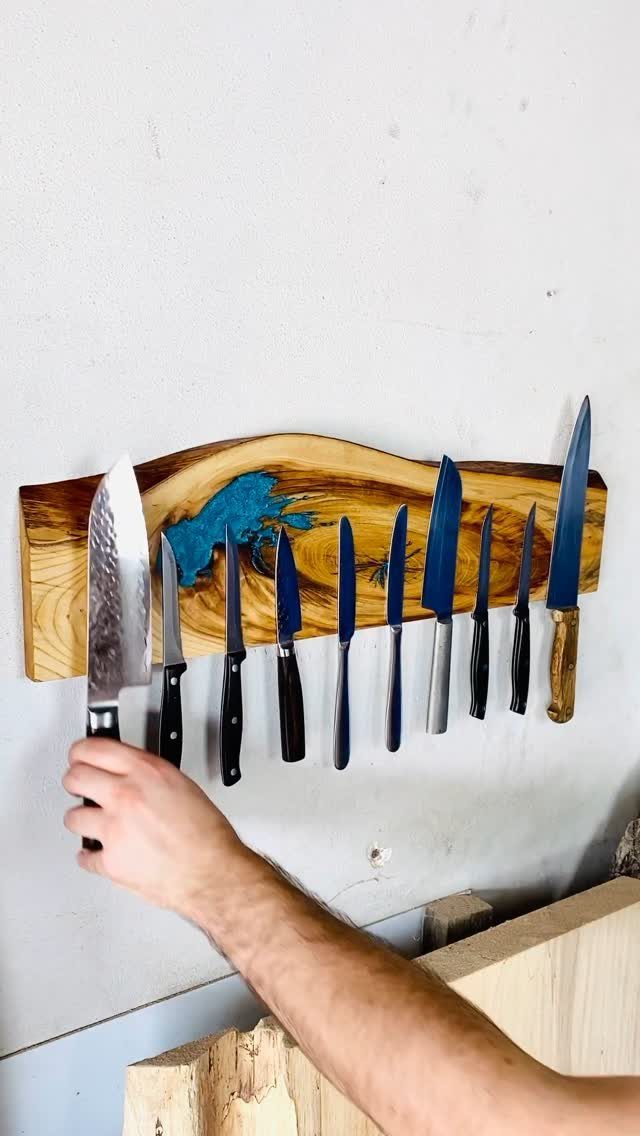
Mounted on a wall, a wooden magnetic strip keeps knives off the counter and out of a crowded drawer. Blades hang in sight, so the one you want is the one your hand finds.
Fasten the strip with screws into studs or rated anchors, since a full set of knives adds real weight.
Mount it above a counter, away from where kids can reach, and place each knife by its spine first so the edge never drags across the wood.
13. Stack Containers and Lids Vertically
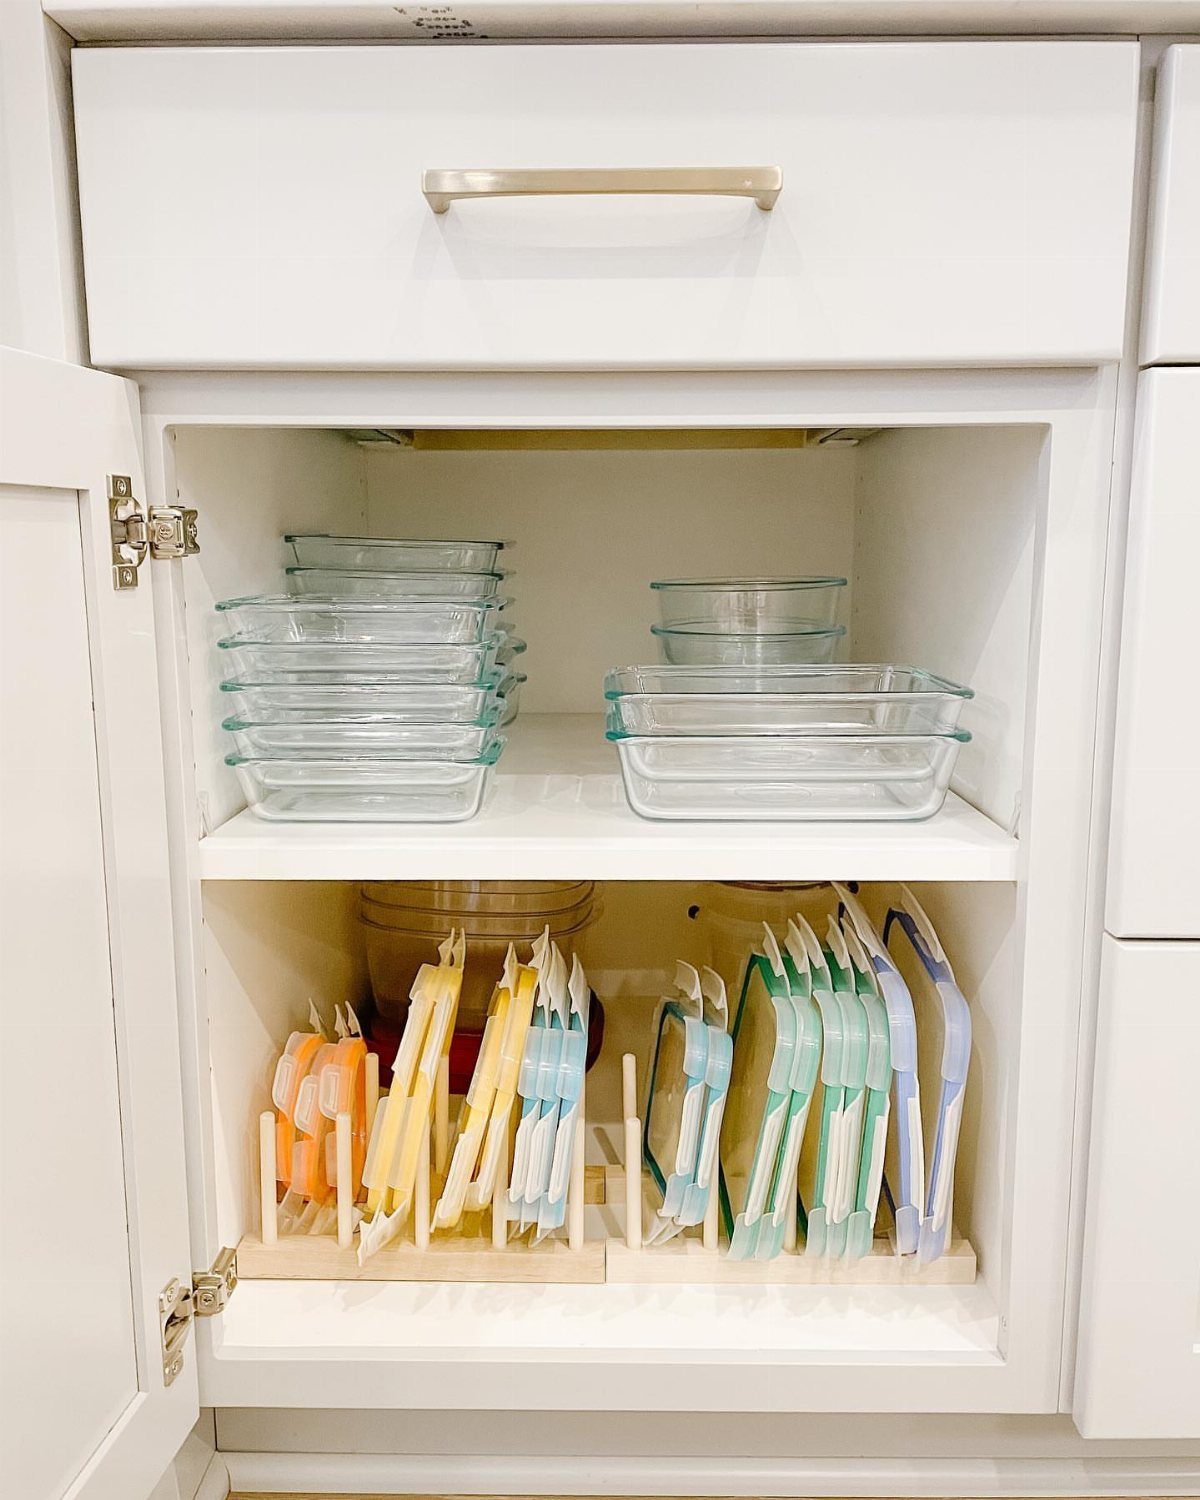
Glass containers nest in a short stack on the top shelf, while the lids stand on edge in a rack below. Lids no longer slide around in a drawer, and you can match one to its container at a glance.
Sort lids by shape first, since round and square ones need separate slots. I would keep the rack on a lower shelf, where you can see the lids without reaching up.
Stacking only works when the containers match in size, so toss any that have lost their lids.
Decluttering Tips
Before buying a single bin, empty one cabinet onto the counter and keep only what you used in the last few weeks.
Whatever you reach for rarely can move to a higher shelf or leave the kitchen altogether, which frees real room without spending anything.
Then group what stays by type and by how often you use it.
Keep plates, spices, and canned goods on the lower shelves where a hand lands without reaching, and give the top shelf to boxed mixes and snacks that only come down once a week.
If a cabinet is too small for baskets, skip them. Grouping like items together keeps the cabinet organized without adding extra hardware.
Regular Organization Schedule
A tidy kitchen drifts back to messy as your cooking habits change, so put a check-in on the calendar every 3–6 months. A change of season is an easy reminder.
Move faster if clutter is building or you can’t find a tool you know you own. That is the sign your setup no longer matches how you cook.
During each check-in, make room for any new tools you picked up and pull out what you stopped using. Short, regular resets also keep the big clean-out from turning into a full weekend.
DIY Storage Solutions
Free storage is sitting in your recycling bin. Cereal boxes, shipping boxes, and diaper boxes can be cut down into drawer dividers that cost nothing.
Rinsed produce containers, like the clear clamshells that hold mushrooms or salad greens, make free bins for sorting small items.
Empty yogurt cups, plastic berry baskets, and sturdy tea or cracker boxes can hold loose packets and snacks the same way.
Arrange them by what you’ll keep in each spot, then fill them. I like this approach for a trial run: if the layout works, you can swap in nicer pieces later, and if it doesn’t, you’ve lost nothing.
Frequently Asked Questions
What is the best way to organize my kitchen?
Pull everything out of a single cabinet, put back only what has seen use in the past few weeks, and sort the keepers by type and by how often your hand goes to them.
Clear containers, drawer dividers, and wall space for shelves or racks do the rest. Decluttering first matters because it frees room before you spend anything on bins.
What are some clever storage ideas for small kitchens?
Pullout wire baskets under the sink, narrow racks inside a pantry door, and tiered risers for plates are three of the most useful.
Each one puts items that sat hidden or buried in plain view. Before buying a door rack, measure the clearance and make sure its bars won’t catch the jars on the shelf behind the door.
How do I organize a small kitchen without a pantry?
A freestanding wooden bookshelf can serve as a pantry. Put deep shelves to work for jars and bowls, hide messy packaging in baskets, and keep heavy jars on the lower shelves.
Screw the top to a wall stud with an anti-tip strap so it stays put, and a renter can unscrew it and carry it to the next place.
How often should I reorganize my kitchen?
A check-in every 3–6 months keeps a small kitchen in order.
If clutter is piling up or a tool you know you own keeps hiding, reset early, because the layout has stopped matching how you cook. A 15-minute reset every month or so keeps the full clean-out from swallowing a weekend.