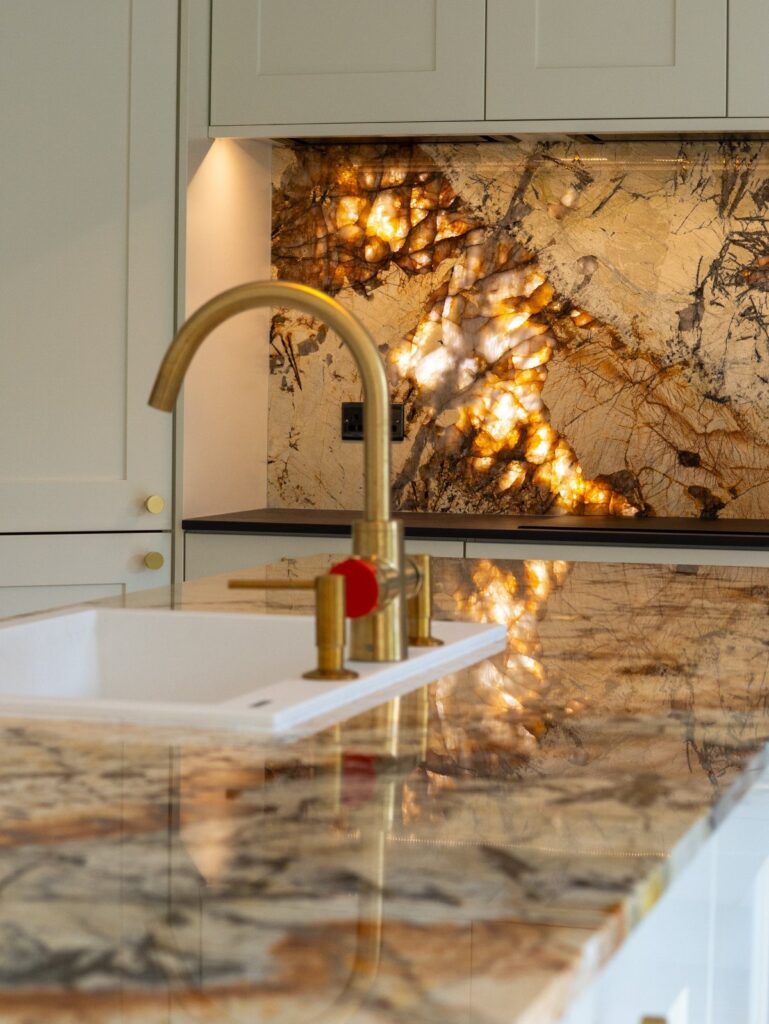
Natural stone backsplashes range from basalt subway tile with an inset mosaic panel behind the range to an onyx feature wall that has to be wired for backlighting before the stone is ordered.
Who will be setting the stone decides your pick: basalt subway tile and mosaic sheets are within reach if you’ve worked with stone before, while the slab backsplashes and the curved alcove call for a pro.
Every option also needs sealing, which the post puts at every 12 to 24 months.
1. Onyx Feature Wall
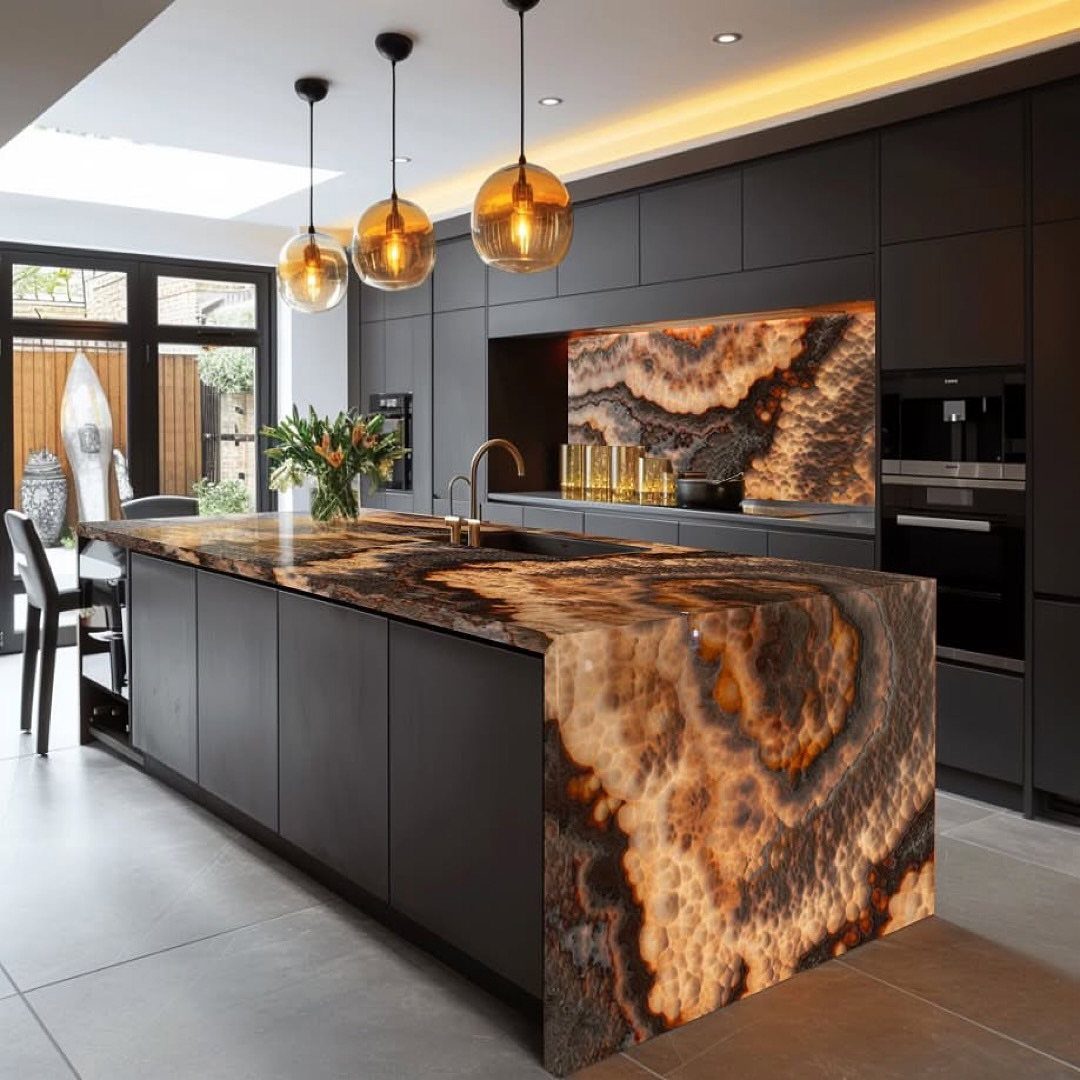
Backlighting is what turns onyx from a pretty stone into a glowing one, and the amber pendants over this island pick up the same warm tone. Against dark grey cabinets, a lit panel reads like a piece of art.
Onyx is a feature stone, so I’d keep it to one wall or one island face and let everything else stay quiet.
Plan the lighting before the stone is ordered, since the light source has to be built in behind it. It’s a splurge, not a weekend job.
2. Mixed Stone Waterjet Mosaic
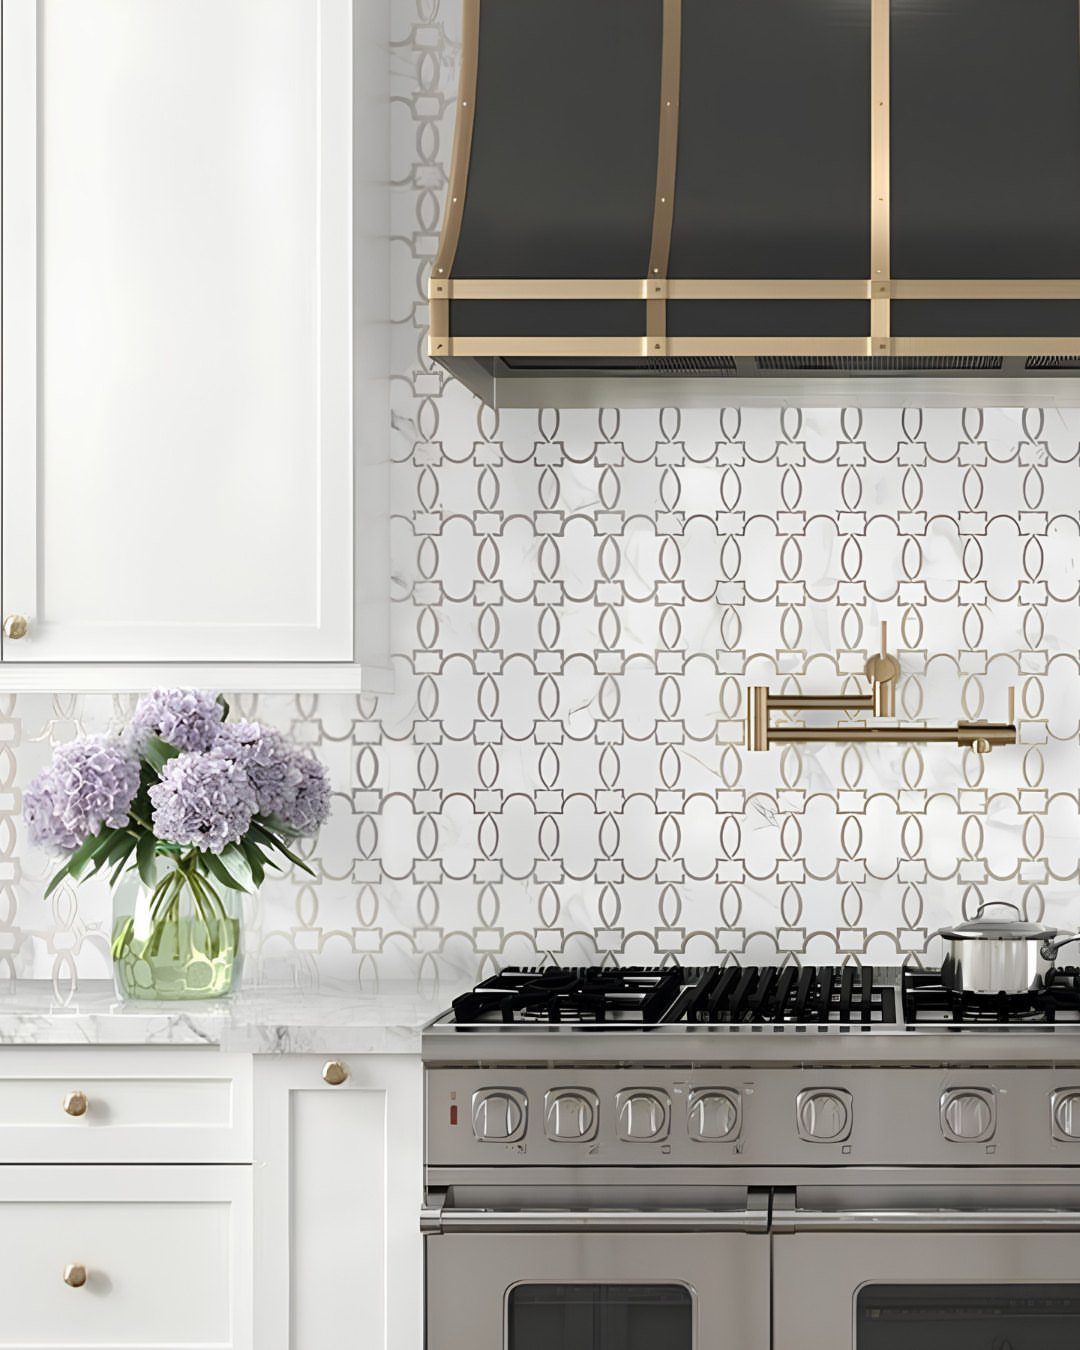
A waterjet mosaic starts as several stones cut into interlocking shapes, then fitted together into one pattern. The white and grey geometric version here keeps the palette tight, which is why it works behind a stainless range without fighting it.
If you like the look but not the cost, I’d limit the mosaic to the cooking wall and run something plain elsewhere.
Stick with 2 or 3 tones that already appear in your counters and cabinets. A busy pattern needs a calm room around it.
3. Granite Slab Backsplash
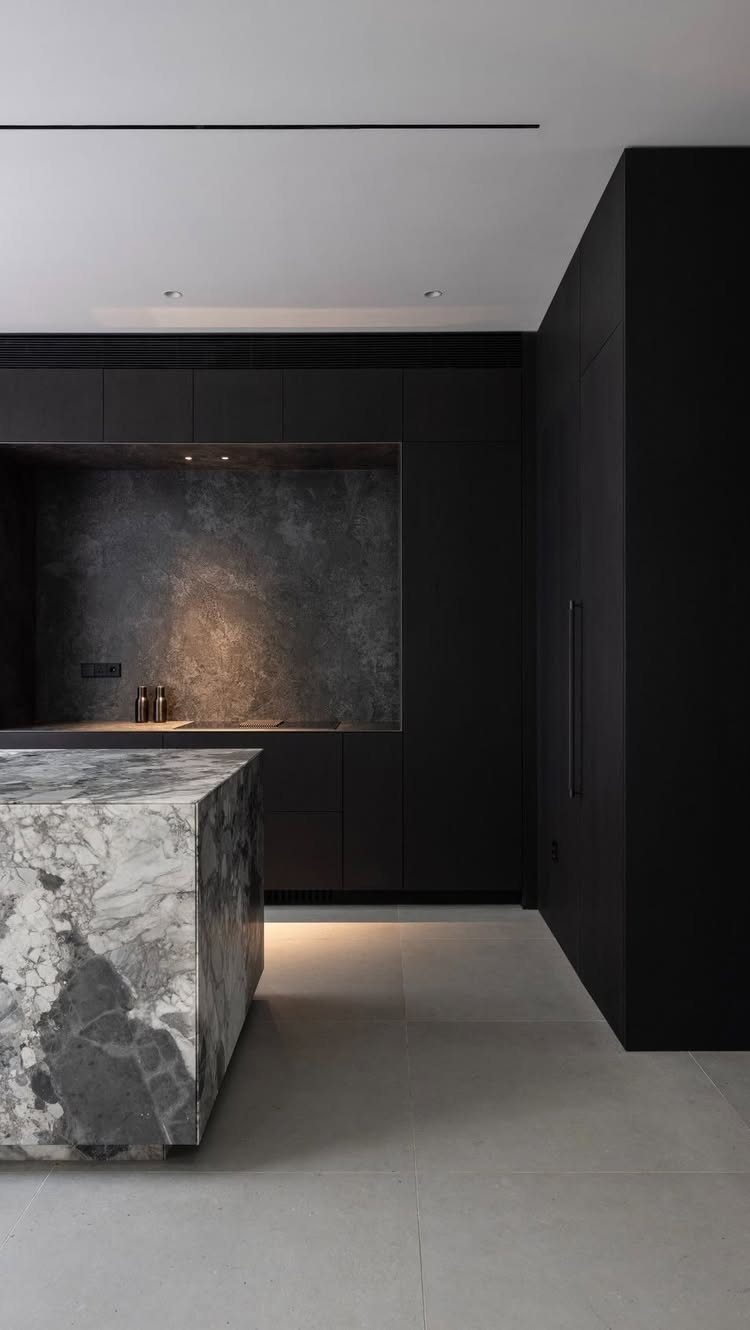
Running the same granite from countertop up the wall removes the seam where most backsplashes break the eye. In a black kitchen with dark grey stone, that continuity makes the cabinets and slab look like one built piece.
I’d choose this over tile when the counter is already granite, since matching the slab keeps the surface calm.
Ask the fabricator to cut the backsplash from the same slab as the counter so the veining lines up. Skip it if you want visible texture or color on the wall.
4. White Marble Slab Backsplash
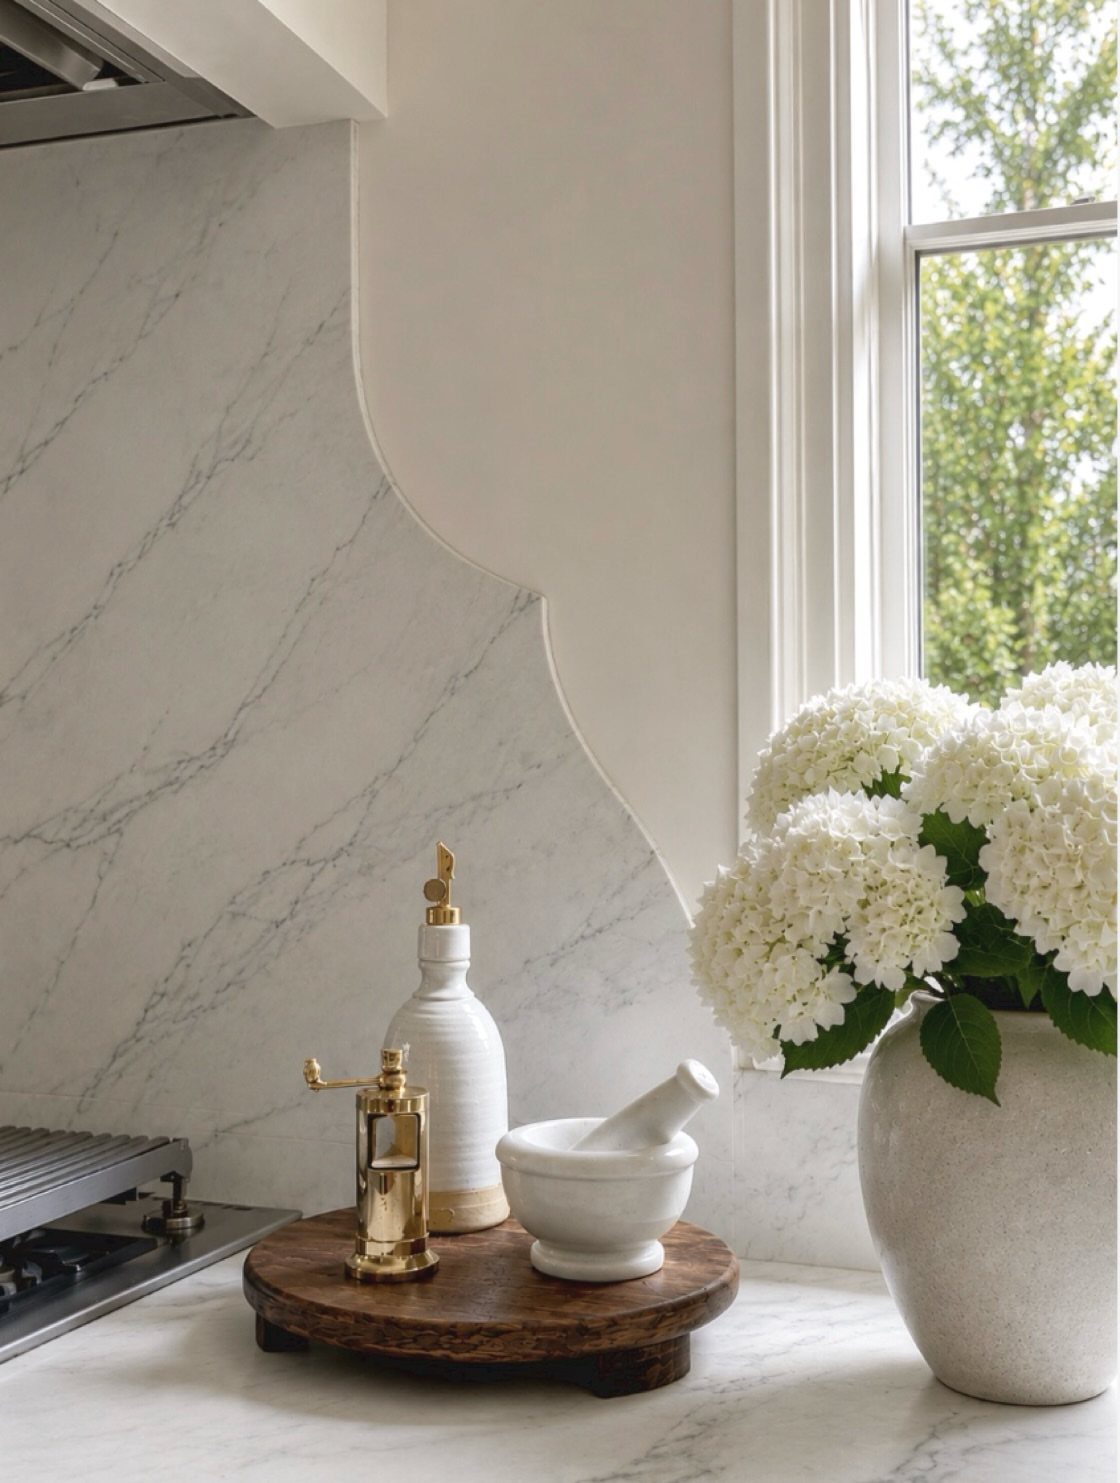
One slab of white marble running from counter to cabinets means no grout lines at all, so there is nothing to scrub and nothing to interrupt the veining.
Beside a window, the stone picks up daylight and brightens the whole counter zone.
This is the most expensive way to get a marble backsplash, because you pay for slab and fabrication. Marble is also softer and more porous than granite, so I’d have it sealed and wipe up splashes near the stove quickly.
April Graves, vice president of Aria Stone Gallery, agrees that backsplashes have the potential to be an extension of beautiful countertops. They are an effortless and elegant way to complement the rest of your surfaces, as well as cabinetry, flooring, and décor.
5. Marble Herringbone Mosaic
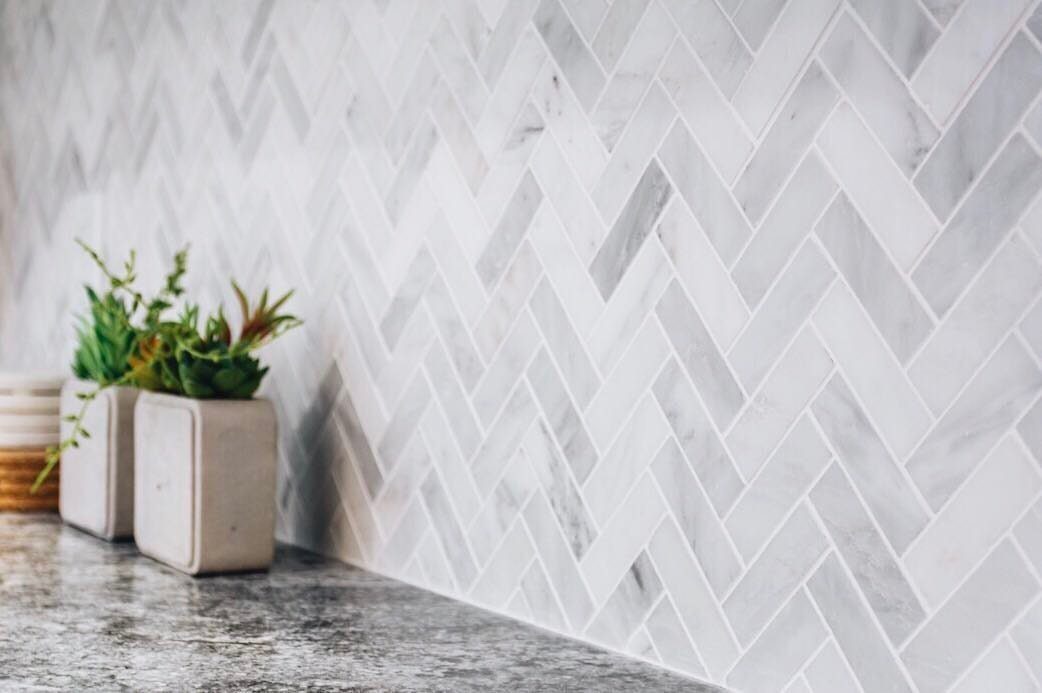
Herringbone makes small marble pieces zigzag, and the direction change gives a plain white backsplash movement without adding any color. Over a grey stone counter, it stays soft and quiet.
Mosaic sheets are the budget-friendly way in, since they install faster than setting every small piece alone.
Keep the grout color close to the marble so the pattern, not the lines, does the work. I’d use it on a short run rather than a whole kitchen wall.
6. Basalt Subway Tile
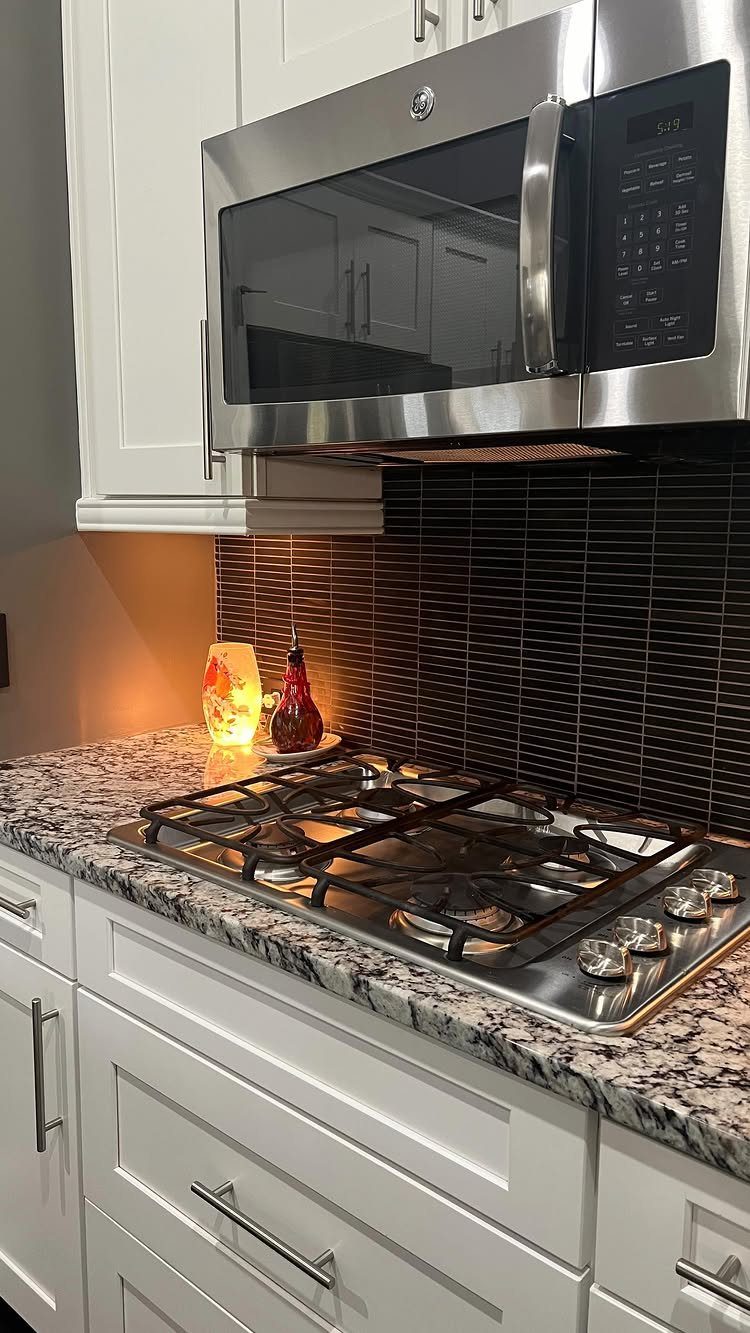
Basalt in a subway shape gives you a deep, even black with very little variation, so the backsplash reads as a clean dark band behind the stovetop. Against white cabinets, the contrast is sharp and graphic.
A dark tile suits a kitchen that already has a lot of pattern, because it calms things down.
Choose a black or deep charcoal grout so the joints disappear. Plan on wiping it often, since splatters and water spots show easily on dark surfaces.
7. Blue Marble Diamond Mosaic
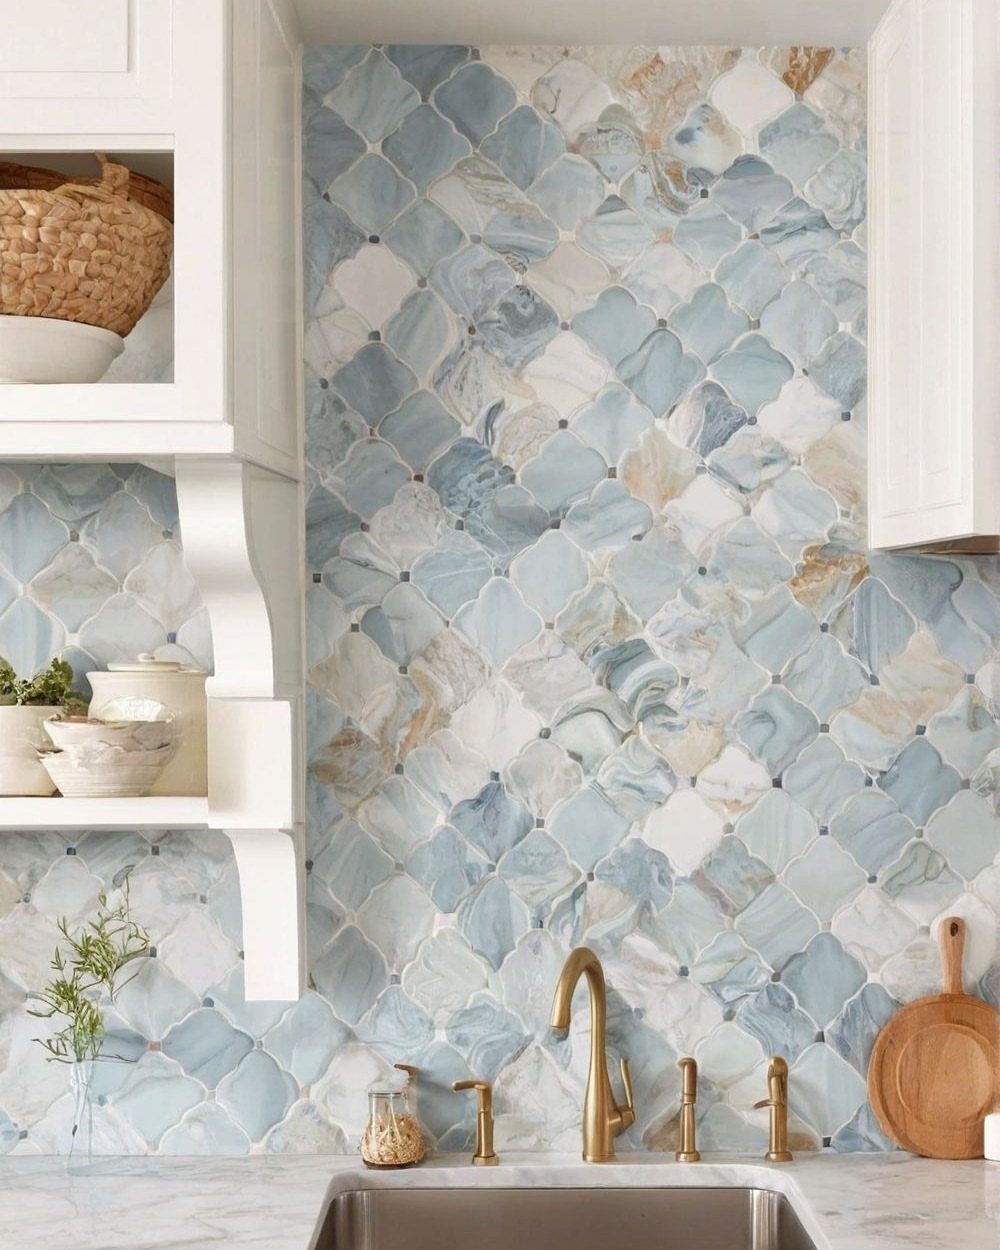
Pale blue veining against white marble makes a diamond mosaic read as soft color rather than pattern. Gold hardware and white cabinets let the blue do all the talking.
I’d use this on a single wall behind the sink and keep the counters plain.
Choose a grout close to the white of the stone so the diamonds stay the focus. Because marble soaks up liquid, a coat of sealer before grouting and a quick wipe after any splash will keep stains from setting in.
Buying the diamond pattern as premounted mesh sheets means you set a dozen tiles at once, which saves hours over placing each piece by hand.
8. Subway Tile with Inset Mosaic
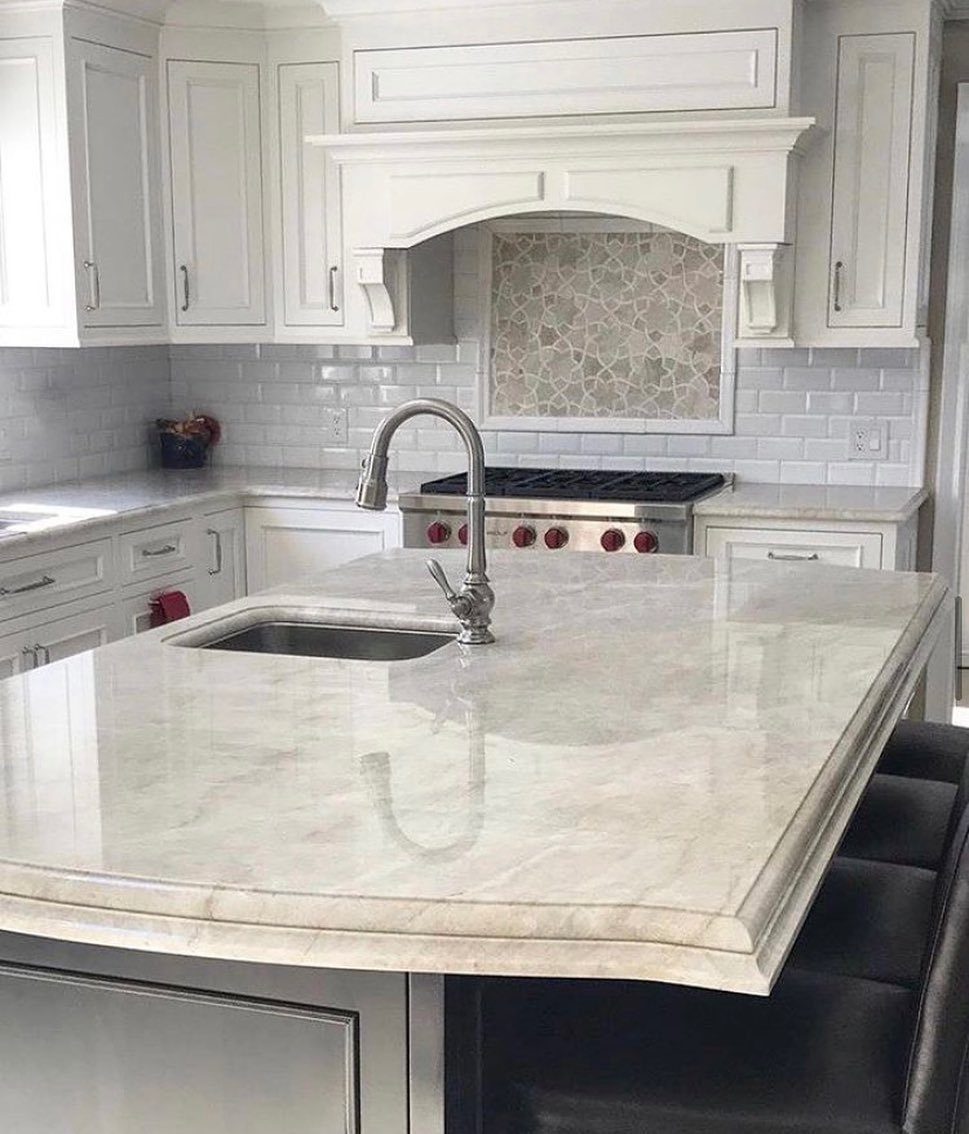
A plain light grey stone subway field with one decorative mosaic panel behind the range is the budget-minded way to get a focal point. The tile does the quiet work, and the insert gets all the attention.
Size the panel to the range width so it looks planned, and keep the grout tone near the subway tile.
I’d spend on the mosaic and save on the field. Marble on the island and white cabinets leave the insert as the only busy spot, which is exactly where it belongs.
9. Curved Alcove Stone Backsplash
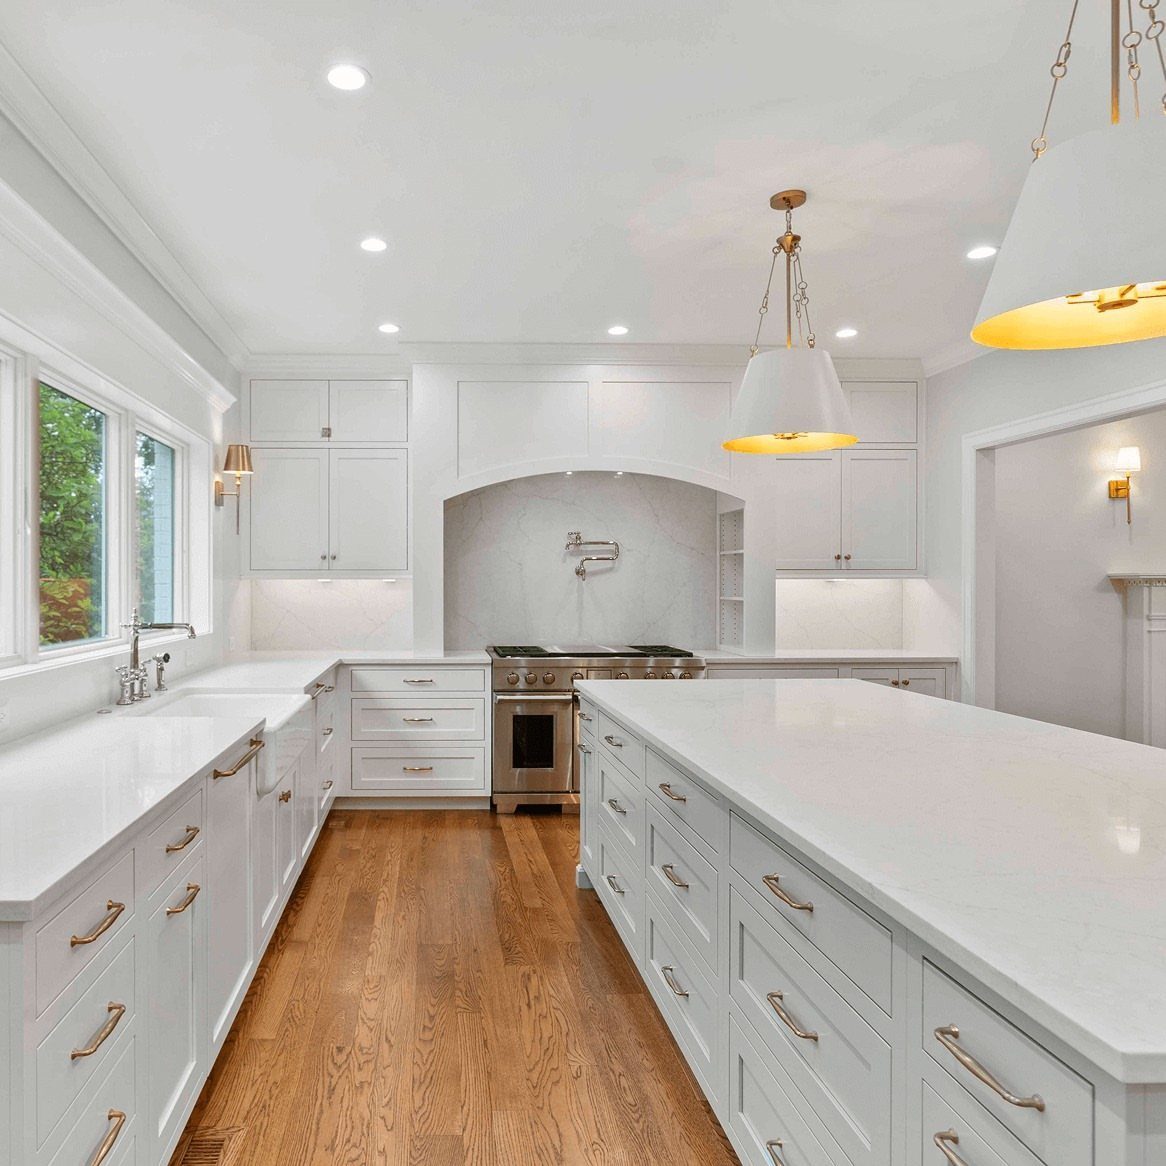
A curved alcove asks for stone that can follow the bend, which makes small pieces or mosaic sheets a better bet than large flat tiles.
Light stone keeps the recess bright in an all-white kitchen, and it gives the stove its own framed spot.
Expect more cutting and a slower install than a flat wall, so I’d hire a tile setter unless you’ve done curves before.
Maintenance of Natural Stone
Plan on sealing natural stone every 12 to 24 months, and lean toward the short end if the stone is porous or the range gets daily use. The wall behind the stove takes the most grease, so check that spot first.
I clean mine with plain warm water and a microfiber cloth, or a cleaner made for stone if something has really stuck. Vinegar, lemon juice, bleach and scrub pads all damage the finish, so keep them away from the wall.
Wipe spills quickly. Acidic ones like citrus, wine and tomato sauce can etch marble and leave dull marks, and oil can slowly stain.
For an oil stain, a paste of baking soda and water is the first thing I’d try.
Organic stains sometimes lift with hydrogen peroxide, though I test it on a scrap piece first. Minor etching on marble can often be buffed out with polishing powder.
Installation Considerations
Stone is heavy, so check the wall before you buy anything. Backer boards need to be fastened securely and sit level, especially under full-height slabs or thick stone cladding.
Stone is also more fragile than ceramic, and cutting around outlets, corners and uneven walls is where mistakes happen.
I’d hire a pro for slabs. Tile is possible to set yourself, but only if you’ve worked with stone before.
Seal the stone with a penetrating product right after install, then again every year or two depending on how much oil hits the surface.
Frequently Asked Questions
Does stone make a good backsplash?
Yes.
Stone is hard, durable and has natural variation that tile can’t copy. The trade-off is upkeep: it needs sealing and quick wipe-ups, and marble is softer and more porous than granite.
How much is a natural stone backsplash?
Expect to pay anywhere from about $32 per square foot for basic granite up to $250 for the rarest onyx, with labor adding another $60–$80 per square foot.
A single slab costs the most because you pay for the stone plus fabrication. Mosaic sheets and a stone feature panel on one wall are the cheaper ways in.
How do you seal a stone backsplash?
Start with clean, fully dry stone, then work a penetrating sealer across it with a brush or cloth and wipe away any drips before they cure.
Leave it for at least 10 minutes to soak in, wipe off the excess and let it dry before use.
Seal once before grouting and once after, then redo it every 12–24 months; porous stone or a range that gets daily use calls for the shorter end.