Your budget and how much of the kitchen you’re willing to repaint decide which of these is yours: stock cabinets in green run $1,500–$5,000, while custom cabinetry starts at $15,000, so most first-home and renter projects belong with painted lowers, new brass pulls or a single butcher block island.
The ideas range from a one-afternoon hardware swap to a full run of dark green cabinets, and the wood moves the mood as much as the paint: pale maple keeps mint light, while dark walnut deepens olive and forest green.
1. Olive Green Cabinets with Walnut Butcher Block
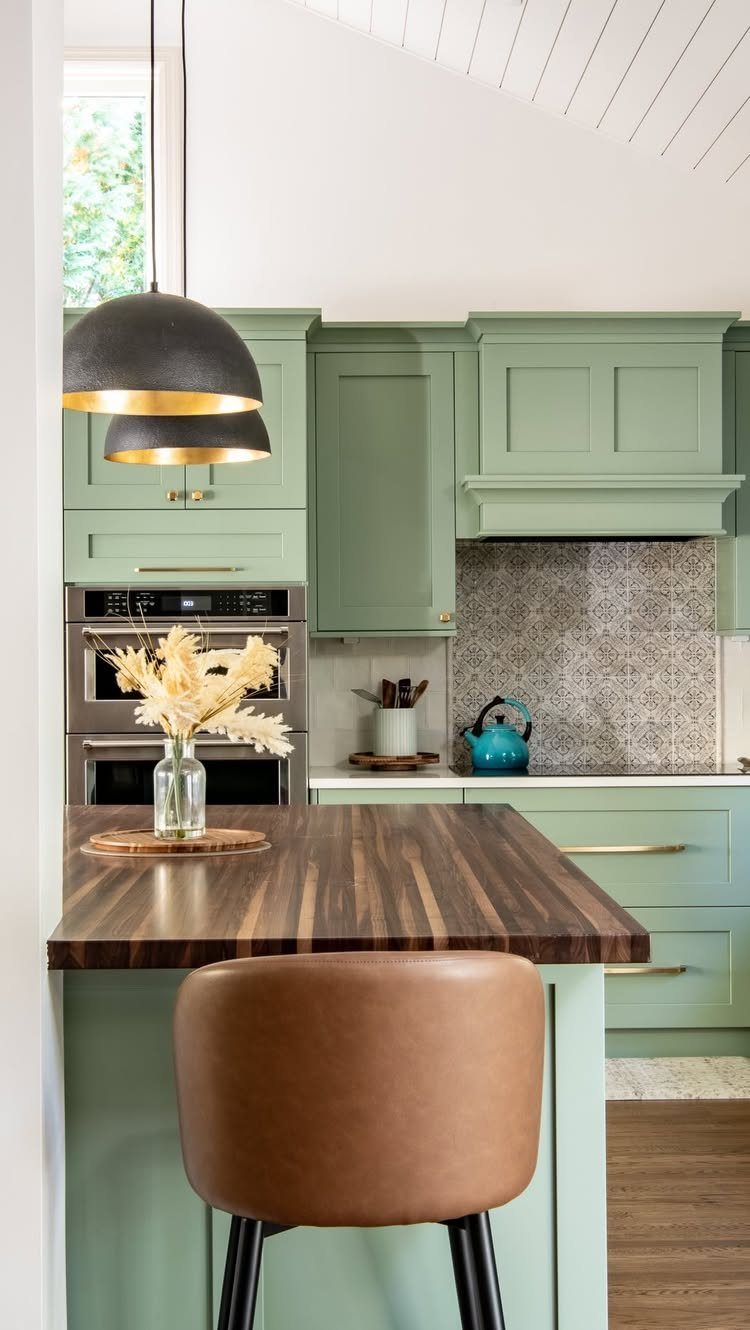
Olive green is a moody color, and dark walnut butcher block on the island deepens it further. Gold hardware and pendants with gold interiors add just enough warmth to keep the pairing from going heavy.
Olive green stays in the same warm family as the walnut butcher block, so nothing competes with the cabinets.
If your kitchen gets little daylight, a lighter wall color gives the olive and walnut room to breathe.
2. Forest Green Cabinets with Walnut Butcher Block
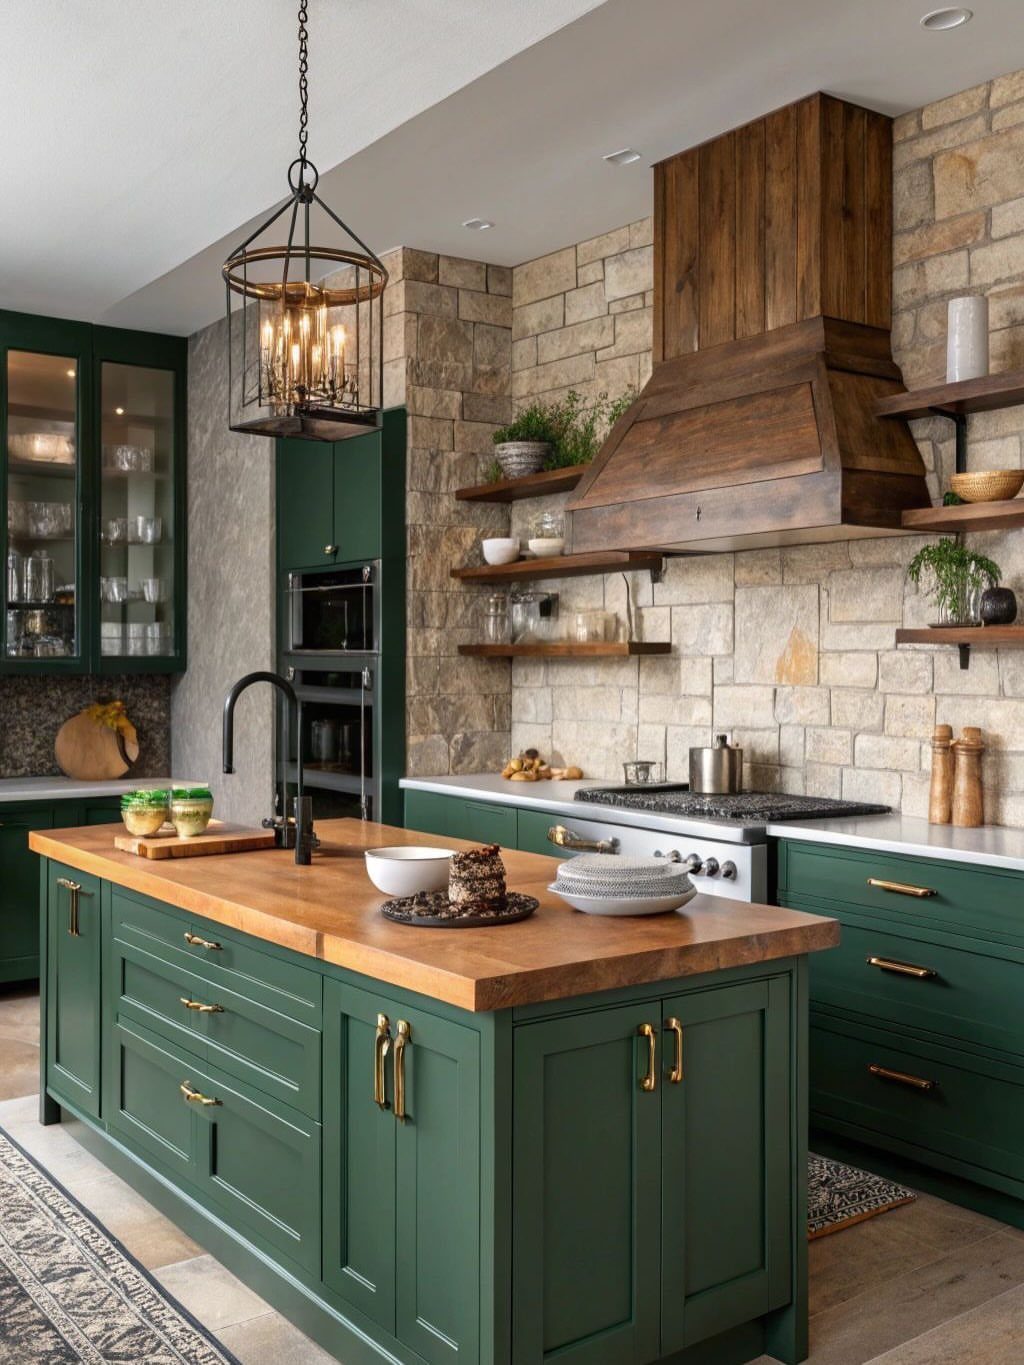
Forest green and walnut are both deep tones, so the island carries the room. A butcher block top on a green base keeps all that darkness from feeling flat, because the wood grain adds visible texture.
A stone backsplash behind it works well, since its pattern gives the eye something to rest on. I would pick one more wood element, like a range hood, to echo the island.
Black lighting, such as a lantern chandelier, finishes the look without adding another color.
3. Mint Green Cabinets with Maple Butcher Block
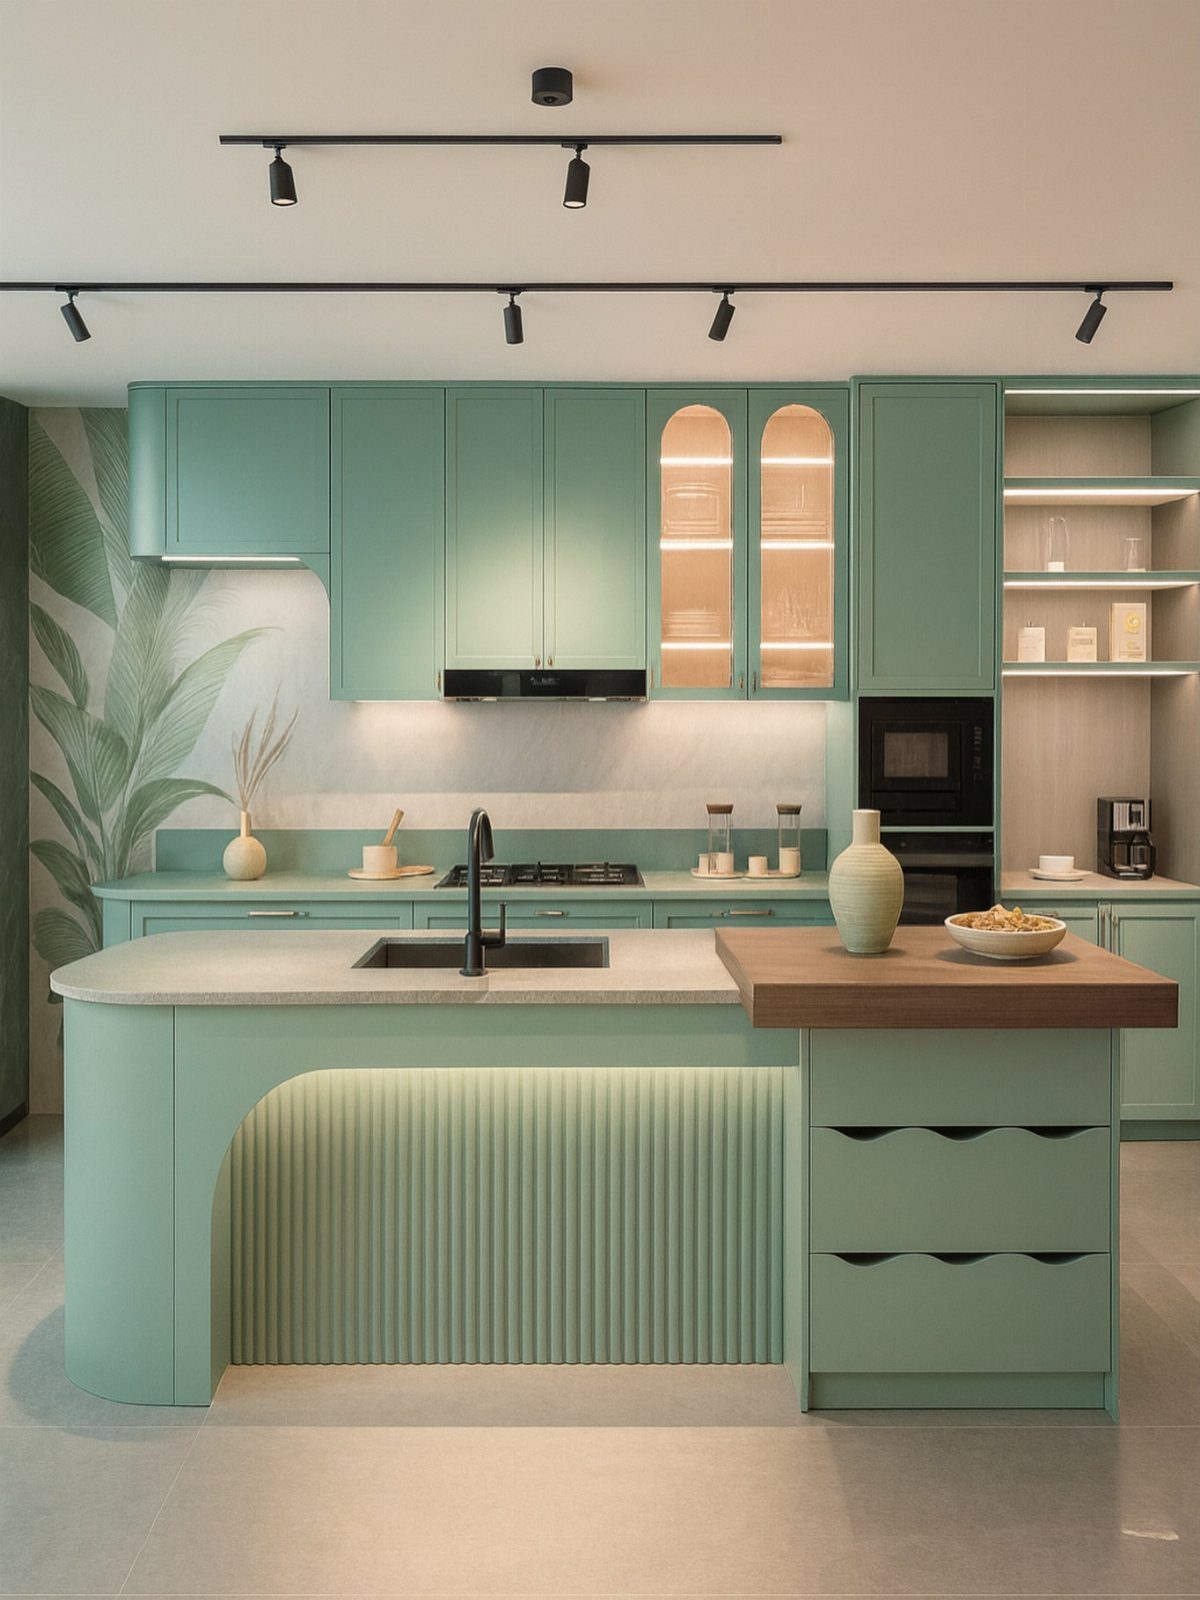
Mint cabinets feel fresh, and a small maple butcher block section on the island keeps them from going too sweet. You don’t have to cover the whole run in wood.
Pairing mint with a light countertop on the perimeter and wood only on the island gives you a prep surface and a focal point at once. It is also the cheaper route, since you buy less butcher block.
Maple’s pale tone suits mint better than anything dark would.
4. Light Green Cabinets with Walnut Butcher Block
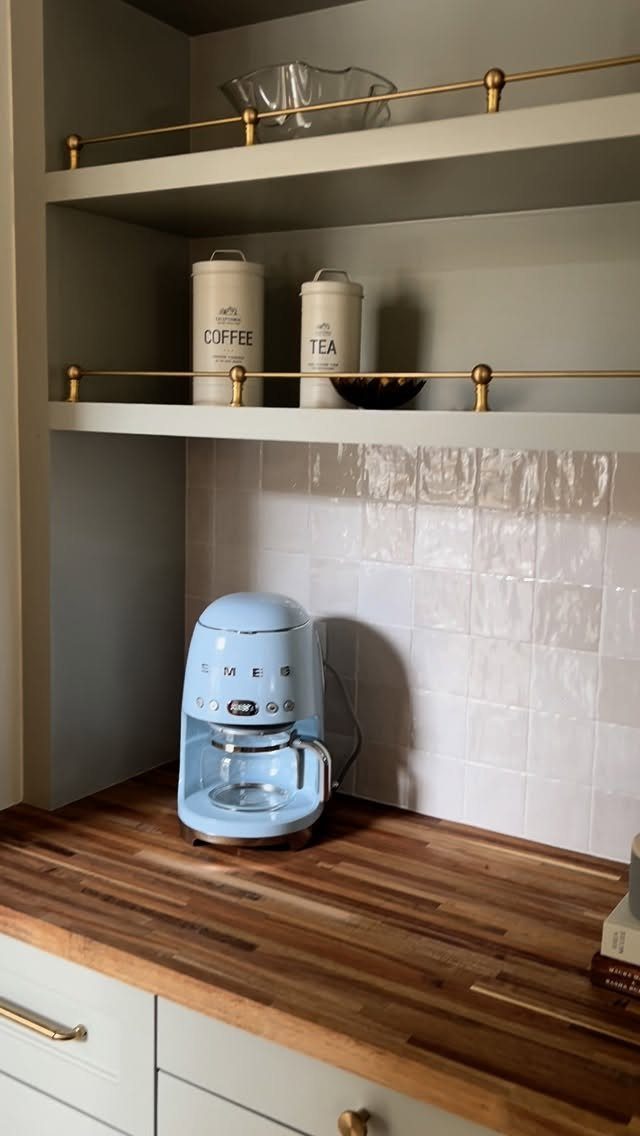
Light green cabinets and walnut butcher block suit a small coffee nook better than a full kitchen. A white tiled backsplash keeps the green soft and lets the dark wood stand out.
I would stop at one accent color. Light green already does plenty of work.
5. Olive Green Cabinets with Oak Butcher Block
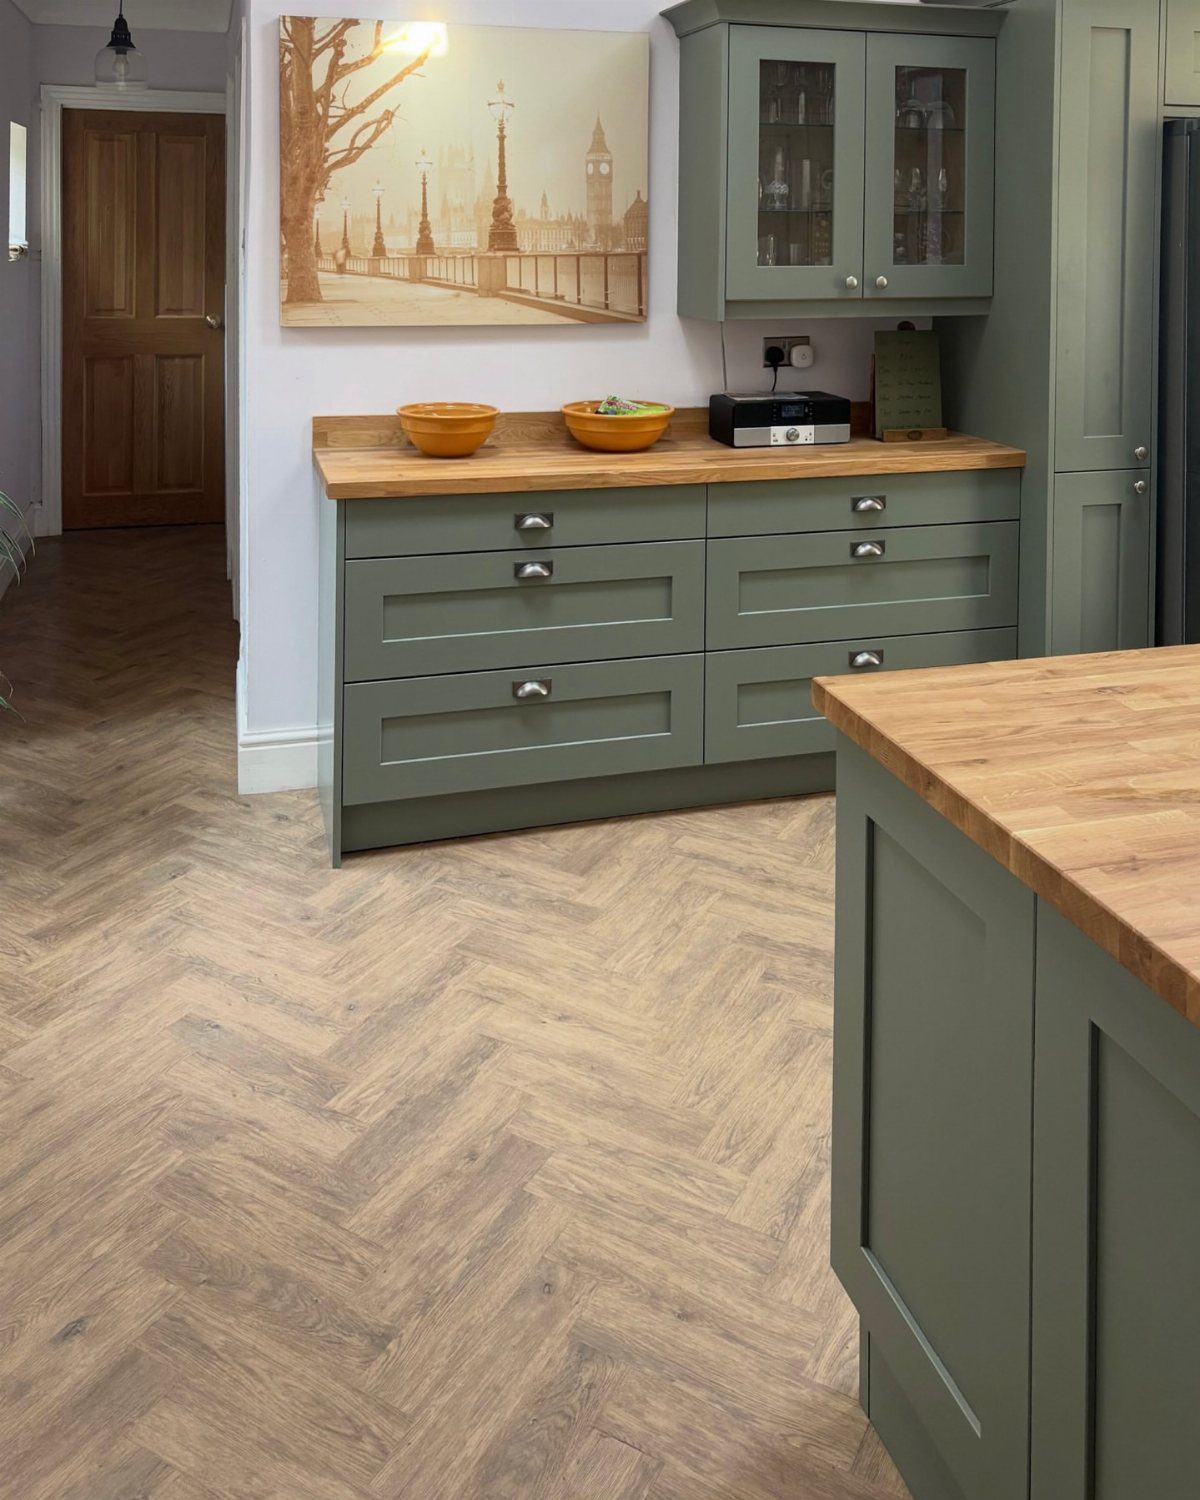
Oak brings warmth without the pale tone of maple, and against olive green it reads relaxed rather than dramatic. Olive cabinets with an oak butcher block top make a calm, earthy kitchen.
Hang a painting over the counter, as here, and the room feels collected rather than purely functional.
6. Green Lower Cabinets
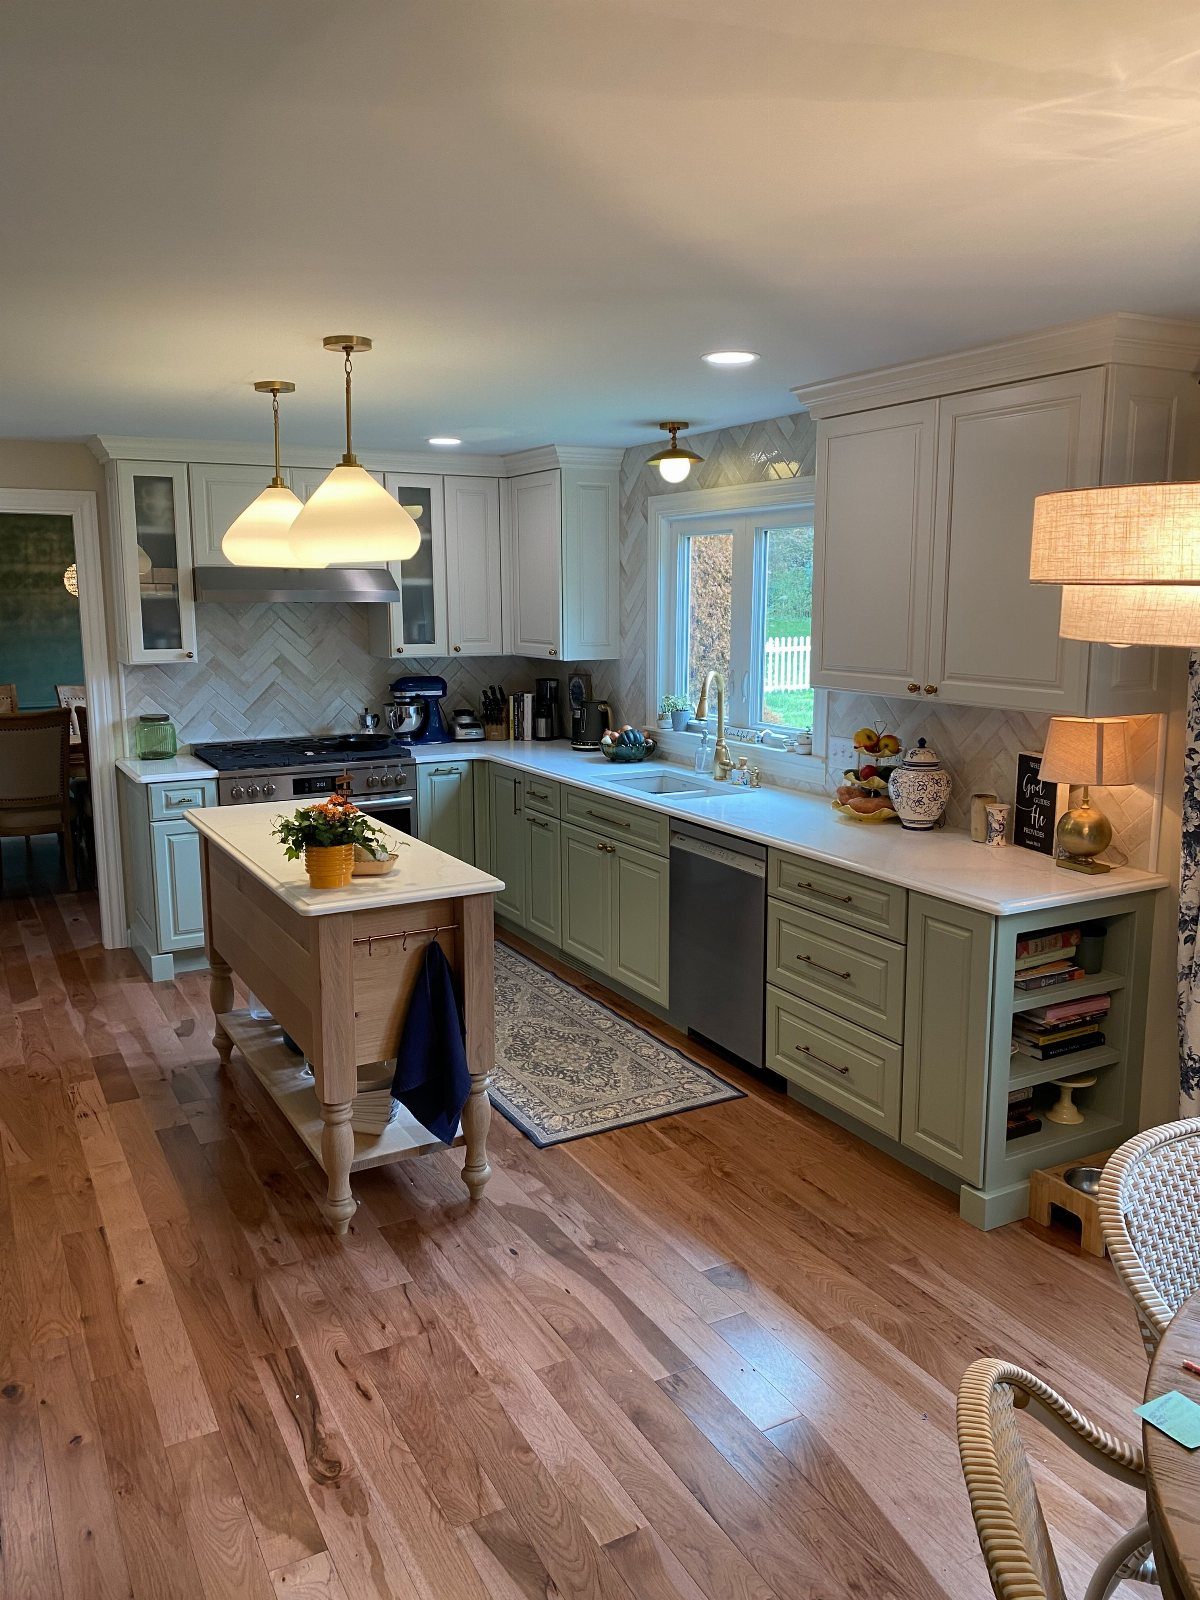
Painting only the lower cabinets sage green and leaving the uppers white is the easiest way into this look. Less green means less risk, and the room stays bright.
A wooden butcher block island ties the 2 levels together, because wood sits comfortably between green and white.
For a weekend budget project, this is the version I would pick: you repaint half the cabinets and still get the full color effect.
7. Brass Hardware
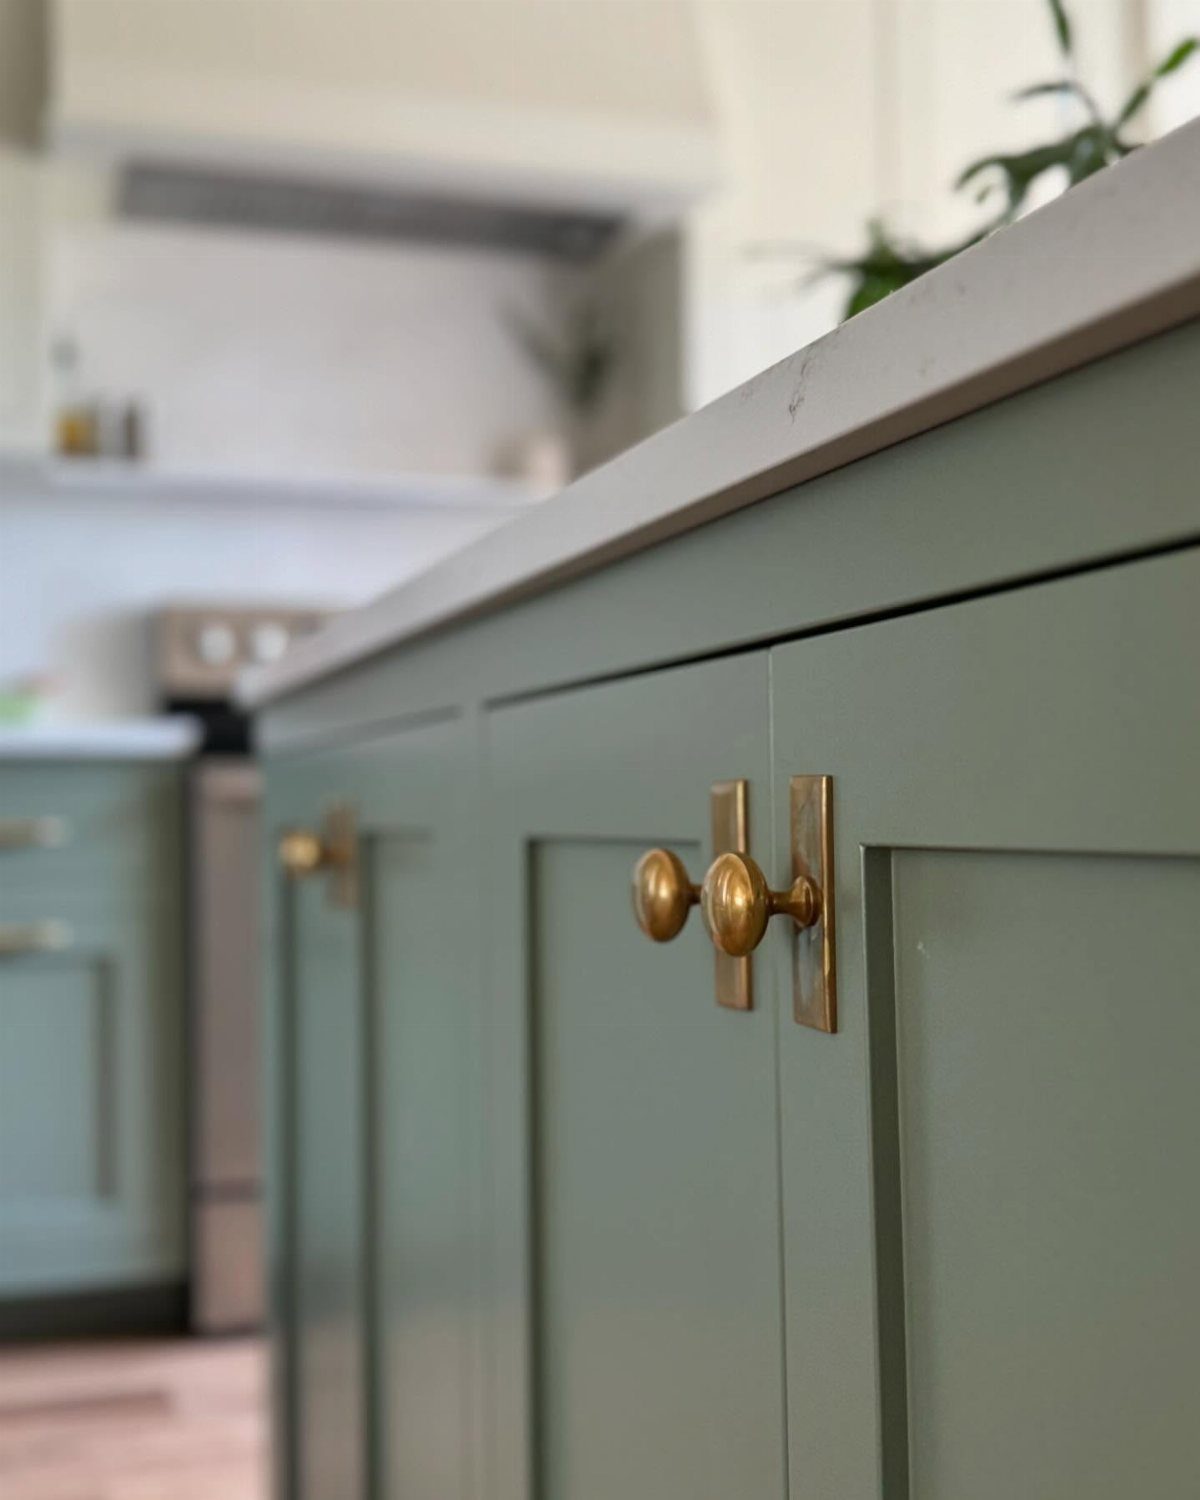
Brass knobs and backplates on sage green cabinets bring warmth without adding another color. Against a light butcher block top, the metal reads as a soft accent rather than a bold statement.
Hardware is also the cheapest part of this look. Swapping pulls takes an afternoon with a screwdriver, so it suits a renter’s budget as well as a first-home remodel.
I would keep the finish consistent across every door and drawer.
8. Sage Green Beverage Station
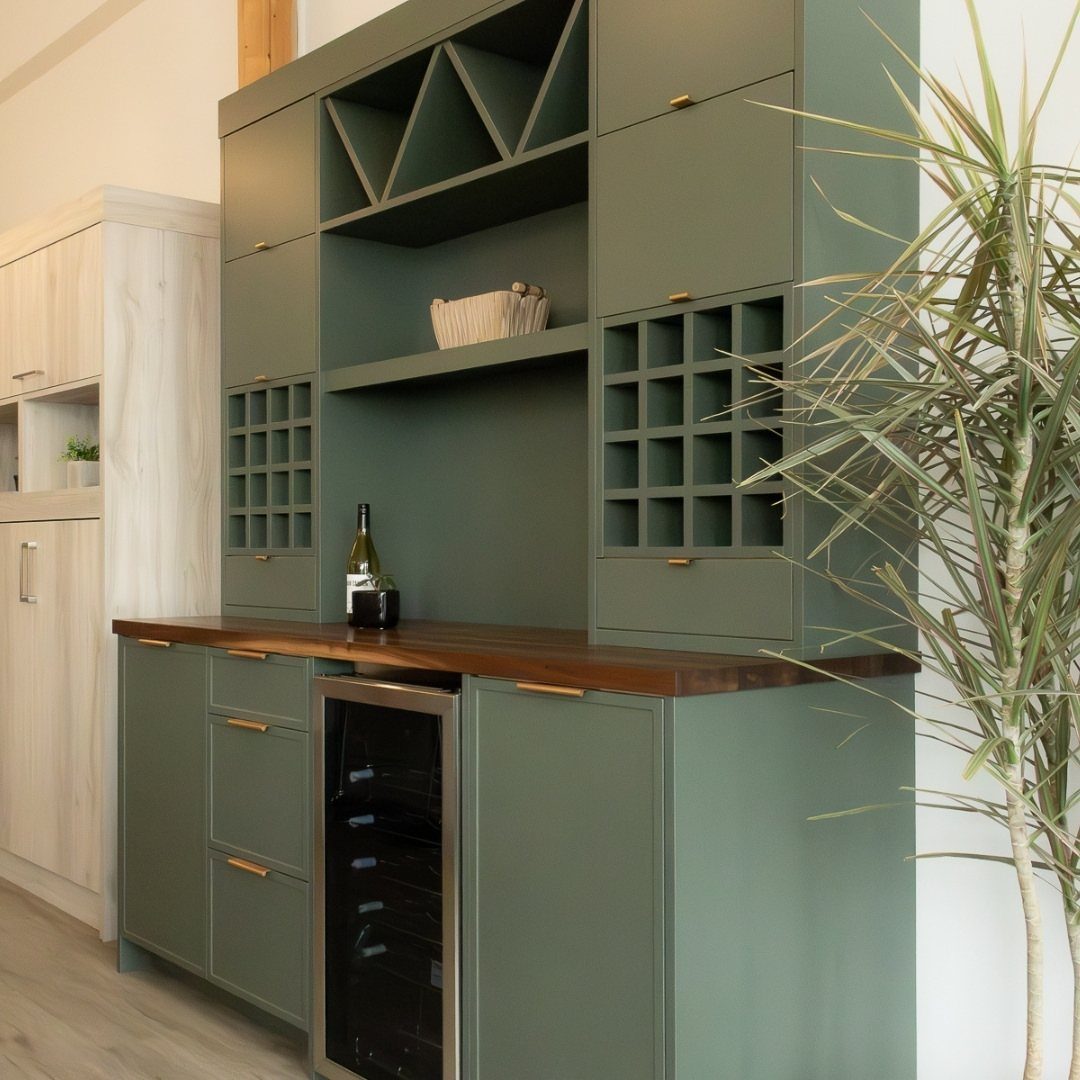
A beverage station built from sage green cabinets gives a wine fridge and a few bottles their own corner, away from the cooking traffic.
Thick butcher block on top gives you a real surface for glasses and a cutting board for garnishes.
Open shelving above holds the everyday glassware, and the wine racks keep bottles within reach. A small wine fridge is the priciest piece, so I would start with the cabinets and countertop and add the fridge later.
9. Sage Green with Farmhouse Sink
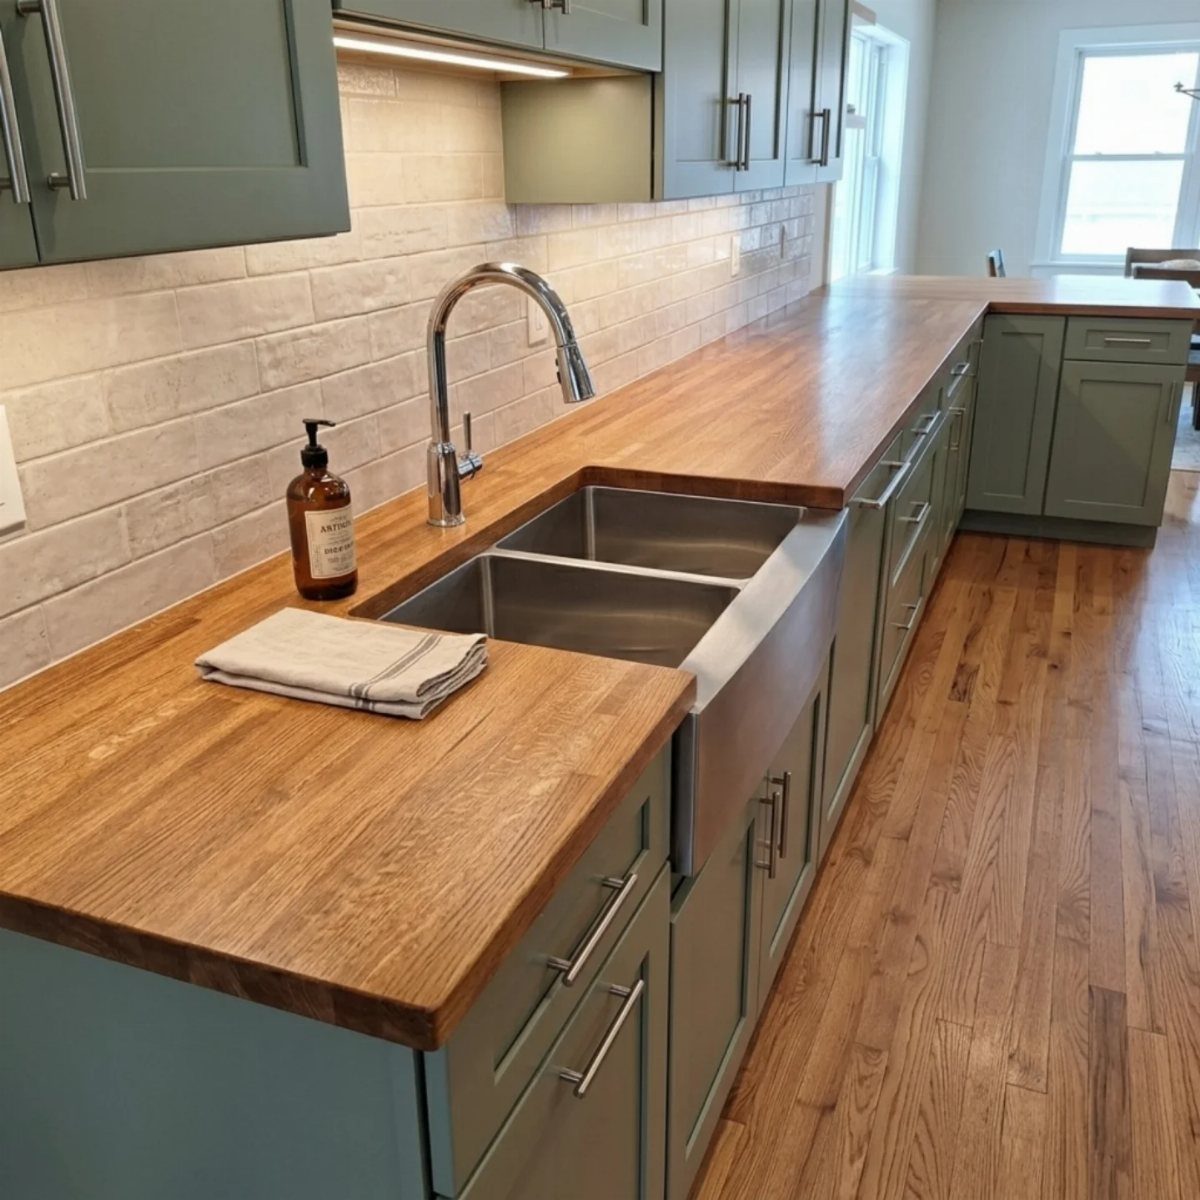
A stainless steel apron-front sink looks sharper against sage green cabinets than a white one would, and light butcher block on either side keeps the whole run soft. White brick behind it adds texture without competing.
Wood and water need care, so seal the butcher block around the sink well and wipe up splashes quickly. Of all the surfaces in this look, the counter beside the basin is the one that needs the most attention.
10. Dark Green Butler’s Pantry
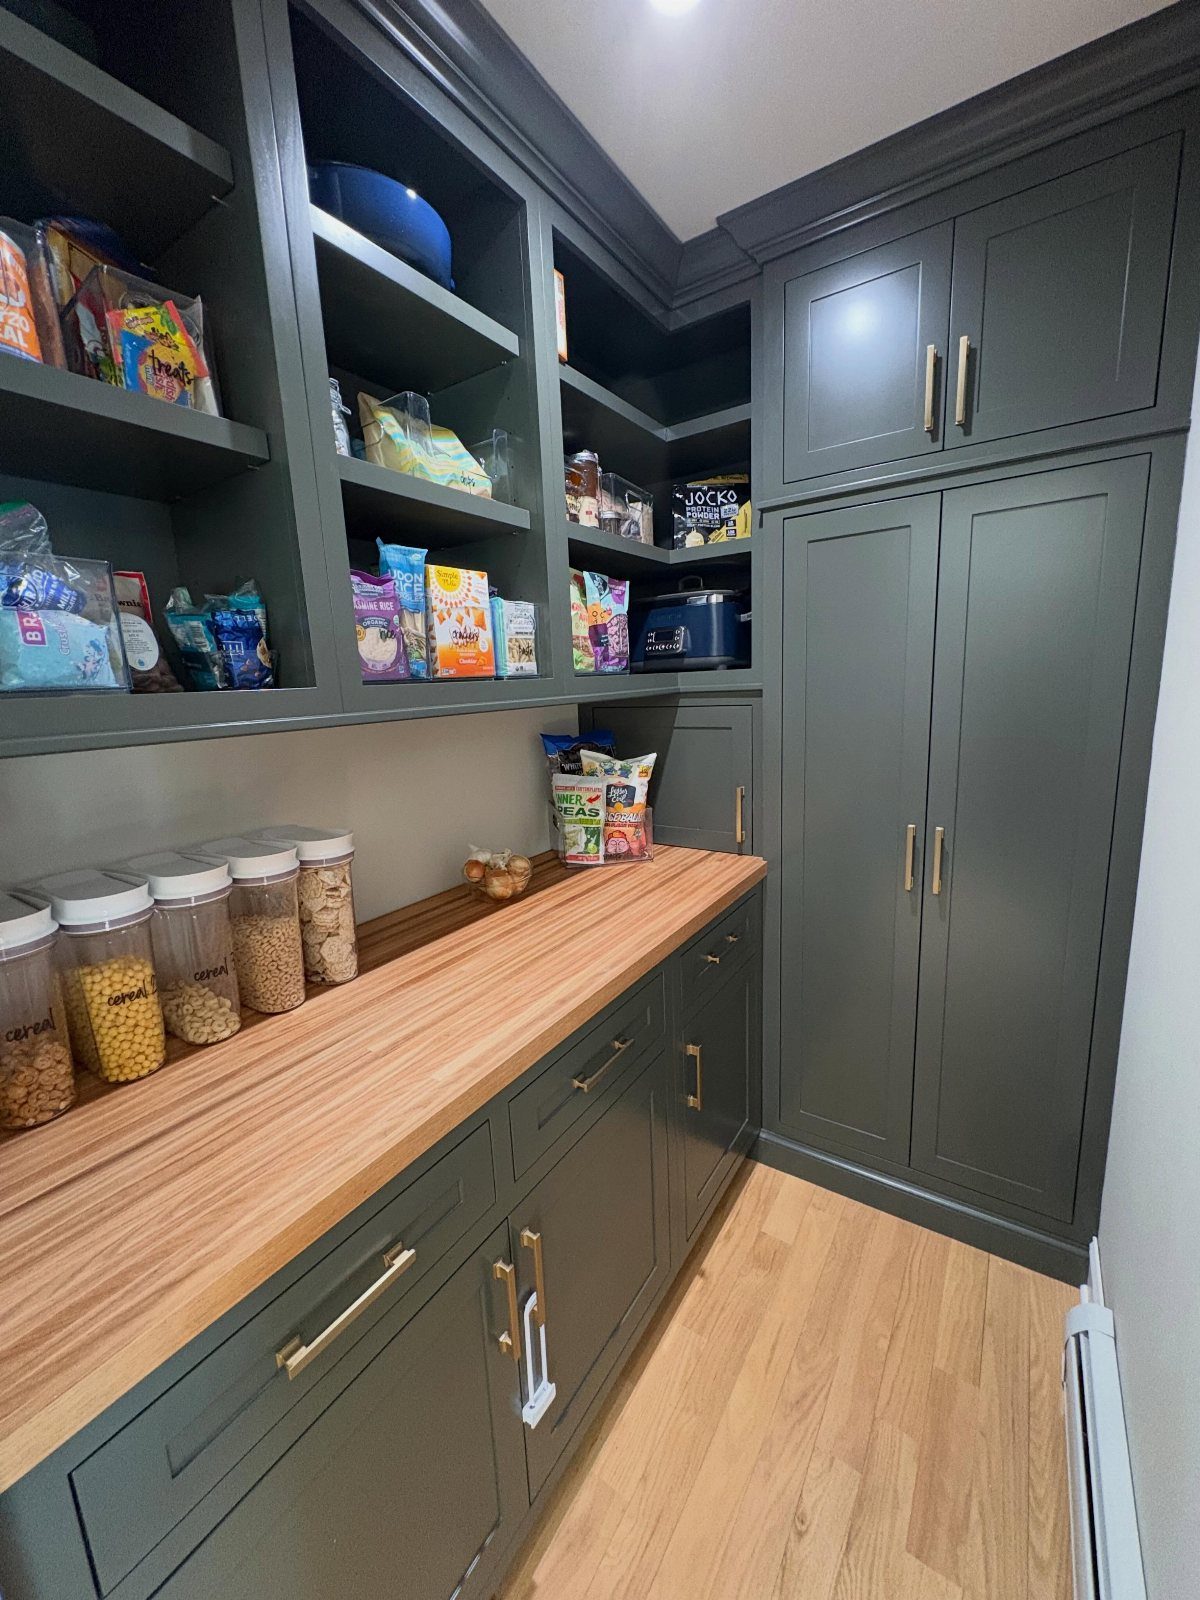
A butler’s pantry is a good place to try dark green, since a small room can carry a deep color without overwhelming the main kitchen. Light wood butcher block on top keeps it from feeling like a cave.
Open shelving lets you see your dry goods at a glance, so decant them into matching jars and the shelves look tidy.
Brass pulls repeated across every door and drawer give the dark green one warm thread to follow from end to end.
I would keep the shelves to everyday items and put the clutter behind the cabinet doors.
11. Dark Green Cabinets with Island
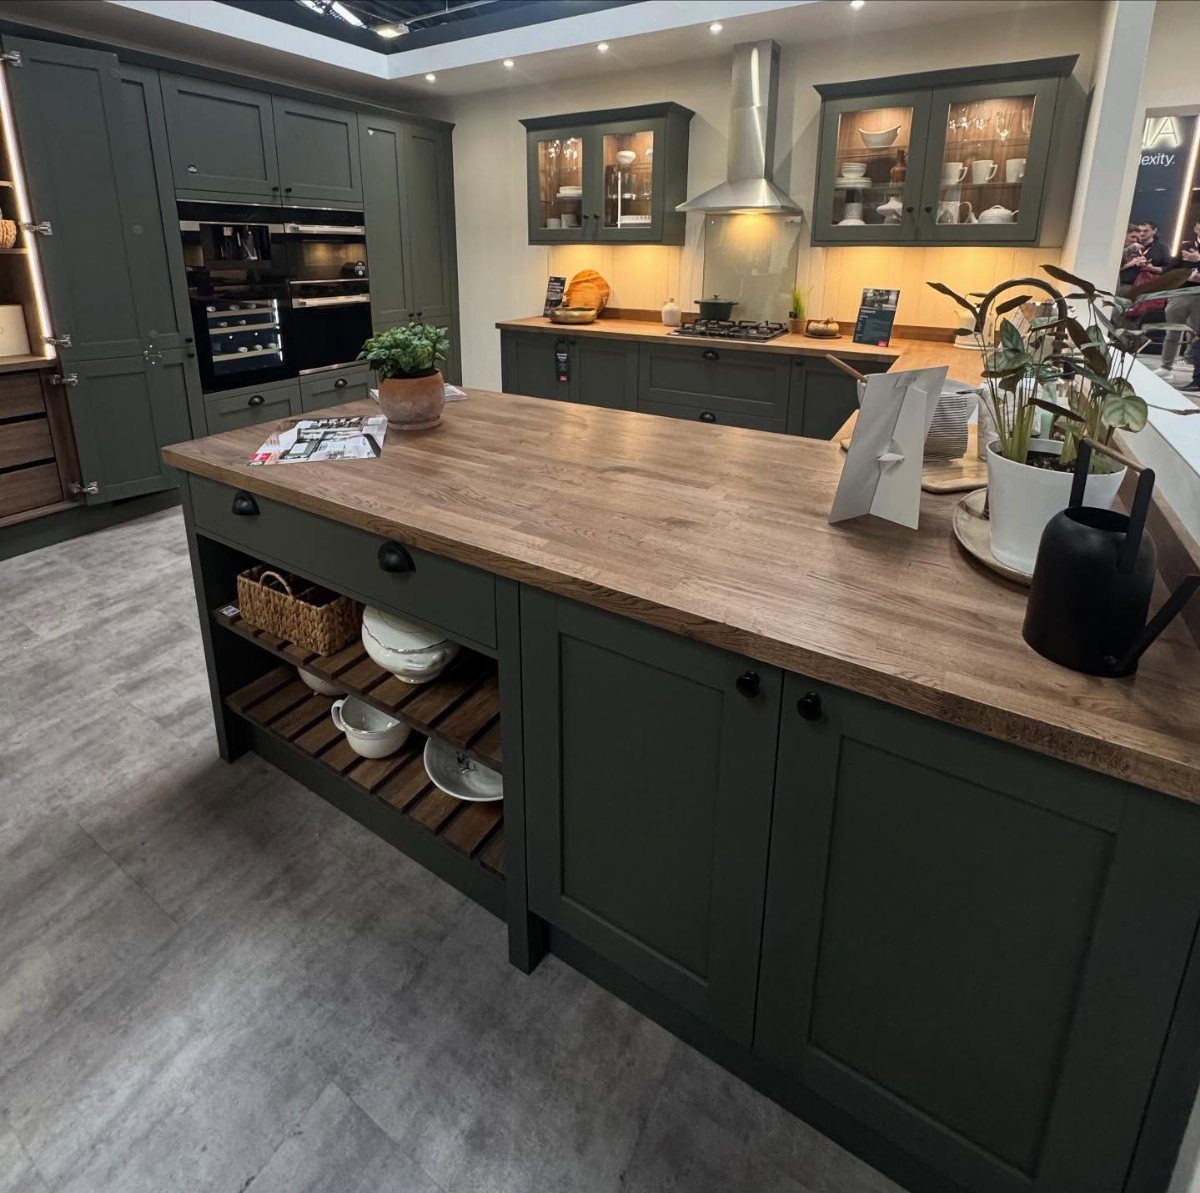
Dark green shaker cabinets wrapped around a large butcher block island make the wood the center of the room. Stainless steel appliances sit quietly against that much deep color, so there is no need to add more.
Choose a thick top for the island; it looks substantial against the heavy cabinet bases and gives you generous prep room. Pale walls, in a warm white or a soft greige, let the dark green look rich instead of heavy.
12. Olive Green with Open Shelving
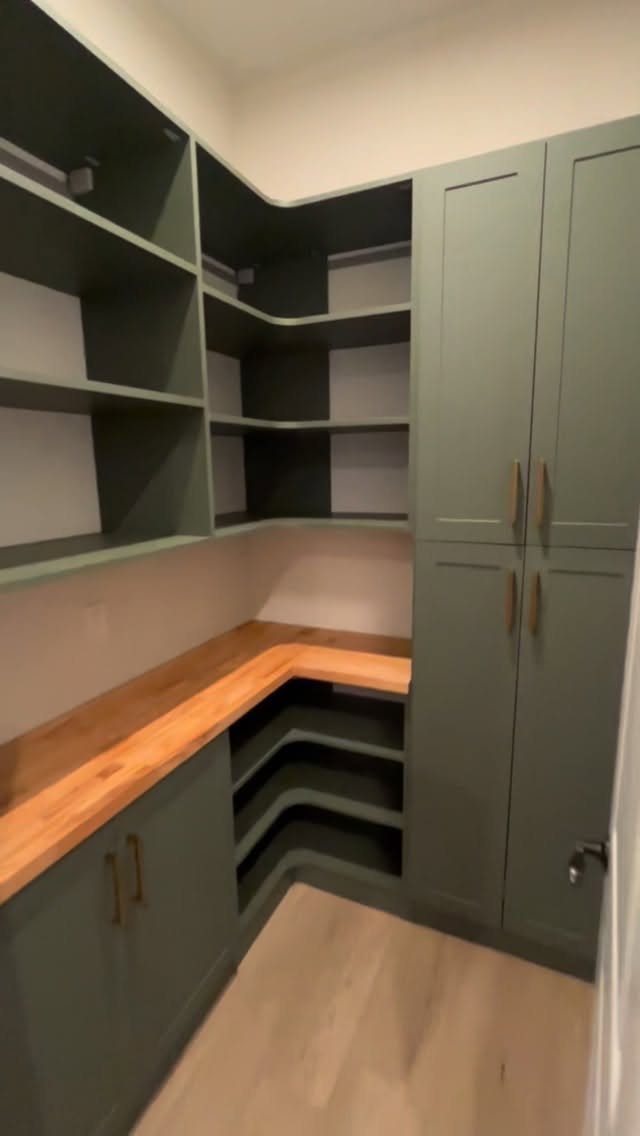
Olive green cabinets in a corner with open shelving turn a tucked-away spot into a display space. A light butcher block counter keeps the olive from reading too dark, and the shelves keep the corner open rather than boxed in.
Open shelves work best with a restrained edit: a few bowls, a plant, some cookbooks. In a corner, I would use shelves in place of upper cabinets so the olive below stays the focus.
Butcher Block Maintenance
Mineral oil or a butcher block conditioner, both food-safe, should go on about every 4–6 weeks to keep the wood from drying out.
Spread the oil on thickly, give it 15–20 minutes to sink in, and then buff away whatever is still sitting on the surface.
In a dry kitchen, oil a little more often, because the wood can crack without it.
Spills are the bigger risk. Spills should come off the wood quickly, and lemon juice or vinegar deserve the fastest wipe because their acid can leave stains.
Keep standing water off the surface, and use a cutting board instead of slicing directly on the top. If a small mark does show up, sand it out and oil the spot again.
Cared for this way, a butcher block top can last for decades and gain a richer patina as it ages.
Budgeting for Renovation
A standard kitchen’s worth of stock cabinets in green typically costs $1,500–$5,000. Custom cabinetry starts at $15,000, which is why I steer first-home budgets toward stock and spend the effort on finish and hardware.
Thicker tops and pricier species sit at the top of that range, so choose the wood before you fix the budget.
Good-quality pulls and knobs can take $200–$600 of the budget, so plan for that line early. It’s a small line, but hardware is what people touch every day.
Hiring a pro to install usually tacks on 10–20% of the material cost, though local labor rates move that number up or down. If you can hang cabinets and set a countertop yourself, that is the easiest place to save.
Add up all four lines before you order anything, so one splurge doesn’t squeeze the rest.
Frequently Asked Questions
What are some good green paint colors for kitchens?
Sage, olive, forest, mint, and dark green all work with butcher block. Sage is the easiest start because it stays soft and the room stays bright.
Olive shares walnut’s warm undertone, while forest and other deep greens hold up in bigger or brighter kitchens; mint is the lighter, crisper option and looks best against pale maple.
What wood is used for butcher block countertops?
Maple, oak, walnut, and cherry are the common choices, and bamboo is an alternative. Maple is the usual pick: a hard wood with a tight, even grain that stands up to years of chopping.
Walnut costs more and runs dark, oak shows a coarser, more rustic grain, and cherry starts light reddish-brown and deepens as it ages. For countertops, edge-grain construction is the usual pick because it moves less than end-grain.